15
1
2
B
A
1
5.PREPARATION BEFORE SEWING
WARNING :
To protect against possible personal injury due to abrupt start of the machine, be sure to start the
following work after turning the power off and ascertaining that the motor is at rest.
5-1. Inserting the needle
1) Turn the handwheel by hand to raise the needle to
its highest position.
2) Loosen the needle clamp screw 2 . Hold the needle
1so that the long groove B on the needle is facing
exactly toward you.
3) Insert the needle deep into the hole of the needle
bar in the direction of the arrow until it will go no
further.
4) Securely tighten the screw 2 .
5) Confirm that the long groove B on the needle faces
toward you.
WARNING :
To protect against possible personal injury due to abrupt start of the machine, be sure to start the
following work after turning the power off and ascertaining that the motor is at rest.
5-2. Removing the bobbin case
1) Turn the handwheel by hand to raise the needle to
its highest position.
2) Raise bobbin case latch 1 and remove the bobbin
case.
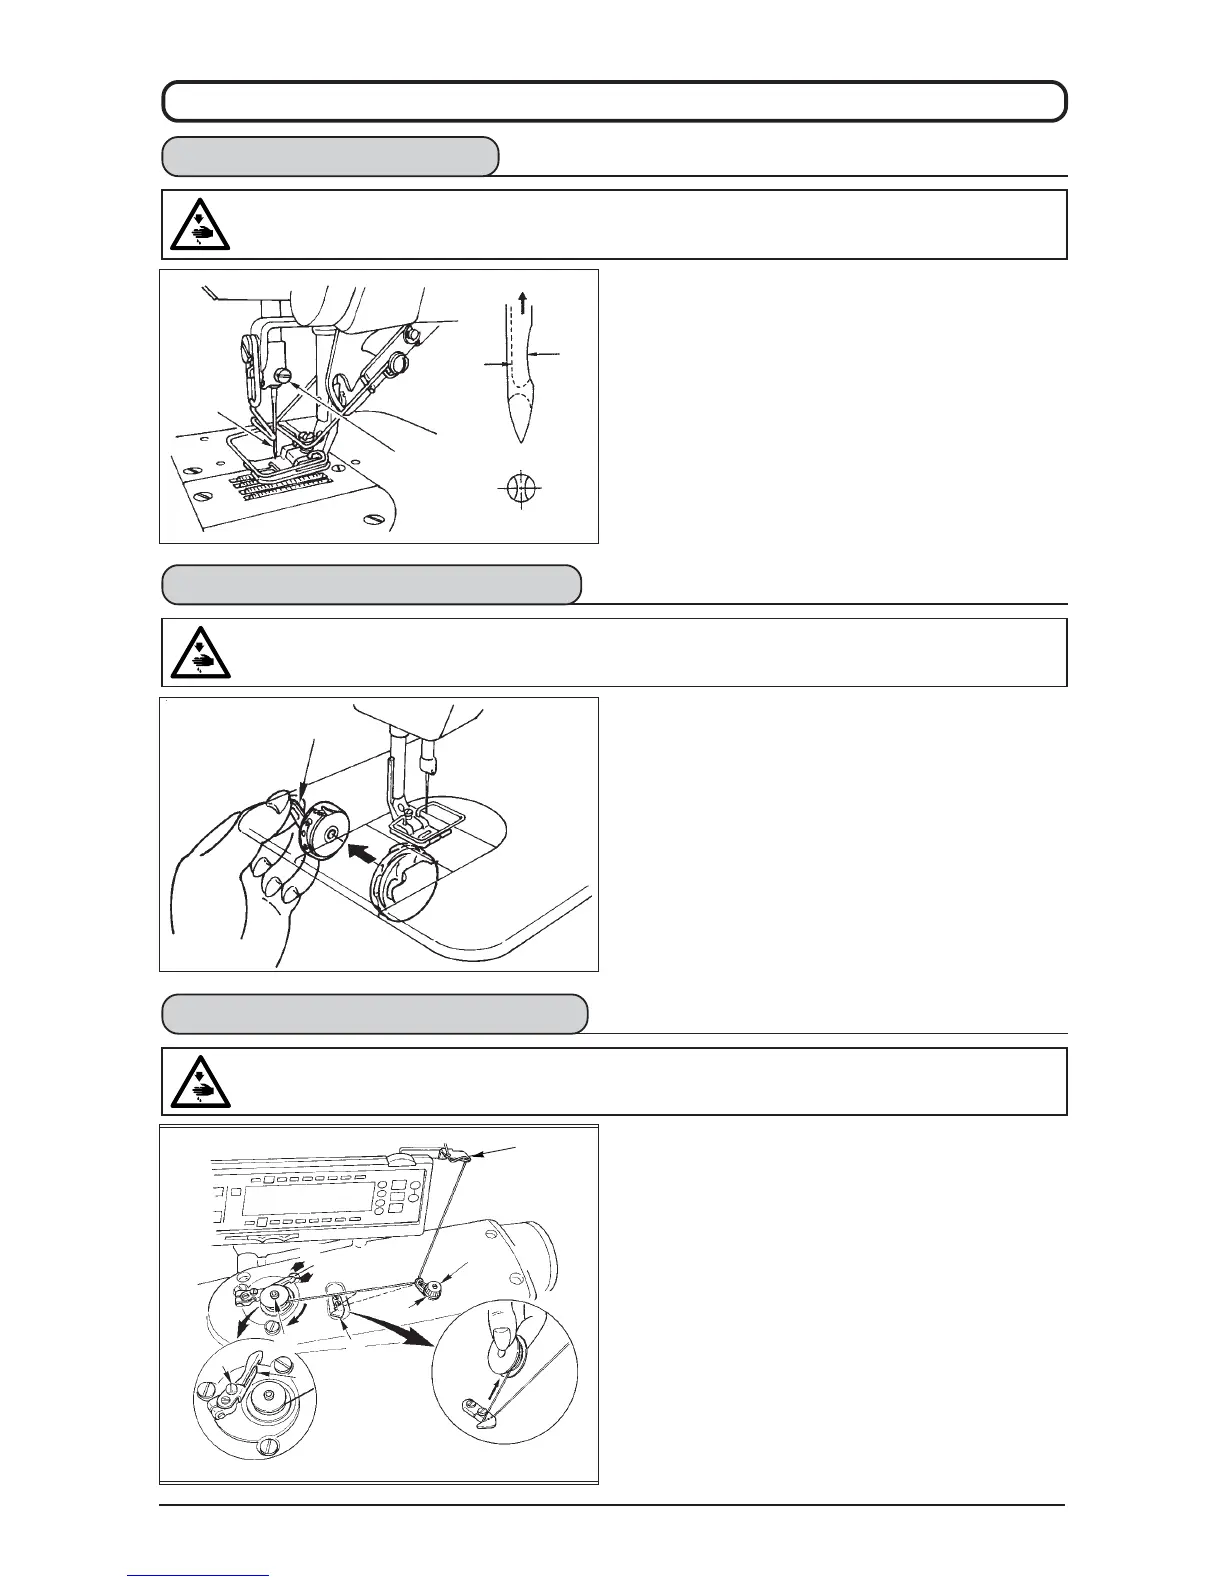
5-3. Winding the bobbin thread
1) Insert the bobbin deep into the bobbin winder spindle
5 until it will go no further.
2) Pass the bobbin thread pulled out from the spool rested
on the right side of the thread stand following the order
from 1 as shown in the figure on the left. Then, wind
the end of the bobbin thread on the bobbin several times.
3) Press the bobbin winder adjusting plate 6 in the
direction of A and start the sewing machine. The
bobbin rotates in the direction of C and the bobbin
thread is wound up. The bobbin winder spindle 5 will
automatically stop as soon as the winding is finished.
4) Remove the bobbin and cut the bobbin thread with
the thread cut retainer 8 .
5) To adjust the winding amount of the bobbin thread,
loosen setscrew 7 and move bobbin winder adjusting
plate 6 to the direction of A or B. Then, tighten
setscrew 7.
To the direction A : The amount is decreased.
To the direction B : The amount is increased.
WARNING :
To protect against possible personal injury due to abrupt start of the machine, be sure to start the
following work after turning the power off and ascertaining that the motor is at rest.
A
7
3
2
1
C
6
8
5
B