Required Tools and Safety Items for Installing CTP Modules
You need the following tools to install the interface module of a CTP151 device:
•
Phillips screwdriver
•
ESD wrist strap or other grounding device
RELATED DOCUMENTATION
Safety Guidelines and Warnings for Installing CTP151 Modules
Installing a CTP Interface Module, Processor Module, or Clock Module
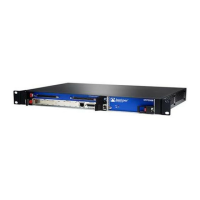
Installing a CTP Interface Module, Processor Module, or Clock Module
To install a CTP module:
1. Ground yourself by using an antistatic wrist strap or other device, and connect it to one of the ESD
grounding jacks, if available, or another grounding device.
2. Choose the slot where you want to insert the module.
3. With a Phillips screwdriver, loosen the screws that secure the blank filler panel covering the empty
chassis slot, if present, and remove the filler panel.
4. Remove the module from its antistatic bag, being careful not to touch module components, pins, leads,
or solder connections.
5. Verify that the ejectors are in the open position (facing outward).
6. Guide the module into the chassis by placing it between the guides of the selected slot and pushing
the module until it stops.
The module stops sliding when the ejectors make contact with the chassis.
95
 Loading...