12
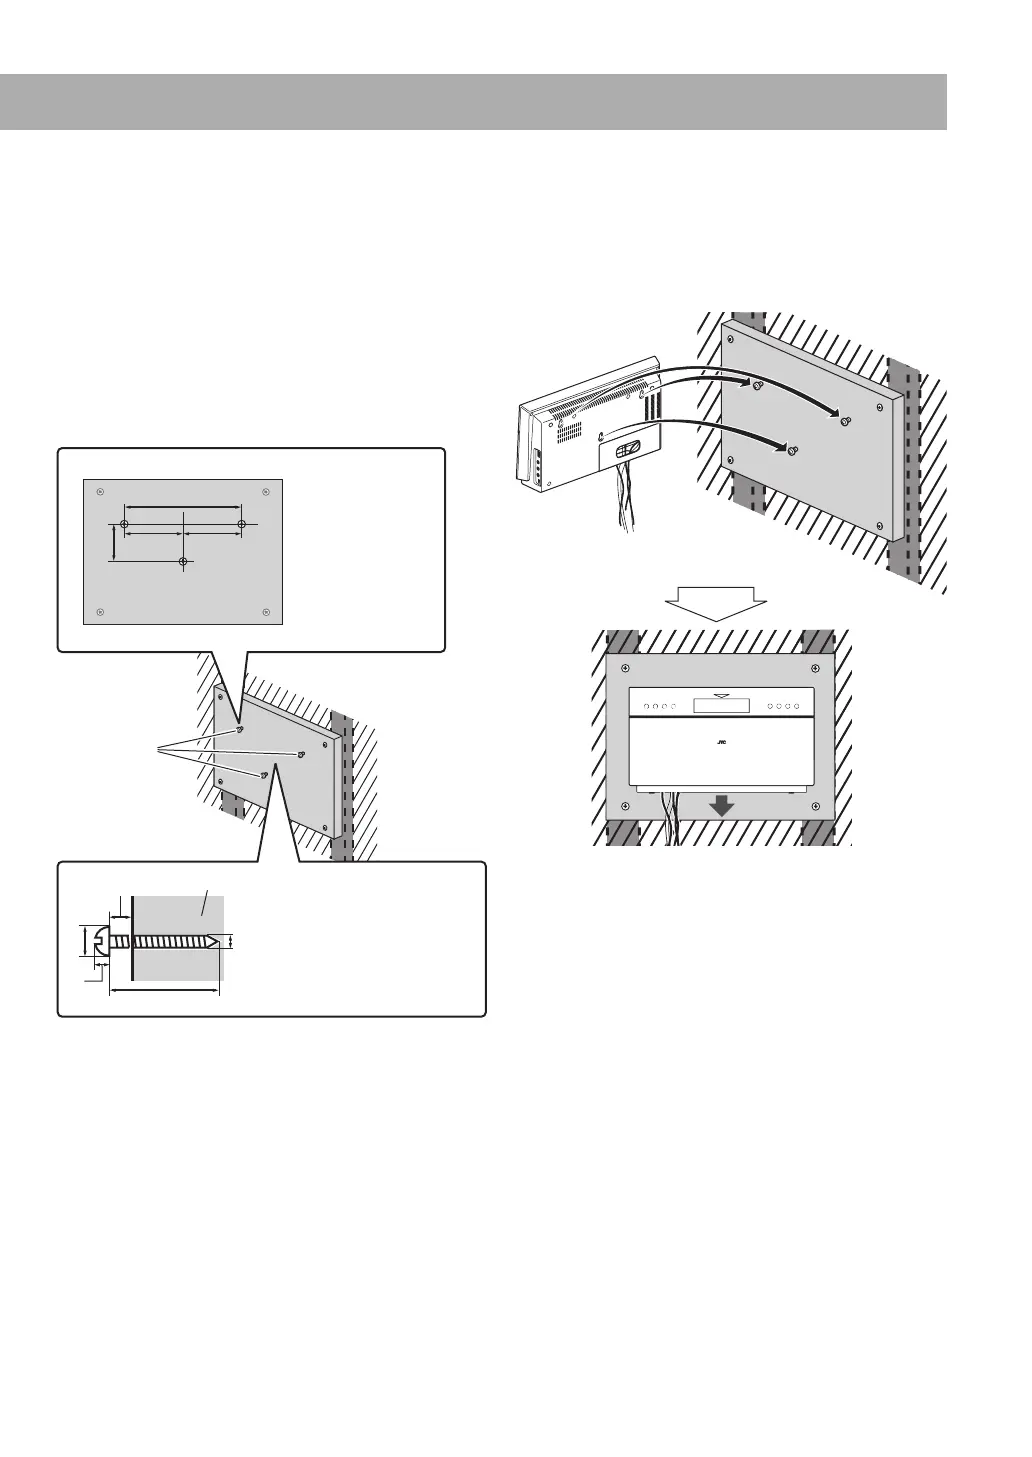
5 Hook the main unit onto the mounted screws and
slide the main unit down.
Make sure that the main unit is installed securely.
• Adjust the screws if the main unit is not installed
securely.
Continued on the next page
3 Attach the board to the wall.
Anchor the board securely in at least four places to the
supports inside the wall.
The diameter of the screws must be more than 4 mm
and their length must be 3 times the thickness of the
board mounted on the wall (also take the thickness of
the wall into account).
4 Mount three screws (not supplied) to the board which
has been attached on the wall.
Attach the screws to the board as illustrated below.
Slide down.
D
Screws (not
supplied)
FF
E
D: 240 mm
E: 78 mm
F: 120 mm
Board
G
H
I
J
K
G: Keep the space of 6 to 7 mm.
H: 10.5 to 12 mm
I: Within 3.5 mm
J: 12 to 19 mm (According to
the thickness of the board)
K: 5 mm
EN_NX-T10[UG]_CS2.indb 12EN_NX-T10[UG]_CS2.indb 12 09.12.14 9:53:09 PM09.12.14 9:53:09 PM
 Loading...