27
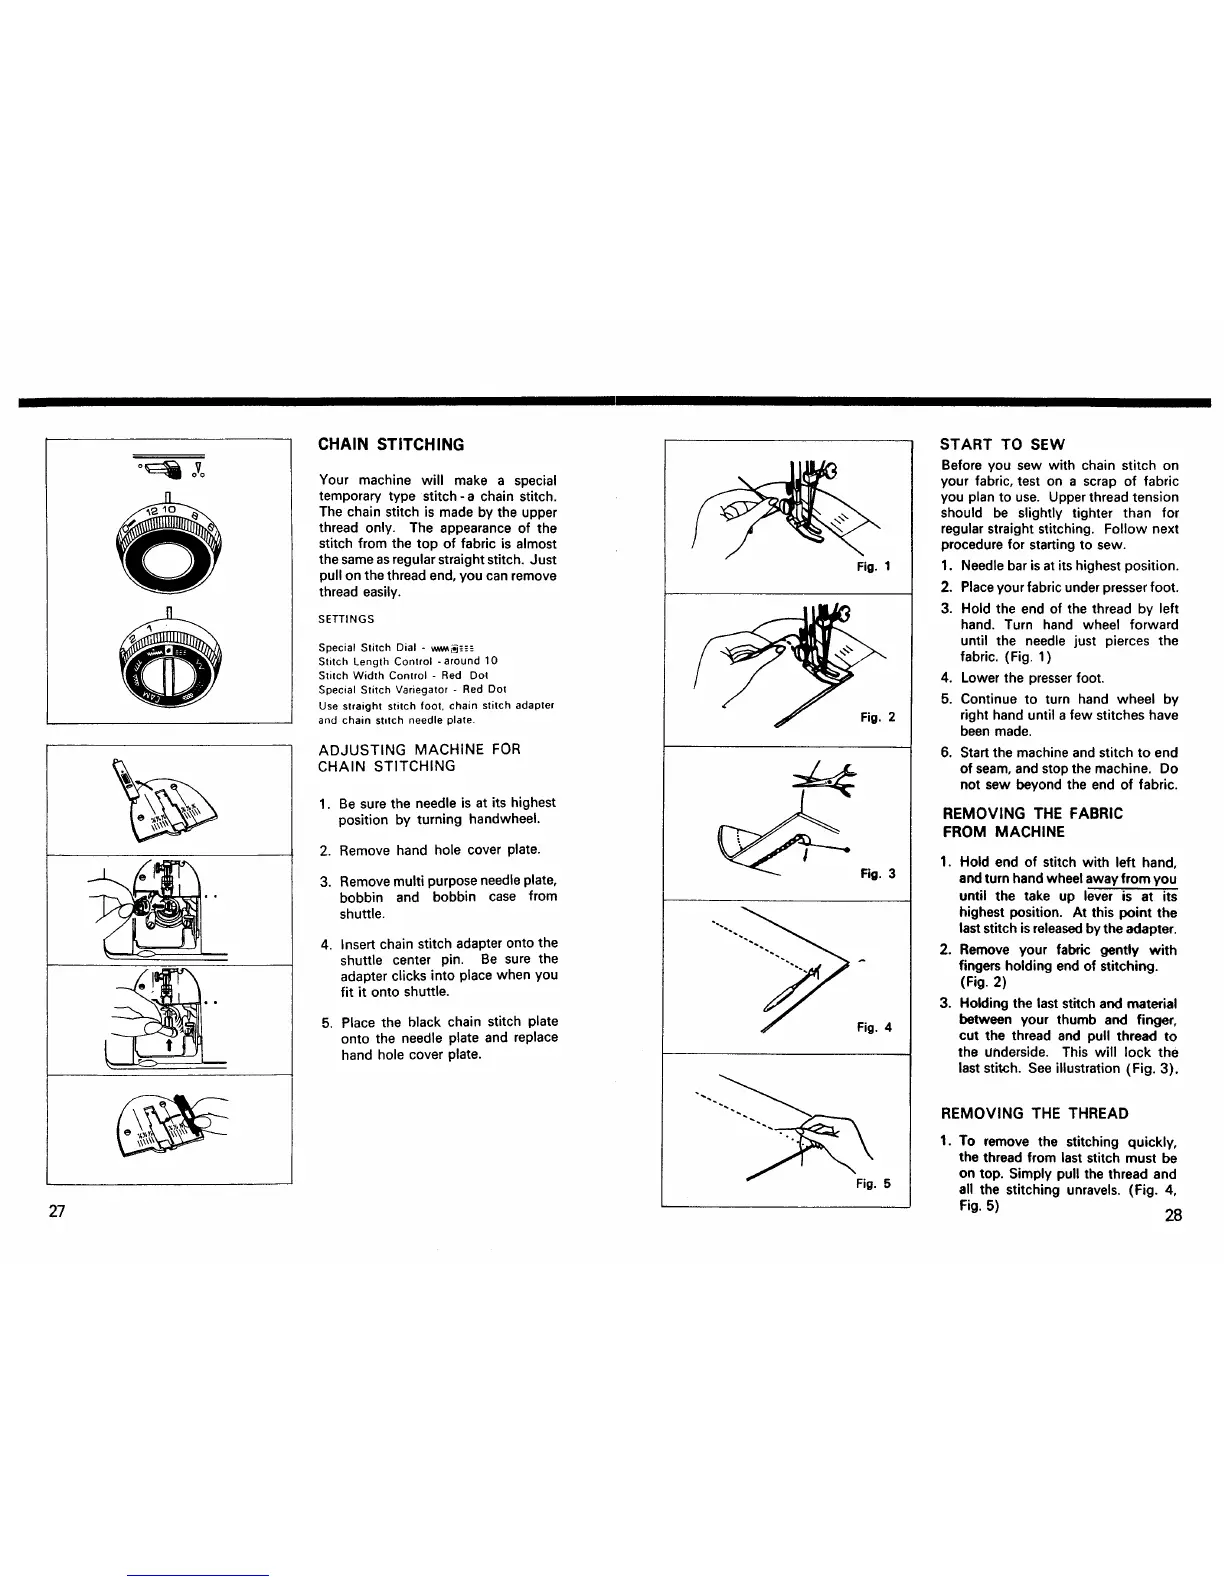
CHAIN STITCHING
Your machine will make a special
temporary type stitch-a chain stitch.
The chain stitch is made by the upper
thread only. The appearance of the
stitch from the top of fabric is almost
the same as regular straight stitch. Just
pull on the thread end, you can remove
thread easily.
SETTINGS
Special Stitch Dial - _--_=_-
Stitch Length Control -around 10
Stitch Width Control - Red Dot
Special Stitch Variegator - Red Dot
Use straight stitch foot, chain stitch adapter
and chain st=tch needle plate.
ADJUSTING MACHINE FOR
CHAIN STITCHING
1.
.
3.
4.
5.
Be sure the needle is at its highest
position by turning handwheel.
Remove hand hole cover plate.
Remove multi purpose needle plate,
bobbin and bobbin case from
shuttle.
Insert chain stitch adapter onto the
shuttle center pin. Be sure the
adapter clicks into place when you
fit it onto shuttle.
Place the black chain stitch plate
onto the needle plate and replace
hand hole cover plate.
Fig. 1
Fig. 2
Rg. 3
Fig. 4
Fig. 5
START TO SEW
Before you sew with chain stitch on
your fabric, test on a scrap of fabric
you plan to use. Upper thread tension
should be slightly tighter than for
regular straight stitching. Follow next
procedure for starting to sew.
1. Needle bar isat its highest position.
2. Place your fabric under presserfoot.
3. Hold the end of the thread by left
hand. Turn hand wheel forward
until the needle just pierces the
fabric. (Fig. 1)
4. Lower the presser foot.
5. Continue to turn hand wheel by
right hand until a few stitches have
been made.
6. Start the machine and stitch to end
of seam, and stop the machine. Do
not sew beyond the end of fabric.
REMOVING THE FABRIC
FROM MACHINE
1. Hold end of stitch with left hand,
and turn hand wheel away from you
until the take up lever is at its
highest position. At this point the
last stitch isreleased by the adapter.
2. Remove your fabric gently with
fingers holding end of stitching.
(Fig. 2)
3. Holding the last stitch and material
between your thumb and finger,
cut the thread and pull thread to
the Underside. This will lock the
last stitch. See illustration (Fig. 3).
REMOVING THE THREAD
1. To remove the stitching quickly,
the thread from last stitch must be
on top. Simply pull the thread and
all the stitching unravels. (Fig. 4,
Fig. 5) 28
 Loading...