SPECIAL FINISHING STITCHES l
After the basic construction of your garment is finished, there are still many
finishing touches to be done. To aid your completion of your garment, the
Kenmore has been designed to do the following tasks that formerly had to be
done by hand.
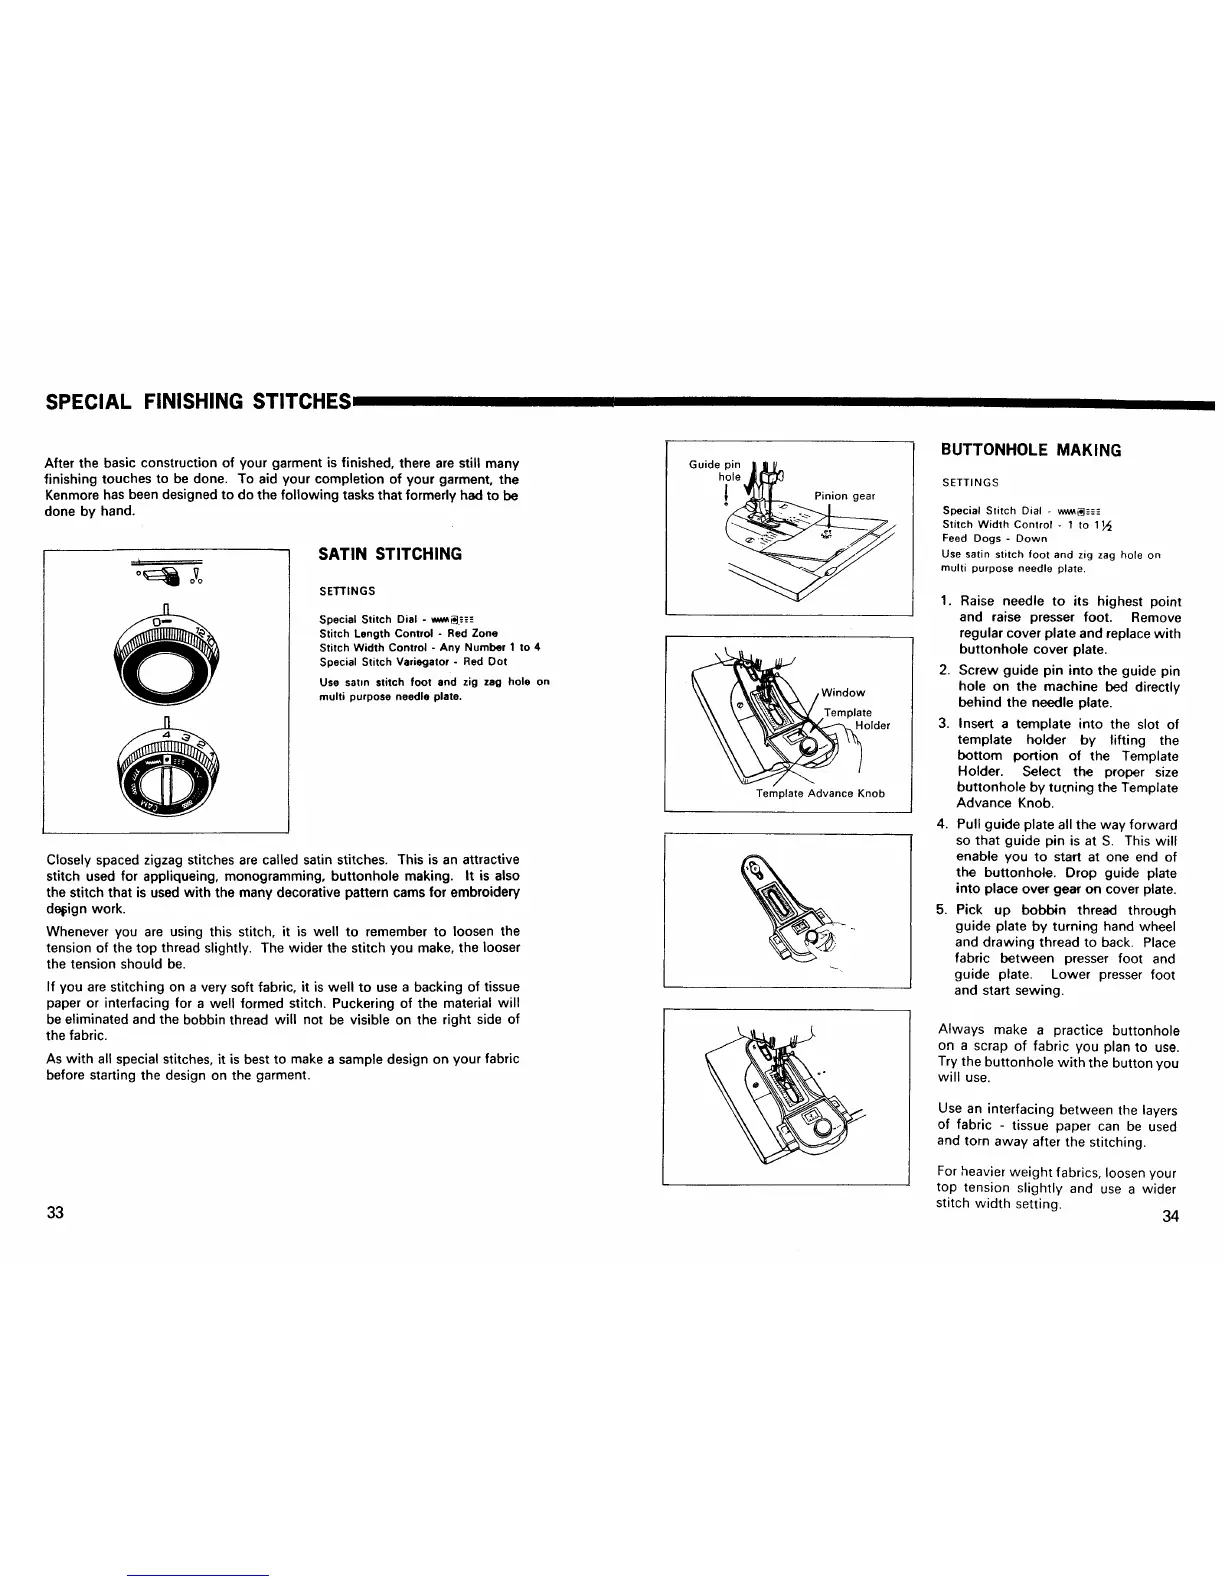
SATIN STITCHING
SETTINGS
Special Stitch Dial - _-'-_'--
Stitch Length Control - Red Zone
Stitch Width Control - Any Number t to 4
Special Stitch Variegator - Red Dot
Use satin stitch foot and zig zag hole on
multi purpose needle plate.
Closely spaced zigzag stitches are called satin stitches. This is an attractive
stitch used for appliqueing, monogramming, buttonhole making. It is also
the stitch that is used with the many decorative pattern cams for embroidery
d_ign work.
Whenever you are using this stitch, it is well to remember to loosen the
tension of the top thread slightly. The wider the stitch you make, the looser
the tension should be.
If you are stitching on a very soft fabric, it is well to use a backing of tissue
paper or interfacing for a well formed stitch. Puckering of the material will
be eliminated and the bobbin thread will not be visible on the right side of
the fabric.
As with all special stitches, it is best to make a sample design on your fabric
before starting the design on the garment.
33
Guide pin
hole
!
Pinion gear
Window
older
Template Advance Knob
BUTTONHOLE MAKING
SETTINGS
Special Stitch Dial - ww_----_-
Stitch Width Control - 1 to 11/_
Feed Dogs- Down
Use satin stitch foot and zig zag hole on
multi purpose needle plate.
1. Raise needle to its highest point
and raise presser foot. Remove
regular cover plate and replace with
buttonhole cover plate.
2. Screw guide pin into the guide pin
hole on the machine bed directly
behind the needle plate.
3. Insert a template into the slot of
template holder by lifting the
bottom portion of the Template
Holder. Select the proper size
buttonhole by tu[ning the Template
Advance Knob.
4. Pull guide plate all the way forward
so that guide pin is at S. This will
enable you to start at one end of
the buttonhole. Drop guide plate
into place over gear on cover plate.
5. Pick up bobbin thread through
guide plate by turning hand wheel
and drawing thread to back. Place
fabric between presser foot and
guide plate. Lower presser foot
and start sewing.
Always make a practice buttonhole
on a scrap of fabric you plan to use.
Try the buttonhole with the button you
will use.
Use an interfacing between the layers
of fabric - tissue paper can be used
and torn away after the stitching.
For heavier weight fabrics, loosen your
top tension slightly and use a wider
stitch width setting.
34
 Loading...