ADJUSTING BOBBIN TENSION,
Bobbin tension requires adjusting less frequently than the upper thread
tension.
If the stitch is satisfactory but the seam is puckered, it may be necessary to
loosen the tension on both the top and bottom threads. Be sure to balance
.
them as indicated on Page 9.
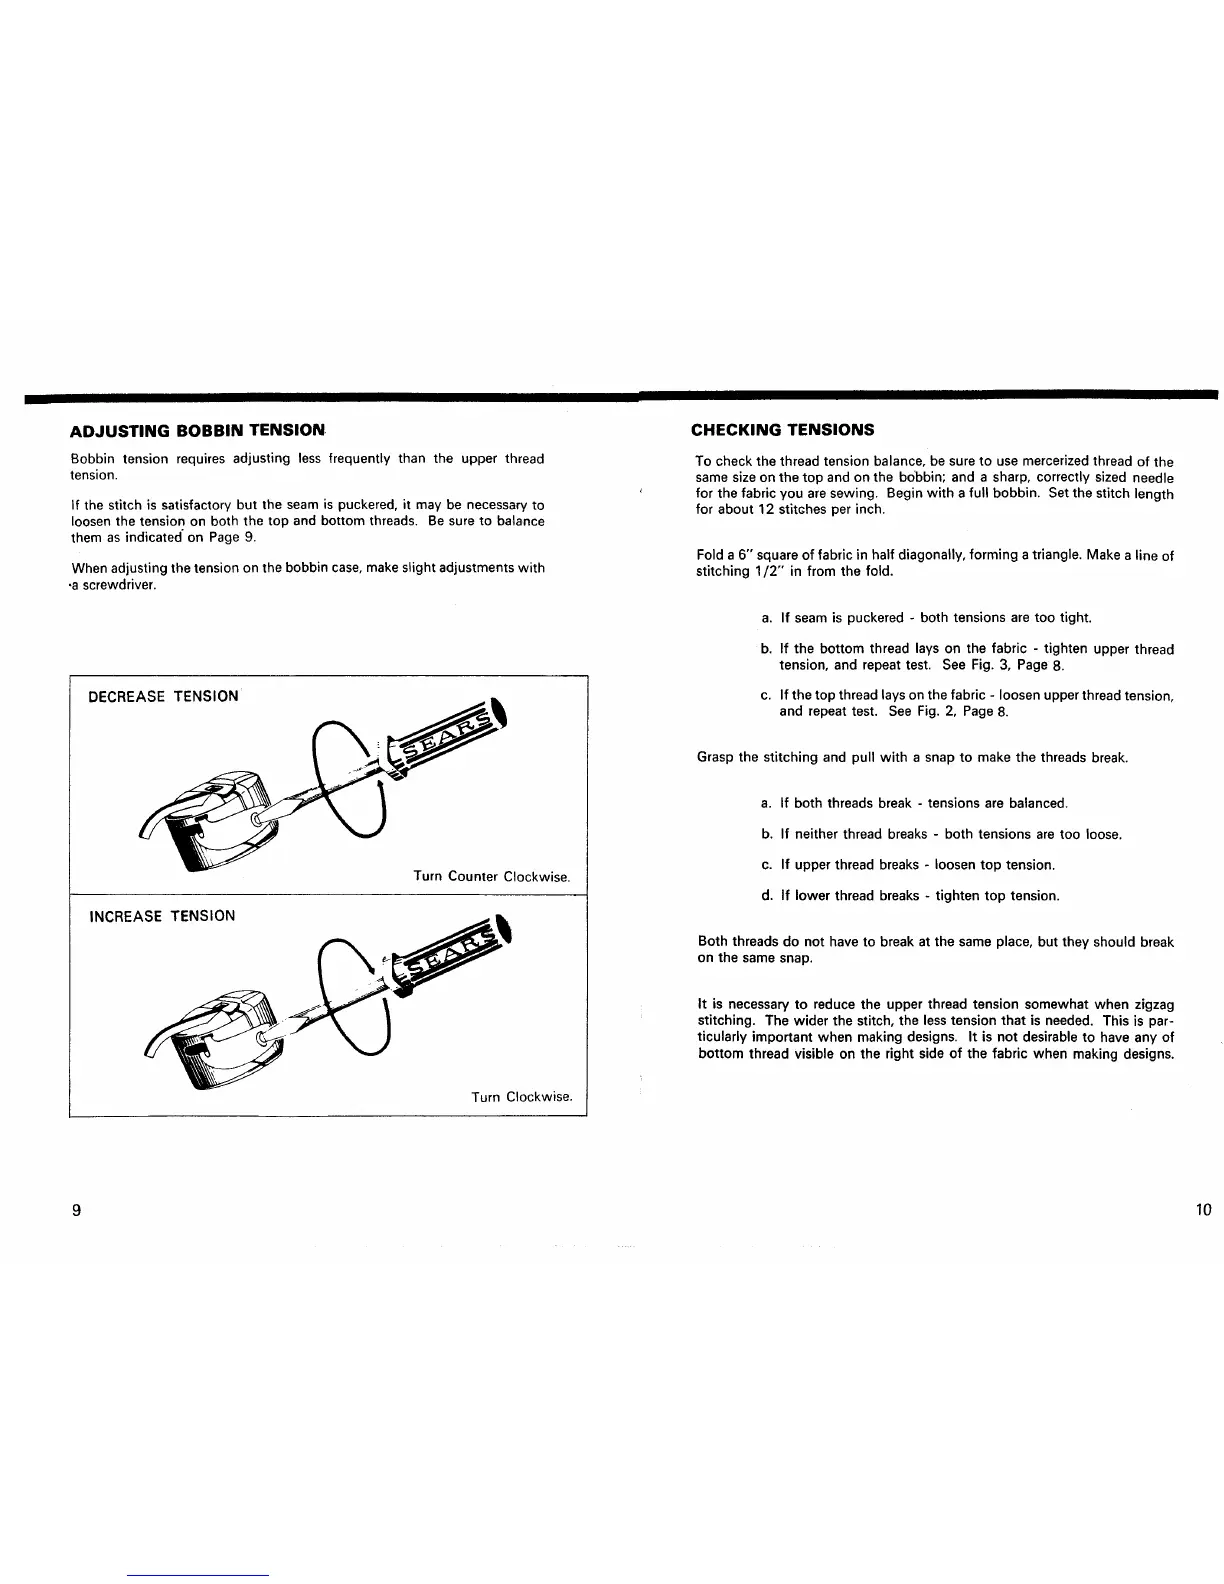
When adjusting the tension on the bobbin case, make slight adjustments with
•a screwdriver.
DECREASE TENSION
INCREASE TENSION
Turn Counter Clockwise.
Turn Clockwise.
CHECKING TENSIONS
To check the thread tension balance, be sure to use mercerized thread of the
same size on the top and on the bobbin; and a sharp, correctly sized needle
for the fabric you are sewing. Begin with a full bobbin. Set the stitch length
for about 12 stitches per inch.
Fold a 6" square of fabric in half diagonally, forming a triangle. Make a line of
stitching 1/2" in from the fold.
a. If seam is puckered - both tensions are too tight.
b. If the bottom thread lays on the fabric - tighten upper thread
tension, and repeat test. See Fig. 3, Page 8.
c. If the top thread lays on the fabric - loosen upper thread tension,
and repeat test. See Fig. 2, Page 8.
Grasp the stitching and pull with a snap to make the threads break.
a. If both threads break - tensions are balanced.
b. If neither thread breaks - both tensions are too loose.
c. If upper thread breaks - loosen top tension.
d. If lower thread breaks - tighten top tension.
Both threads do not have to break at the same place, but they should break
on the same snap.
It is necessary to reduce the upper thread tension somewhat when zigzag
stitching. The wider the stitch, the less tension that is needed. This is par-
ticularly important when making designs. It is not desirable to have any of
bottom thread visible on the right side of the fabric when making designs.
9 10
 Loading...