4
INITIAL SETTINGSINITIAL SETTINGS
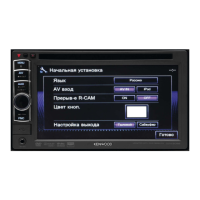
Initial setup
When you power on the unit for the first time or
reset the unit, the initial setting screen appears.
• You can also change the settings on the <Setup>
screen. (Page70)
1 Perform the initial settings.
• You can change the page to display more
items by pressing [ ]/[ ].
*
1
*
2
<Demonstration>
(Page72)
Activate or deactivate the
display demonstration.
<Language>
(Page73)
Select the text language
used for on-screen
information.
• Set <GUI Language>
to display the operation
buttons and menu items
in the selected language
([Local]) or English
([English]).
<Panel Angle>*
1
(Page10)
Adjust the panel angle.
<Front Camera>*
2
(Page47)
Configure the settings to
display the picture from
the connected front view
camera.
<Rear Camera>
(Page47)
Configure the settings to
display the picture from
the connected rear view
camera.
<User
Customize>
(Page66)
Change the display design.
<Viewing Angle>
(Page72)
Select the viewing angle
in relation to the monitor
panel to make the panel
easier to see.
2 Finish the procedure.
• You can change the page to display more
items by pressing [ ]/[ ].
The Home screen is displayed.
*
1
Only for DDX7051BT/DDX794/DDX774BH/DDX751WBTL.
*
2
Only for DDX794/DDX774BH/DDX751WBTL/DDX594/DDX574BH/
DDX394.
Setting the security function
❏ Registering a security code (only for
DDX7051BT/DDX751WBTL/DDX517BT/
DDX417BT)
You can set a security code to protect your receiver
system against theft.
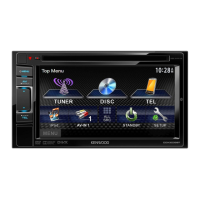
1 Display the Home screen.
On the monitor panel:
DDX7051BT
DDX751WBTL
DDX517BT/DDX417BT
2 Display the <System> setting screen.
2017DDX-EntryK.indb42017DDX-EntryK.indb4 2016/10/3113:122016/10/3113:12
 Loading...