B3000 SERVICE MANUAL
60-200807-000, REV C 58
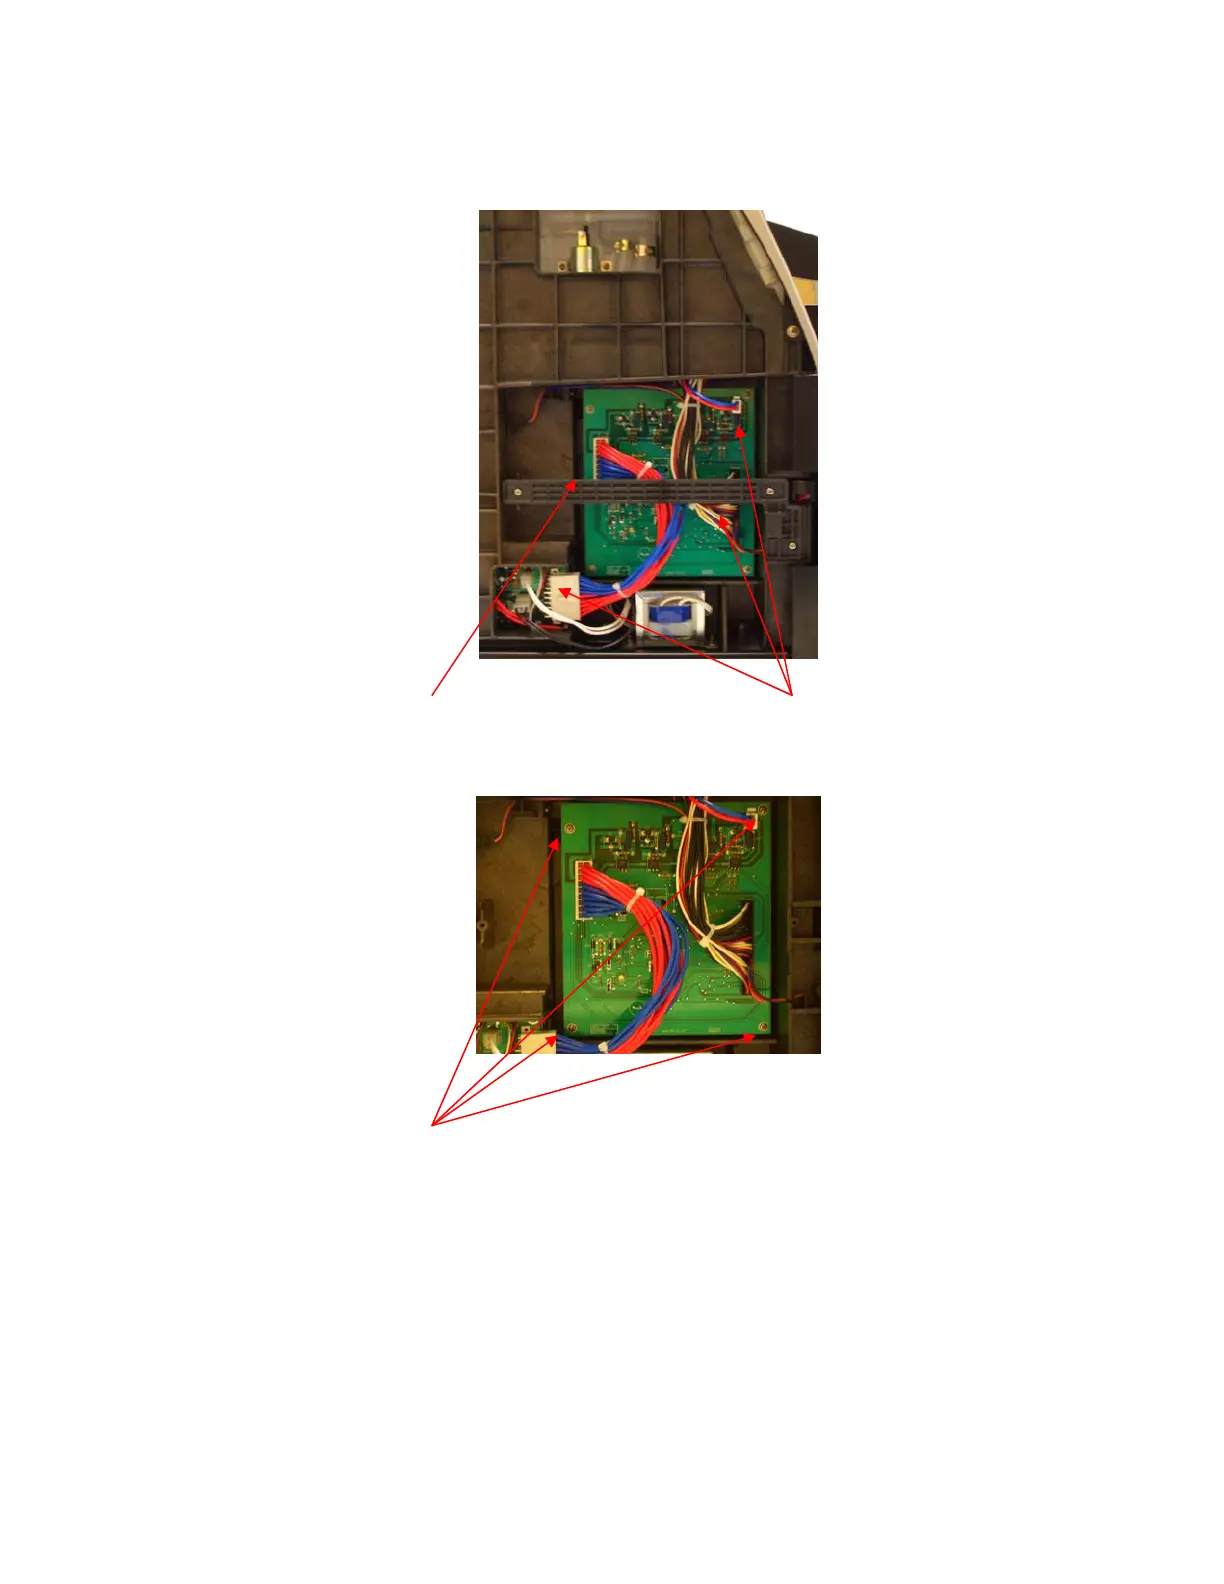
J. MAIN PCB MODULE (Located on the Left side of the brewer)
See REMOVAL of OUTER PANELS (page 36). After completion of panel removal, the technician
must attach an ESD wrist strap to themselves and the metal base plate of the brewer.
1. Remove the plastic bar in front of the Main PCB and disconnect the three wire harness
connections on the board.
2. Remove the four screws holding the PCB to the chassis. Set the PCB aside.
3. The Main PCB can now be removed.
4. Install the new module and connect the appropriate wire connections, and reinstall the protective
plastic bar.
5. Conduct a BIT test (see appendix VII on page 85) to insure the proper function of the brewer.
 Loading...