5
3. Installation of the machine and steps to be
performed before operationSecurity Function Ver. 1.02 Mar. 2016
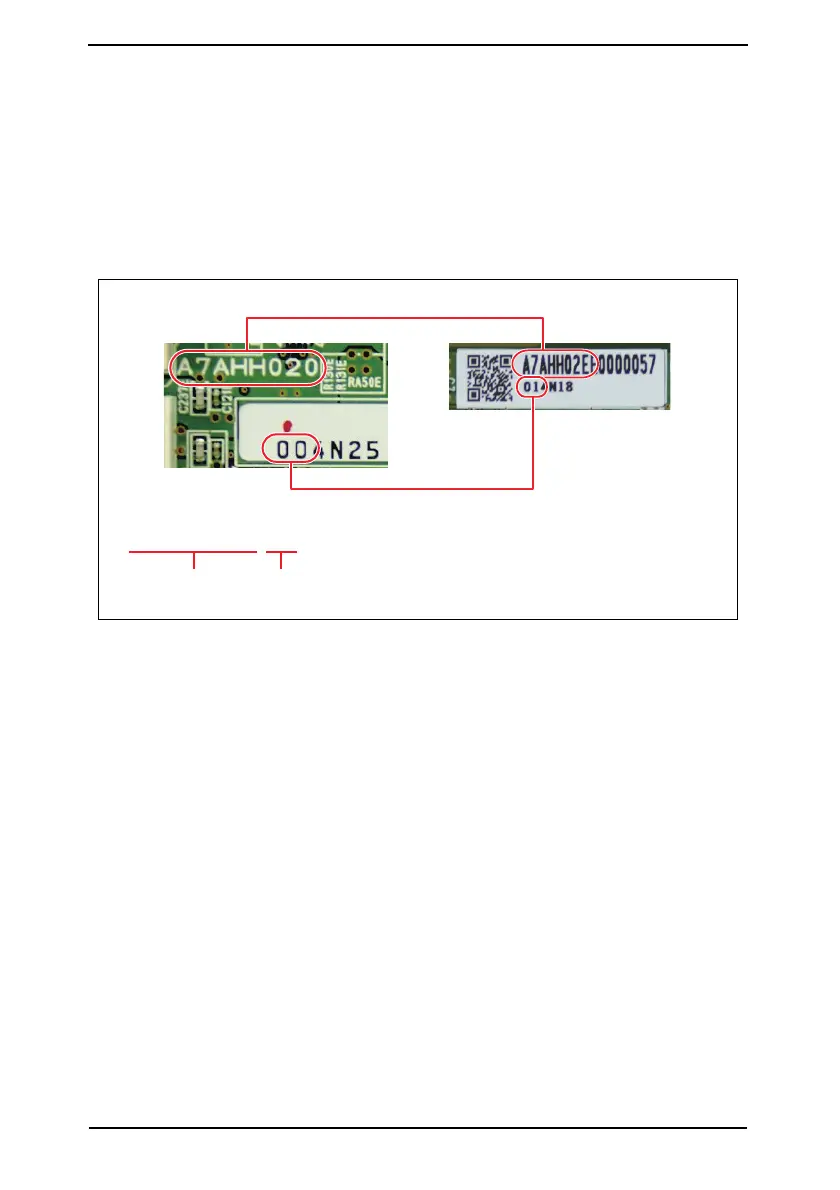
3.1.19 Checking for parts mounted on the machine
1. Check that the part numbers of the MFP board and the eMMC board are as specified
below.
<MFP board>
• A7AHH020-07
<eMMC board>
• A7AHH02E-02
A part number is a 10-digit number consisting of A (8 digits) and B (2 digits) as in the por-
tions encircled in red below.
3.1.20 Switch setting for secured start
1. Open the rear cover of the machine and place switch 1 of "SW1" on the MFP board in
the ON position.
3.1.21 Setting for Custom Function Pattern Selection
1. Copy the Custom Function Pattern Selection setting file (XXX_v1.0_ISO15408.cpd) to
the route directory of a USB memory.
2. Connect the USB memory to the USB port of the MFP.
3. Call the service mode to the screen.
4. Touch [System 2] → [Custom Pattern].
5. Select [Custom Pattern 1], [Custom Pattern 2], or [Custom Pattern 3].
6. Select [Import] and press the start key to import the data.
7. Select functions as follows: [Administrator Settings] → [System Settings] → [Custom
Display Settings] → [Custom Function Pattern Selection] → [Send/Save]. Then, select
the registered custom pattern ([ISO15408]).
* XXX in the cpd file and the Custom Pattern denotes the product name that represents the
series.
A7AHS1E024DA
A
B
XXXXXXXX-XX
A (8 digits) B (2 digits)
 Loading...