3
Scanner
3-3
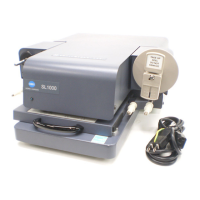
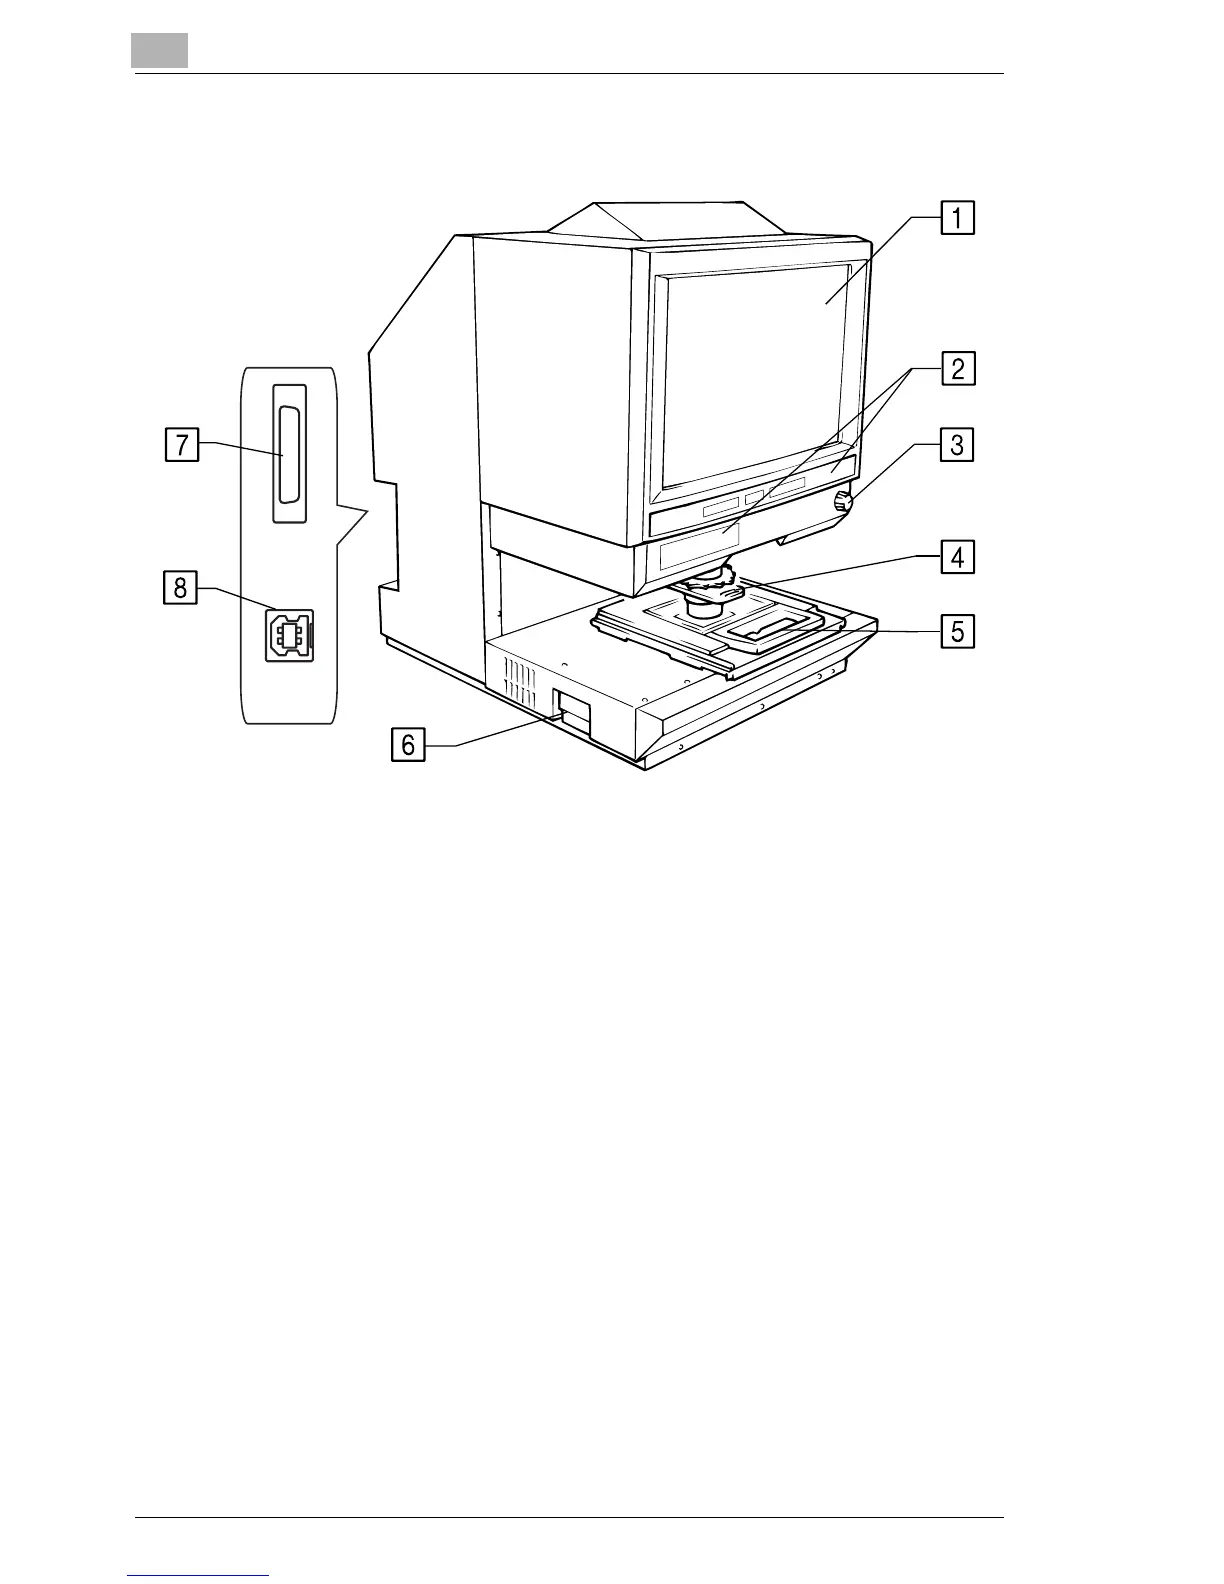
3.3 Parts of the Scanner
1. Screen: The image taken from the film is projected here for
viewing. The frame on the Screen marks the data
reading range.
2. Control Panel: Many operations are controlled from the keys and
indicators provided here.
3. Image Rotation Knob: Used to turn the Prism Unit built into the Scanner,
turning the image on the Screen.
4. Projection Lens (Optional): Used to change the size of the image on the Screen.
5. Fiche Carrier 5 (Optional): Supports the viewing of microfiche.
6. Projection Lamp Unit: Contains a Projection Lamp (halogen lamp) which
projects the film image onto the Screen.
7. Printer Connector: Connects the scanner to the printer through an
interface cable.
8. USB Connector: Connects the scanner to the Personal Computer
through a USB cable.
USA and Canada area: Standard
except USA and Canada area: Option
 Loading...