Controlling an External Device via Ethernet
Use the Ethernet to send commands to an Ethernet-controlled display (see Controlling the
Display via the Network (Ethernet) on page 28).
To control an external device via the Ethernet:
1. In the Navigation pane, click Ethernet. The Ethernet page appears.
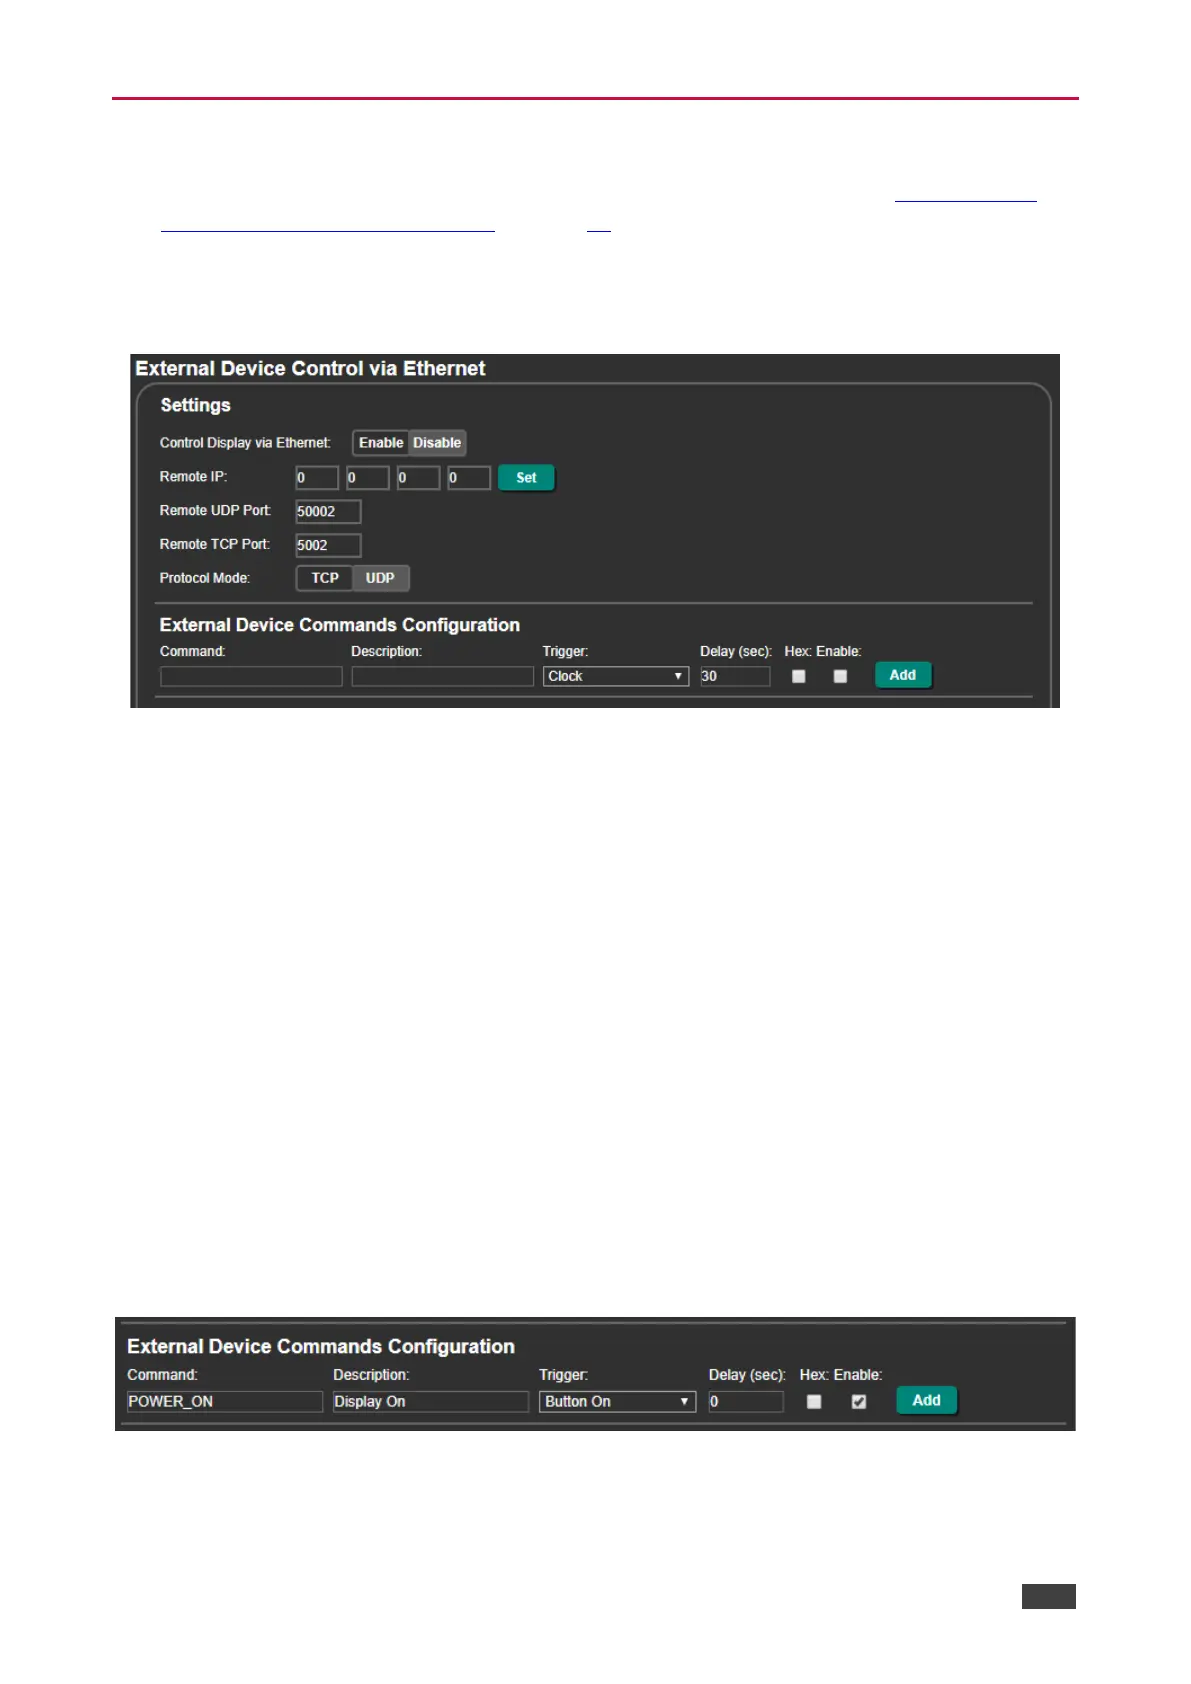
Figure 77: Ethernet Display Control
2. Click Enable display control via Ethernet (Disable, by-default).
3. Enter the remote IP address of the display.
4. Click Set.
5. Set the remote port (UDP – 50002; TCP – 5002, by-default).
6. Click TCP or UDP to select the protocol mode.
7. Configure the external device commands (for example, to turn the display on when the
ON front panel button is pressed):
▪ Enter the command, command description.
▪ Select a trigger from the drop-down box to carry out the command (Clock, No Clock,
5V, No 5V, Button On, Button Off, Remote On, Remote Off, Toggle On or Toggle
Off).
▪ Enter a delay time, if required.
▪ Check Hex for command Hex format, if required.
▪ Check Enable to enable the command.
Figure 78: Configuring an External Device Command
 Loading...