ASSEMBLY
OM 0361BR-AC 12
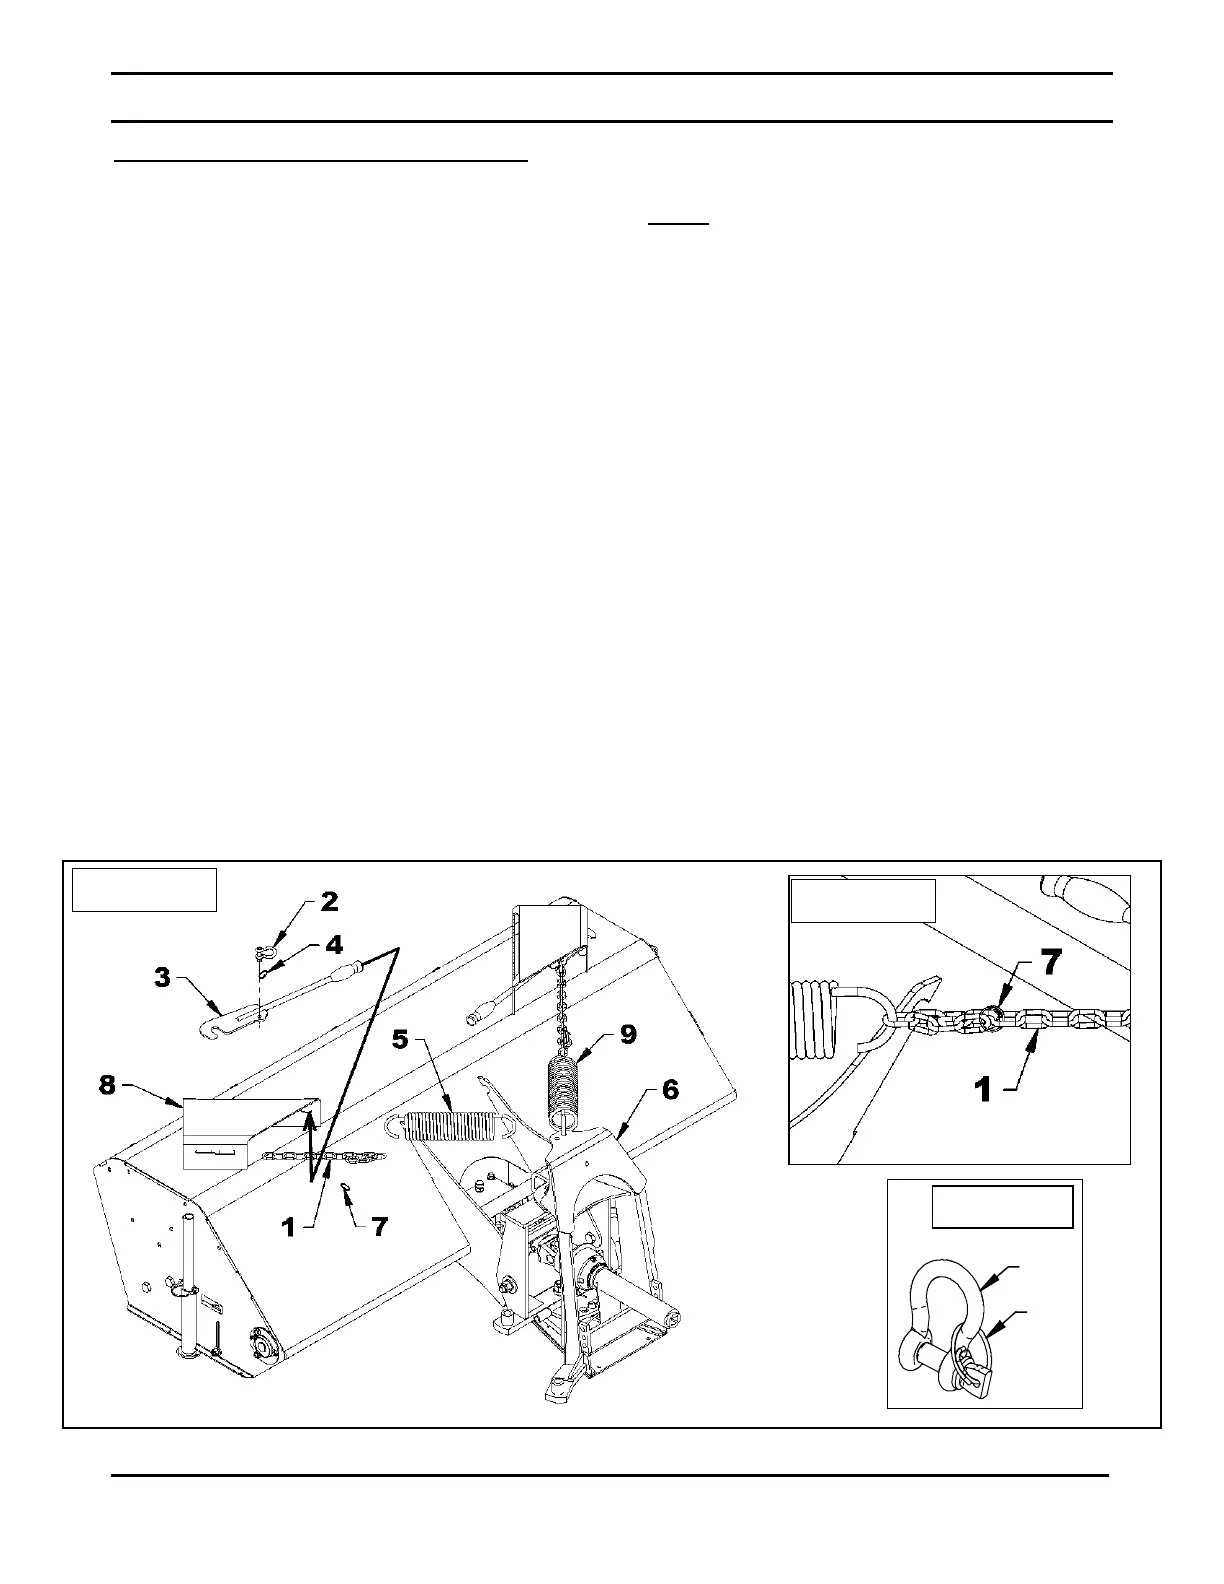
Installation of the Tension Springs
(Figures 5, 5a, 5b)
1. Take apart the two 1/4" clevis assemblies
(item 2) and insert them in the first link of
each chain then attach them to each
engagement lever (item 3) making sure to
place the bolt head of the clevis
underneath.
2. Install the circle cotter (item 4) on each
clevis (item 2) as illustrated on figure 5b.
3. Attach the large spring (item 5) in the left
upper left hole of the female hitch (item 6)
and the small spring (item 9) in the upper
right hole of the female hitch (item 6).
4. Attach the other end of each spring
(items 5-9) in the fourth link of the free end
of each chain (item 1) and secure the first
link to the chain with a circle cotter(item 7)
as illustrated on figure 5a.
NOTE
: The chain links allow for additional
adjustments so, if the engagement levers
(item 3) do not give an adequate adjustment,
attach the tension spring in another link.
5. Insert an engagement lever (item 3),
handle first, in the notches of each tension
adjustment box (item 8).
6. Position a lever (item 3) in the first notch of
the engagement box. Place yourself facing
the broom and put one hand on the spring
hook attached to the chain and the other
hand on the lever putting the index and
middle fingers between the clevis. Pull on
the lever and the spring hook to grip the
pivot pin located inside the adjustment box
(item 8). Proceed the same way for the
second lever.
3
1 0
2
4
Figure 5b
Figure 5a
Figure 5
 Loading...