EasyManuals Logo
Home>Kyocera>All in One Printer>ECOSYS FS-4300DN

Kyocera ECOSYS FS-4300DN Service Manual

Kyocera ECOSYS FS-4300DN
208 pages
To Next Page IconTo Next Page
To Previous Page IconTo Previous Page
Page #115 background imageLoading...
Page #115 background image
2LV/2L1/2L2/2MS/2MT
1-5-19
1-5-8 Fuser section
(1) Detaching and refitting the fuser unit
Procedure
1. Remove the rear cover.
(See page 1-5-6)
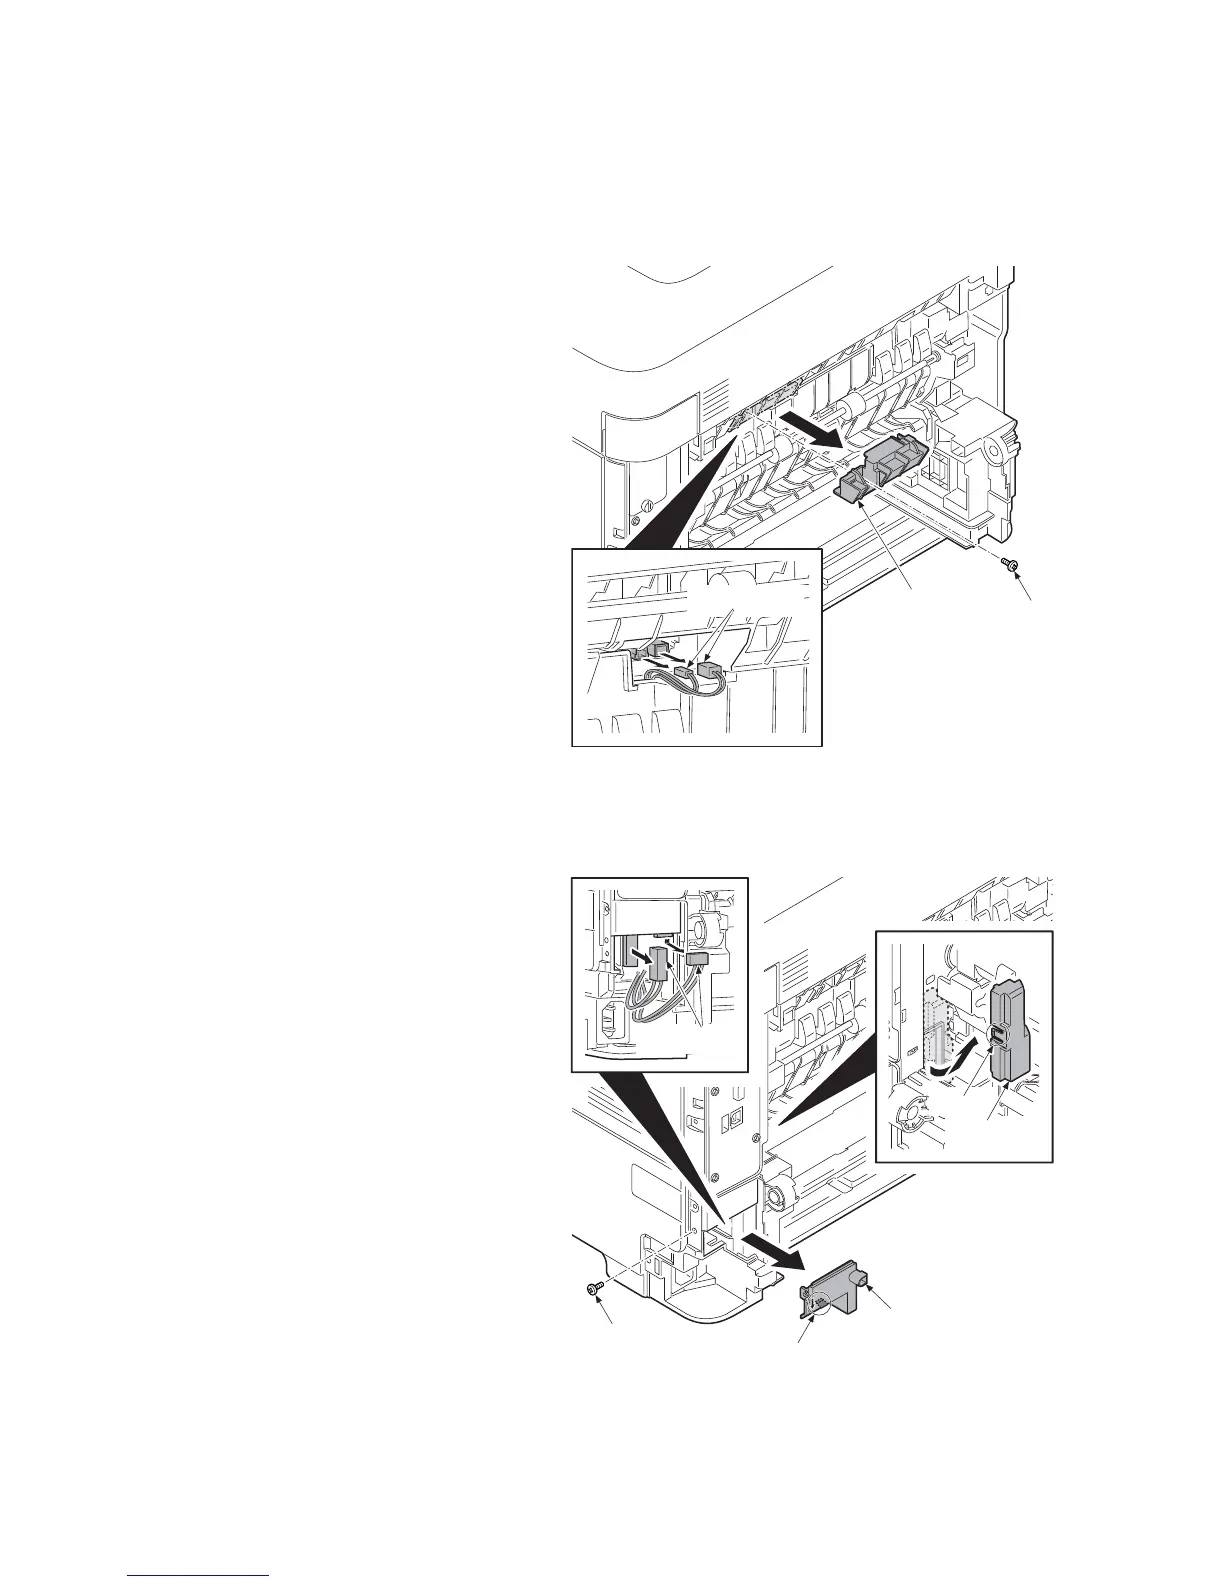
2. Remove the screw and then remove the
connector cover A.
3. Pull two connectors out.
Figure 1-5-29
4. Remove the connector cover B by
releasing the hook.
5. Remove the screw of connector cover
C.
6. Remove the connector cover C by
releasing the hook.
7. Pull two connectors out.
Figure 1-5-30
connector
cover A
Connectors
Screw
Screw
Connector
cover C
Hook
Connectors
Hook
Connector
cover B

Table of Contents

Questions and Answers:

Question and Answer IconNeed help?

Do you have a question about the Kyocera ECOSYS FS-4300DN and is the answer not in the manual?

Kyocera ECOSYS FS-4300DN Specifications

General IconGeneral
BrandKyocera
ModelECOSYS FS-4300DN
CategoryAll in One Printer
LanguageEnglish

Related product manuals