MPS/LPS User Guide 2: Installation
2-2
Installing the MPS
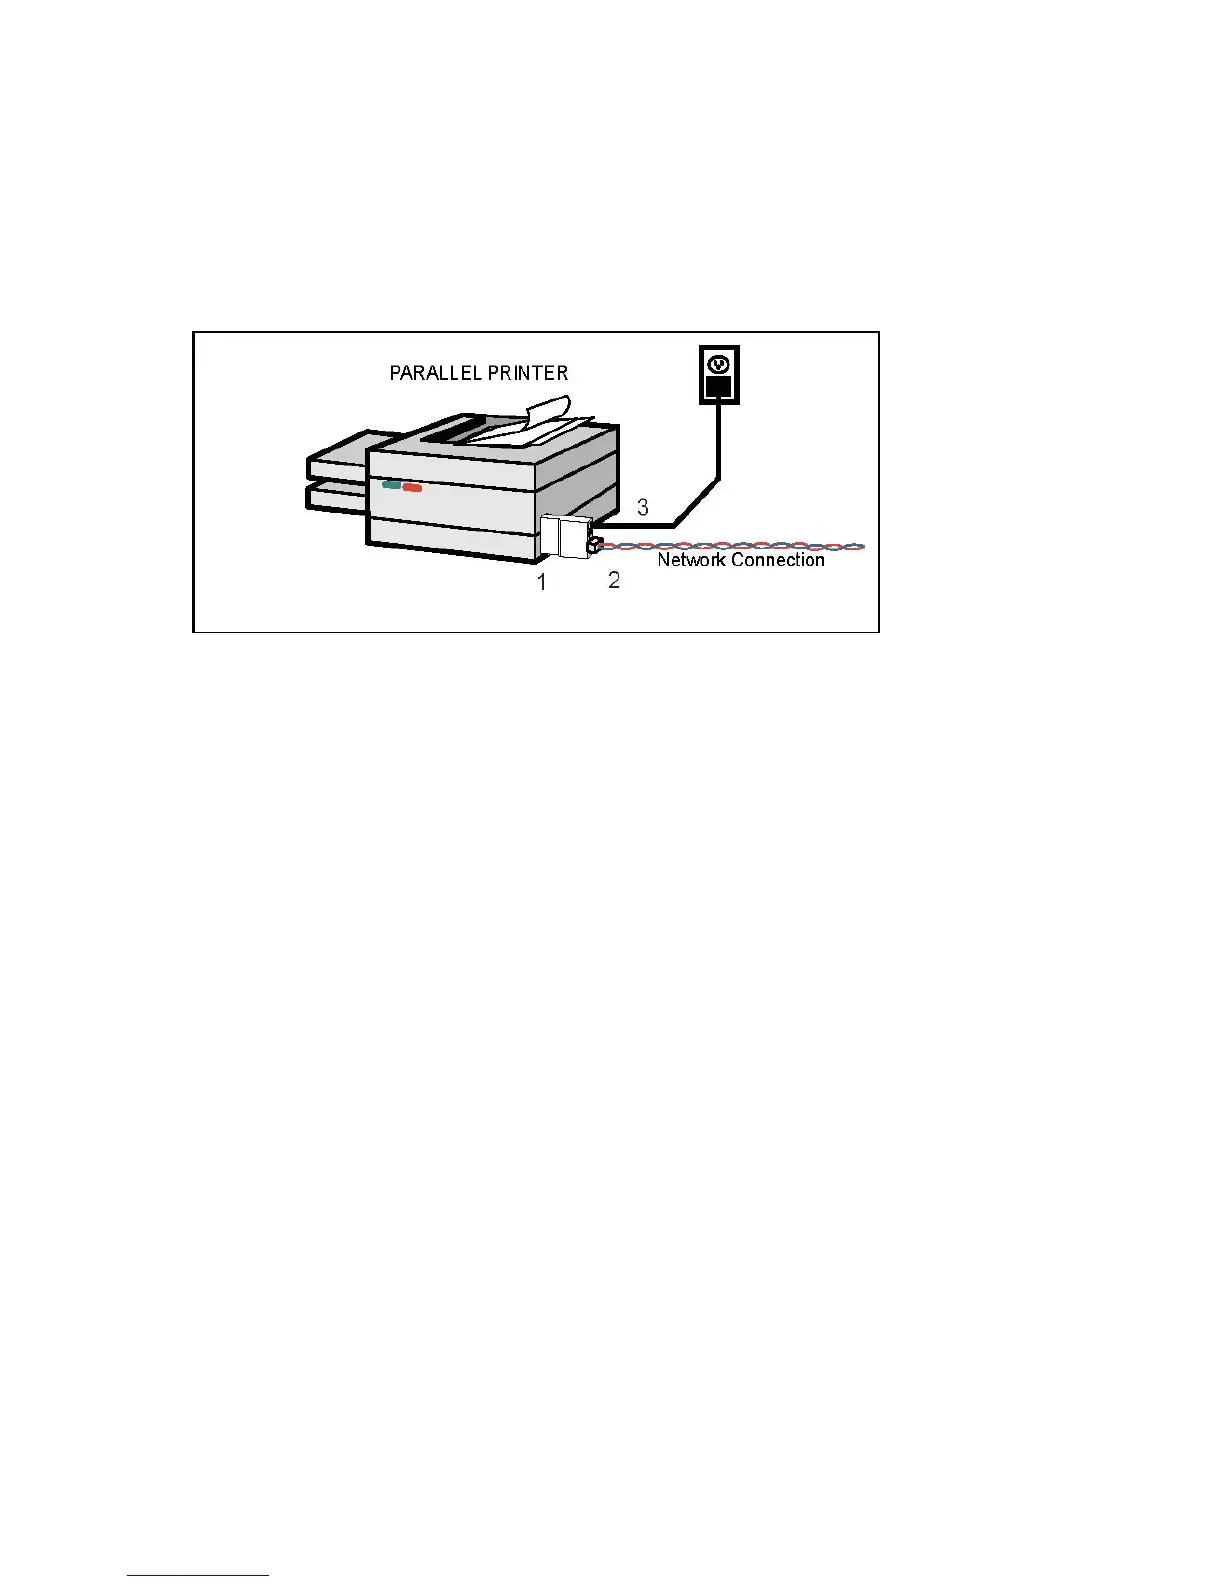
The following diagram shows a properly installed MPS:
To install the MPS, complete the following steps in order. Refer to
the numbers in the figure for help.
1. Connect the MPS Centronics connector directly to your
printer’s connector.
2. Connect an Ethernet cable to your MPS’s RJ45 connector.
3. Attach one end of the power cable to the MPS; plug the other
end into an electrical outlet. Power will come on automatically.
4. Allow 45 seconds for the MPS to fully boot.
It will run through a set of power-up diagnostics for
approximately 12 seconds. The four LEDs will show
varying patterns corresponding to the test being run.
It will try to obtain configuration information via DHCP,
BOOTP, and RARP. This step could last approximately 15
seconds if no hosts answer the requests. The OK LED will
blink approximately 3 times per second, and the
NETWORK LED will blink occasionally as network
requests are transmitted.
It will determine if the code in its Flash is valid. If so, it will
load the code and begin normal execution. If not, the MPS
will have to download software. See Appendix D for more
information.
 Loading...