Mechanical installation 5
23
LDCDS−EL100 EN 8.0
5 Mechanical installation
EL100−004
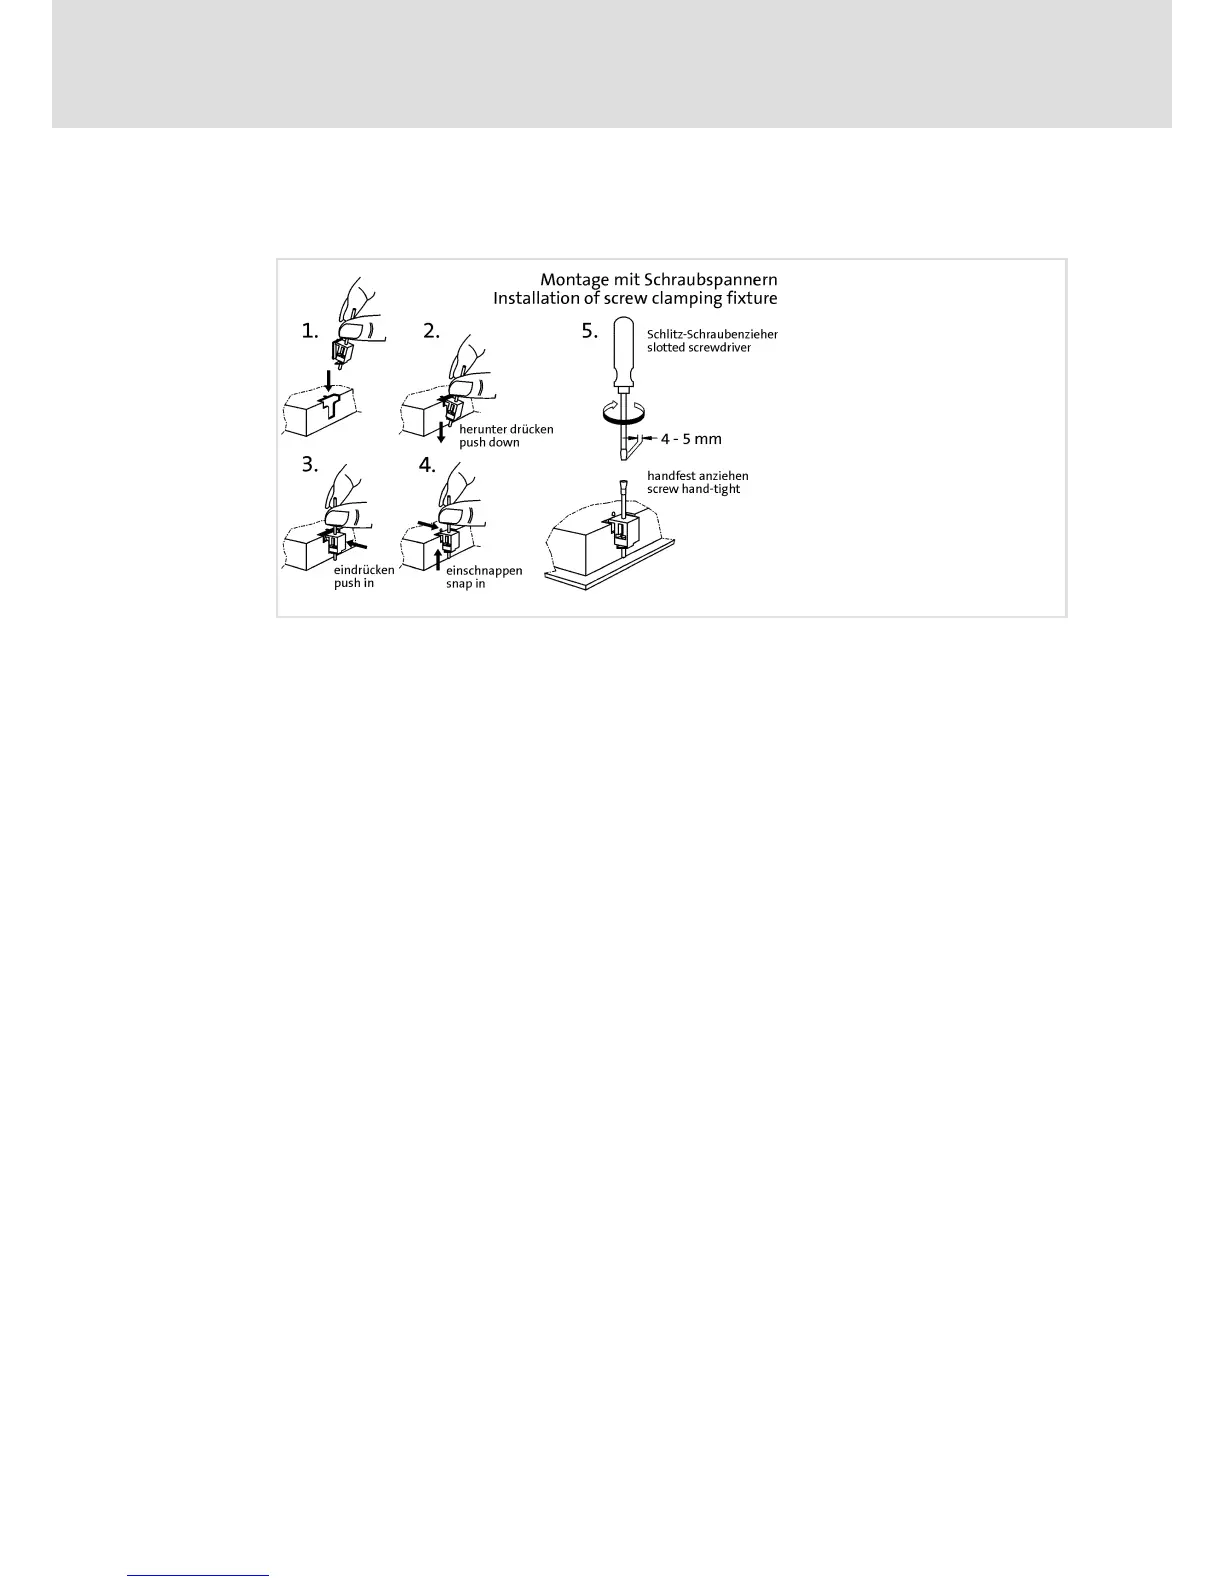
How to assemble the HMI:
1. Cut the mounting cutout out of the control cabinet door.
2. Assemble the upper screw clamping fixtures (see figure).
3. Check if the gasket under the front panel is located correctly.
4. Insert the device into the mounting cutout, secure it by hand against falling down
and tighten the assembled screw clamping fixtures hand−tight.
5. Secure the device by hand, assemble the remaining screw clamping fixtures and
tighten them hand−tight.
6. Check if the device is securely located in the mounting cutout and if the front panel
gasket is located correctly.
– If necessary, loosen the screw clamping fixtures, re−align the device or gasket and
tighten the screw clamping fixtures hand−tight.
– If the gasket is not located correctly, protection class IP65 is not reached on the
front of the device!
 Loading...