59
10.3 UPGRADING HANDGRIPS WITH RESISTANCE BUTTONS
Replacement instructions for the resistance level buttons that are
handle bar mounted to the Ascent Trainer.
1. Each kit includes: Complete left and right hand grip components.
RE-WORK PARTS REQUIRED.
1. #2 Phillips Head Screwdriver
2. Straight Blade Screwdriver
TOOLS AND EQUIPMENT REQUIRED
BEFORE BEGINNING PLEASE NOTE THAT YOU REMOVE AND
REPLACE KEYPADS WITH LIKE ARROW DIRECTIONS ON
EACH SIDE DURING THE REPLACEMENT PROCESS.
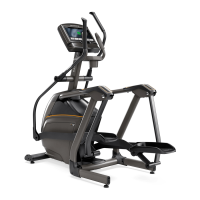
1. Remove the bottom grip plate using a straight blade screwdriver
(Figure A). NOTE: The grip plate and plastic grip will probably be
damaged or destroyed in the removal process, these parts are all
included in the upgrade kit.
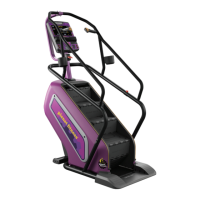
2. Remove the three (3) Phillips head screws that hold the two
halves of the plastic grip together (Figure B).
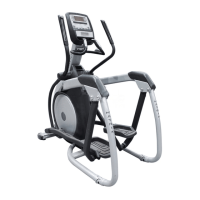
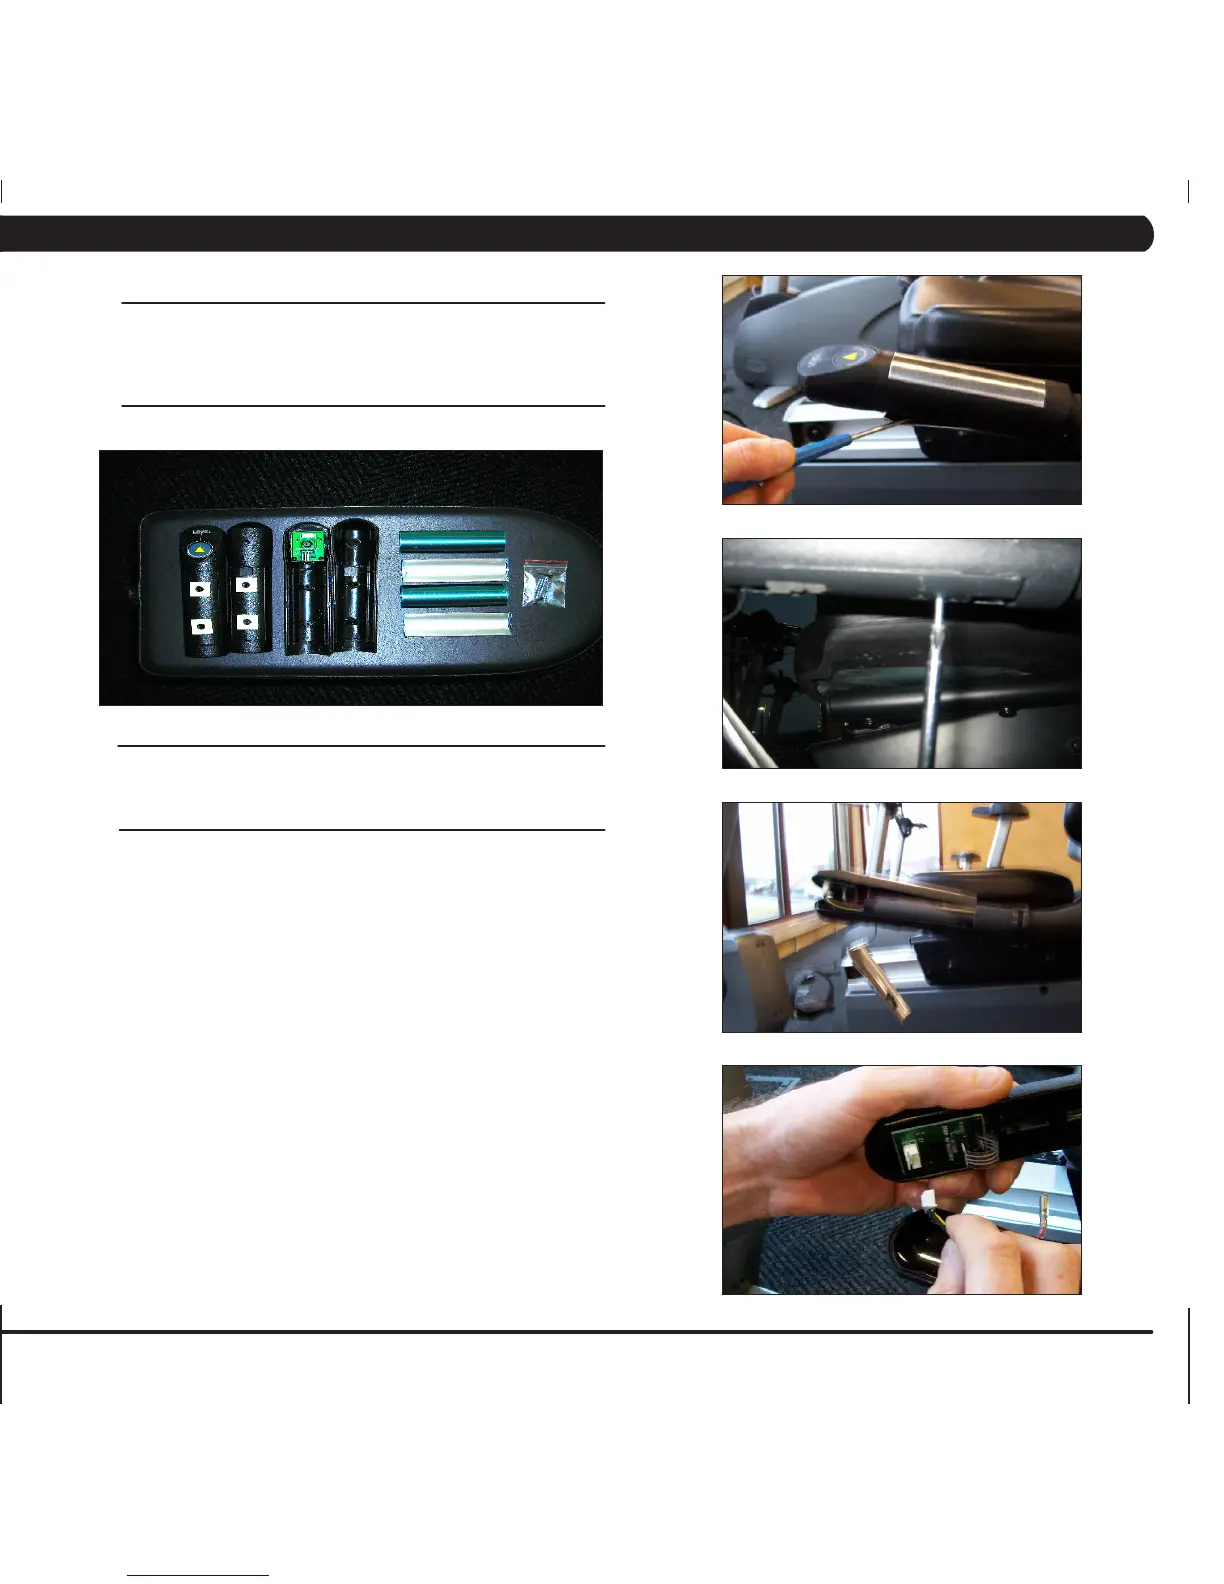
3. Separate the two halves of the hand grip (Figure C) and
disconnect the wires from the grip plates, and unplug the wire from
the circuit board (Figure D).
4. Connect the wire to the top grip plate of the new grips, and install
the grip plate by pressing it into place in the handle (be sure to
remove all of the protective wrapping from the new grip plate and
plastic).
5. Connect the wire to the circuit board of the new handle, and set
this half of the handle in place on the machine.
6. Using the screws provided in the updated kit, set the bottom
portion of the plastic handle in place and fasten the two halves
together being sure to hook the wire to the bottom grip plate.
7, Test the Ascent Trainer for function as outlined in Section 8.20.
PROCEDURE
FIGURE A
FIGURE B
FIGURE C
FIGURE D
CHAPTER 10: UPGRADES
 Loading...