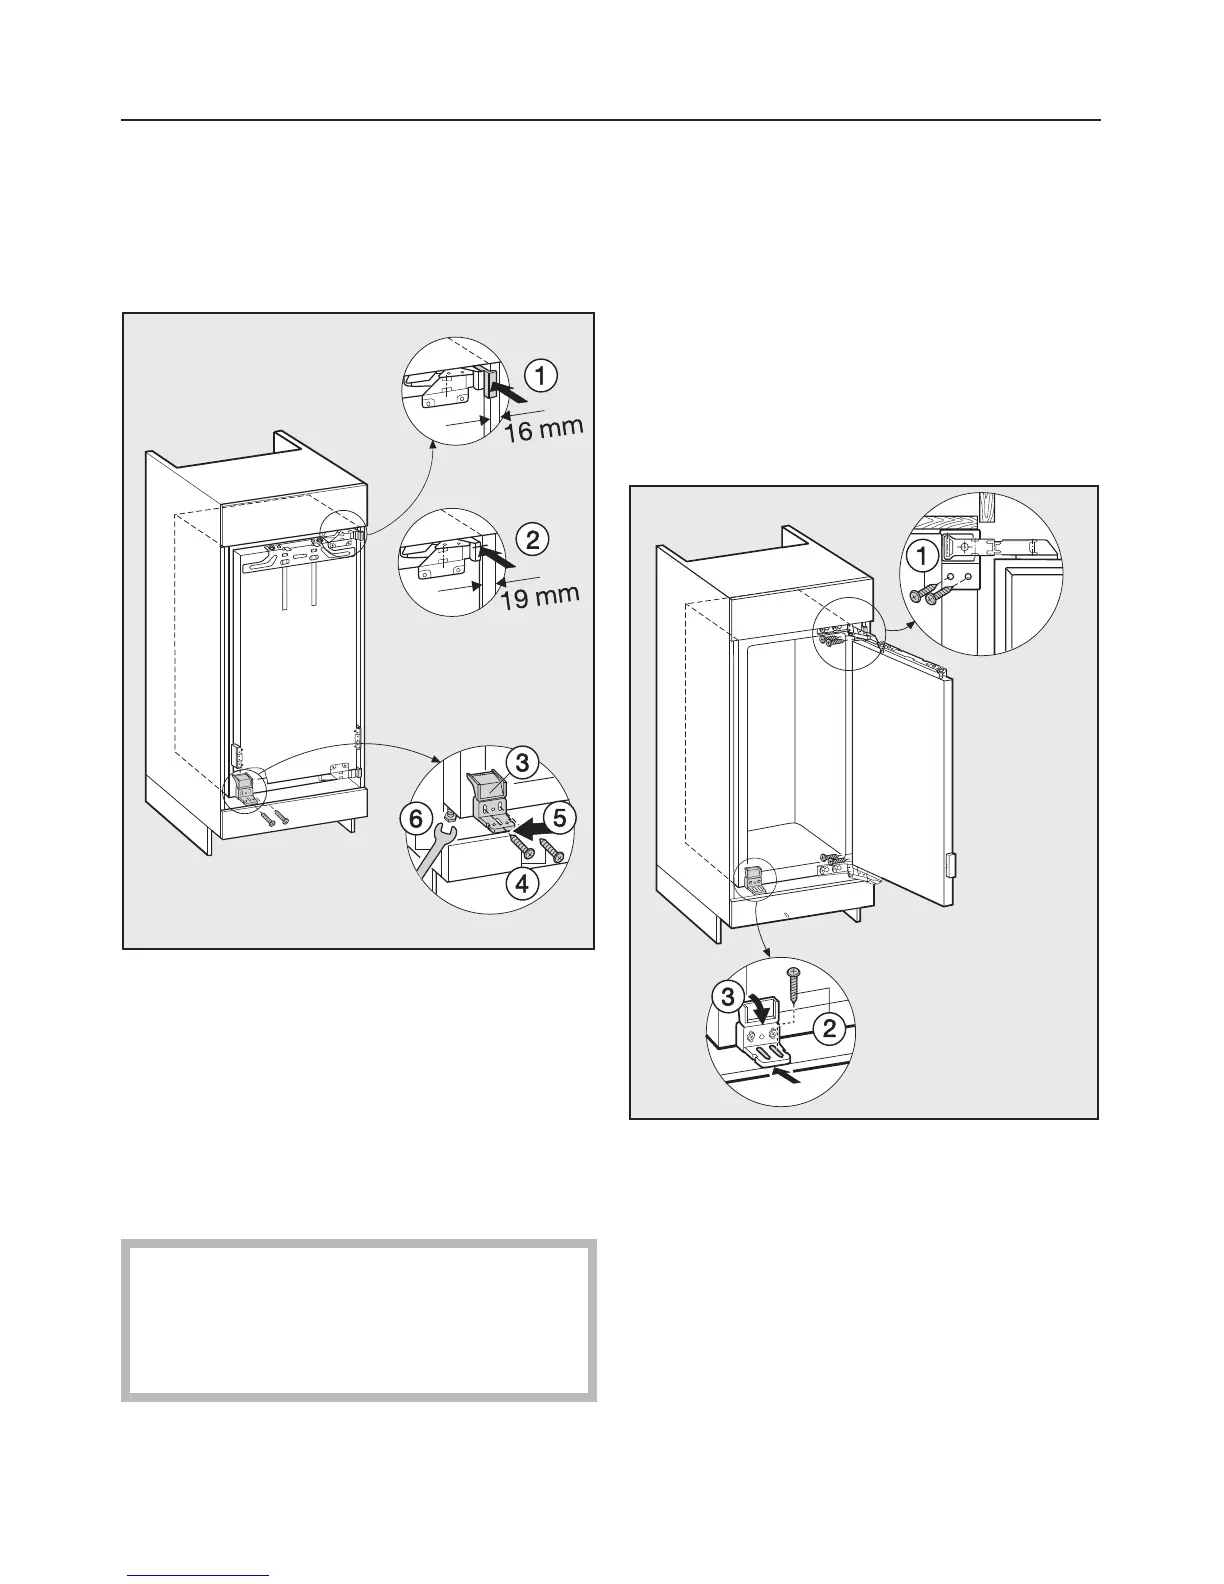
Building in
^
Push the appliance into the niche.
Make sure that the mains cable does
not get trapped.
^
Depending on the thickness of the
appliance housing walls, push the
appliance into the niche until
– the spacer piece touches the hous
-
ing unit wall a (16 mm thick walls),
– or the front edges of the hinges are
flush with the side walls of the hous
-
ing unit b (19 mm thick walls).
The cover strip must not protrude in
front of the edge of the housing unit.
It must disappear completely into
the niche.
^
Push the hinged side of the appli
-
ance to the furniture wall.
^
The appliance height can be cor
-
rected by altering the adjustable feet
using the spanner supplied f.
^
Secure plastic bracket c to the side
opposite the hinges using the
M5 x 22 countersunk screws d.
^
Push the appliance in until the plastic
bracket is flush with the front edge of
the housing unit floor e.
^
To fix the appliance to the housing
unit at the top and bottom screw the
long 4 x 19 mm chip board screws a
loosely into the hinge.
^
Screw a long 4 x 19 mm chip board
screw b loosely into the middle of
the long slot on the plastic bracket
and then turn the plastic bracket c
downwards.
Building in the appliance
29
 Loading...