6-116 Safety
6Safety
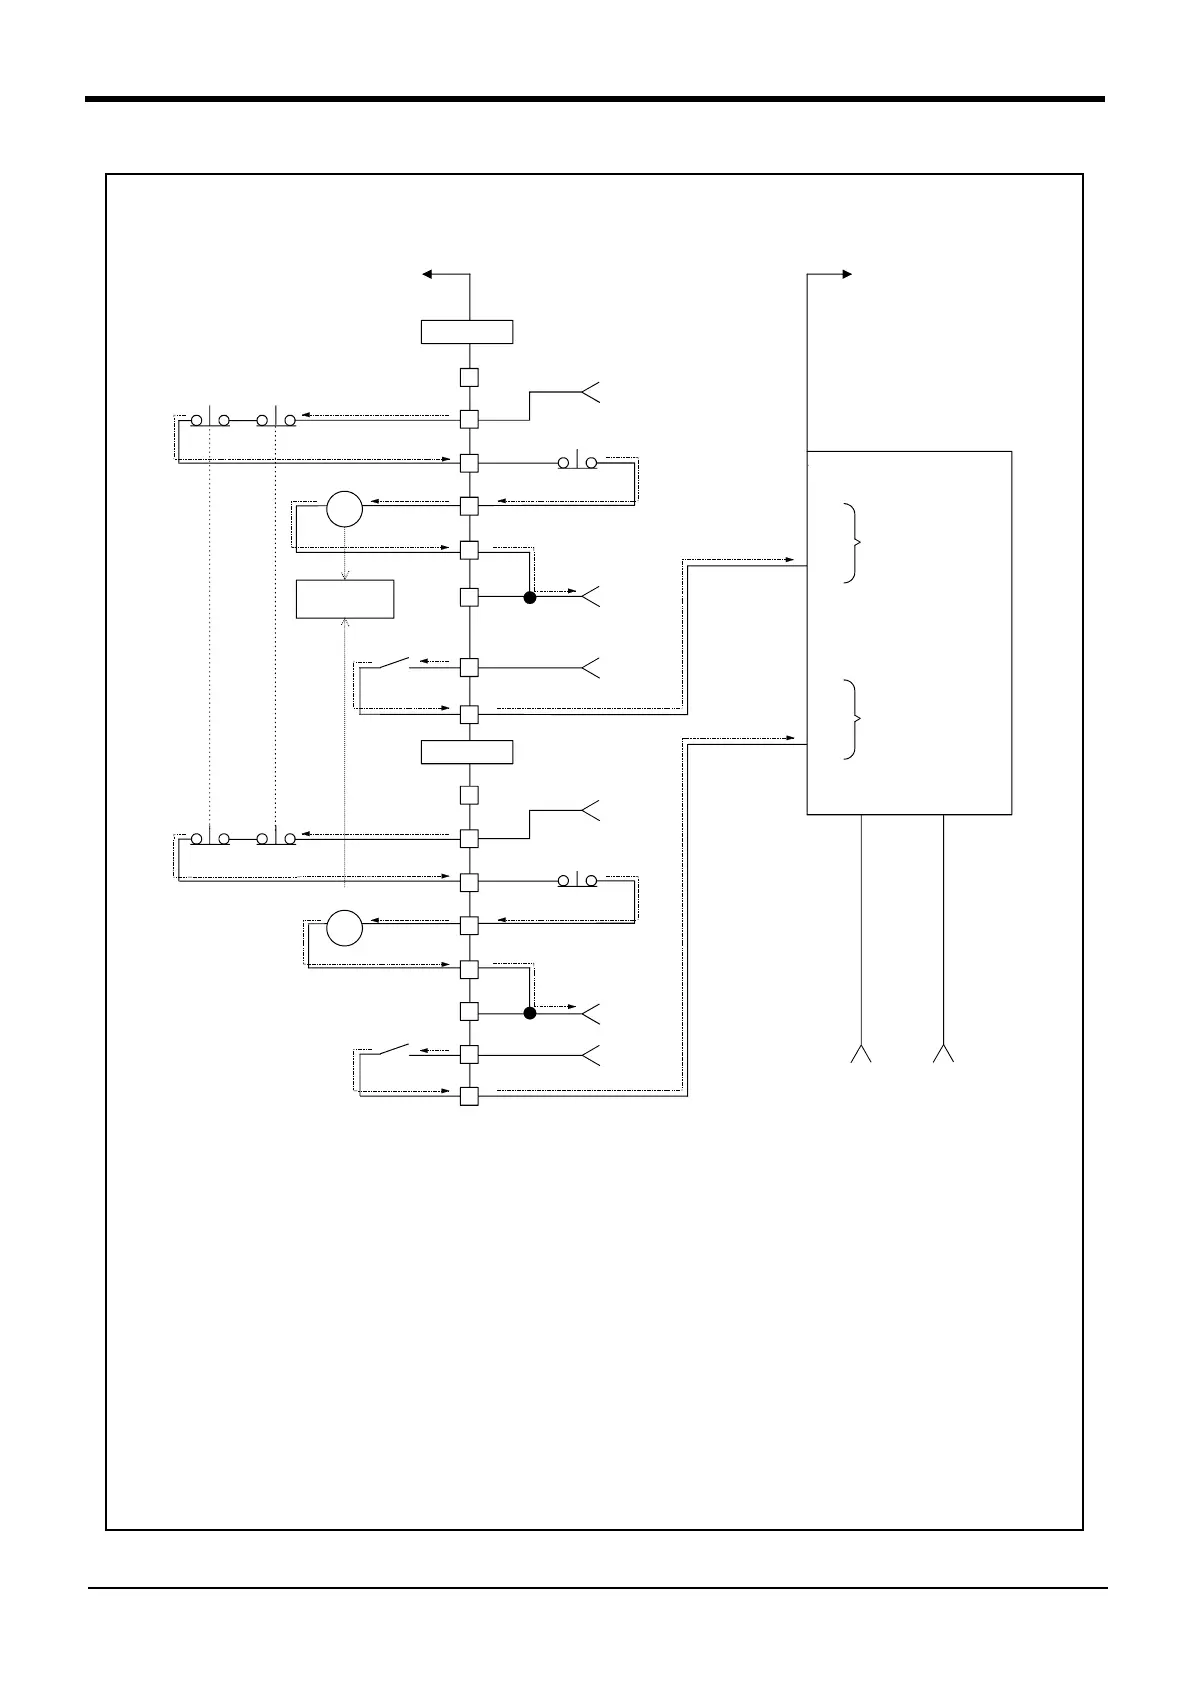
Fig.6-5 : Example of safety measures (CR750 wiring example 5)
OP
E-stop
1
2
3
4
5
6
CNUSR11
内部リレー
TB
E-stop
0V DC
1
2
3
4
5
6
0V DC
内部リレー
T12
T11
T22
T21
No connection
No connection
安全出力1
安全出力2
24V DC 0V DC
例)オムロン社 G9SX-AD
安全リレー
お客様電源(DC 24V)
A1 A2
お客様装置
24V DC
外部非常停止スイッチ
13
14
24V DC
24V DC
外部非常停止スイッチ
13
14
24V DC
安全リレー
非常停止出力
非常停止出力
CNUSR12
No connection
No connection
Controller
Safety relay
*2)
<Wiring example 5>: Connect the controller to the safety relay
Use the controller’s emergency stop button command as an input to the safety relay.
Internal relay
Emergency stop
output
Internal relay
External emergency stop switch
External emergency stop
switch
Emergency stop
output
Customer equipment
Safety relay
ex)
G9SX-AD series *OMRON
Safety output 1
Safety output 2
Customer Power Supply (DC 24V)
[Caution]
1) This product has category 3 functionality and therefore the robot’s whole unit cannot be set to category 4.
2) The controller’s internal circuit has polarity. Please adhere to the polarity as detailed in the wiring examples,
particularly for emergency stop button output when using user equipment. Connect the positive side of the
user equipment (24V DC) to the terminal 2 of CNUSR11/12, then connect the emergency stop button (or
contact points) in the user equipment to across the terminals 3 and 4 of CNUSR11/12, and ultimately con
-
nect the negative side (0V DC).
3) When installing a safety relay to use it as an input point of the controller's emergency stop button command,
use a safety relay that is activated by an input from one of the two systems (i.e. Omron’s G9S Series).
4) The emergency stop input detection relay (internal relay) uses the controller’s internal safety relay control.
If the emergency stop input detection relay is switched OFF, emergency stop is detected and the safety
relay is also switched OFF.
5) When connecting emergency stop button output to an external safety relay, please take note of the polarity
and make sure that the electrical current flows in the same direction as indicated by the dotted arrows in the
two places in the diagram. If the polarity is setup incorrectly, this function will not operate correctly. Please
connect the terminal 13 of CNUSR11/12 to 24V.

 Loading...


