EasyManua.ls Logo

Motorola DLR1060 User Manual

Motorola DLR1060
88 pages
To Next Page IconTo Next Page
To Previous Page IconTo Previous Page
Page #82 background imageLoading...
Page #82 background image
Troubleshooting
Troubleshoot your radio using the method describe in the
table.
Table 21: Troubleshooting
If... Then...
If there is no
power,
recharge or replace the Li-ion bat-
tery.
NOTICE:
Extreme operating tem-
perature may affect bat-
tery life. See Battery
Specifications on page
15.
If CPS is unable
to read the ra-
dio,
perform one of the following actions:
Ensure that one side of the pro-
gramming cable is connected to
the radio,and the other side of
the programming cable is con-
nected to the USB port.
If... Then...
Verify that the switch on the pro-
gramming cable is set at Digital
position or Flash position in old-
er version programming cable.
Ensure that the radio is posi-
tioned correctly inside the Single
Unit Charger (SUC).
If the radio gen-
erates continu-
ous tone when
pressing
thePTT button,
press the PTT button again when
receive mode ends.
If the radio does
not transmit au-
dio when press-
ing the PTT but-
ton,
perform one of the following actions:
Verify that nobody else is using
the channel and try again.
When using an earpiece, ensure
that the PTT button is disabled.
Ensure to use the earpiece in-
line with PTT button to transmit.
If you receive
communication
customize your PROFILE ID to a 4-
digit number for all radios.
English
82

Table of Contents

Question and Answer IconNeed help?

Do you have a question about the Motorola DLR1060 and is the answer not in the manual?
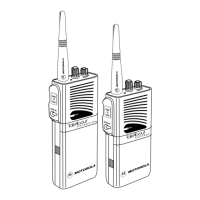
Motorola DLR1060 Specifications

General IconGeneral
BrandMotorola
ModelDLR1060
CategoryTwo-Way Radio
LanguageEnglish

Summary

Product Safety and RF Exposure Compliance

Batteries and Chargers Safety Information

Operational Safety Guidelines

Battery Features

Charging Method

Charging Stand-Alone Battery

Step-by-step instructions for charging a battery separately from the radio.

Charging with the Drop-In Tray Single Unit Charger

Procedure for charging the radio using the optional Single Unit Charger (SUC).

Radio Overview

DLR1060 Controls and Indicators

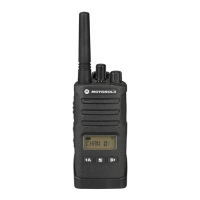
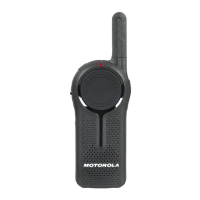
Detailed description of radio buttons, features, and indicators with visual aids.

Radio Specifications

Technical specifications of the DLR1060 radio, including frequency band and channels.

Getting Started

Attaching the Battery

Step-by-step guide on how to properly attach the battery to the radio.

Turning the Radio On or Off

How to power the radio on and off using the power button.

General Radio Operations

Transmitting and Receiving Calls

How to initiate and receive communications using the PTT button and radio.

Talk Permit Tone

Explanation of the Talk Permit Tone (TPT) and its role in communication.

Talking to Group in Channel

Steps for initiating a group conversation on the current channel.

Browsing or Selecting Channel

How to navigate and select different channels on the radio.

Advanced Configuration Mode

PROFILE ID Number

Customize the PROFILE ID Number to ensure interference-free/private communications.

Entering Advanced Configuration Mode

Procedure to access the Advanced Configuration Mode on the radio.

Resetting to Factory Defaults

Procedure to reset the radio to its original factory default settings.

Special Radio Call Features

Private Reply and Direct Call Frequently Asked Questions

Answers common questions regarding Private Reply and Direct Call features.

Customer Programming Software

Setting Radio to Customer Programming Software

Instructions on how to connect and prepare the radio for CPS programming.

Cloning Mode

Cloning Mode in Multi-Unit Charger

How to clone radios using the Multi-Unit Charger (MUC).

Configuring Cloning Mode Using Radio to Radio Cloning Cable

Steps to clone radios using a radio-to-radio cloning cable.

Troubleshooting Cloning Mode

Steps to resolve issues encountered during the cloning process.

Troubleshooting

Related product manuals