Wiring the radar system | 29
4.7 Connect the ground wire
The radar processor has a chassis ground connection stud located on the far right hand side of
the unit. The chassis ground is DC isolated from power (–ve) to eliminate the risk of galvanic
corrosion.
If you are installing the radar processor on a vessel with a metal hull, connect the radar
processor chassis ground to the hull at the closest possible location, using 12 AWG wire (or
thicker):
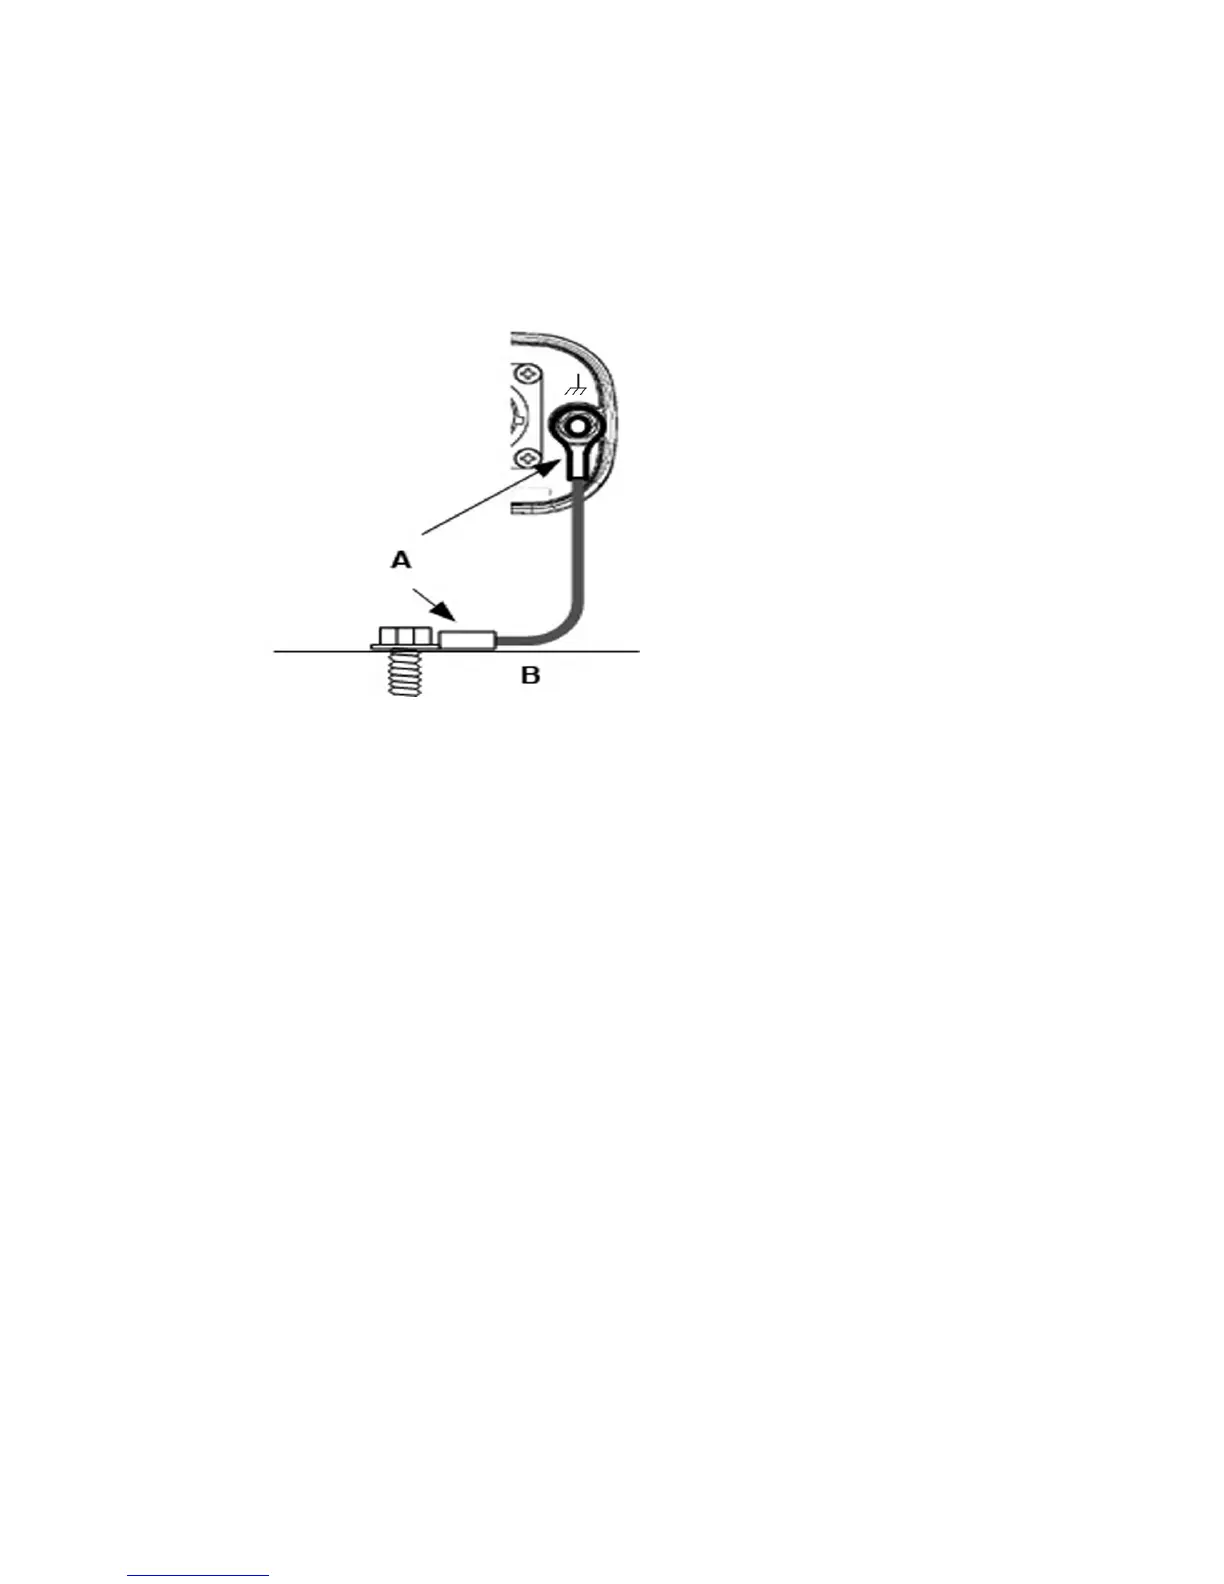
The eyelets must be crimped or soldered at both locations (A) and the method of connection to
the vessel's hull is shown at (B).
If you are installing the radar processor on a vessel with a non-metallic hull, connect the radar
processor chassis ground to the vessel's ground network. If a vessel's ground network is not
available, leave the radar processor chassis ground unconnected.
4.8 Radar system checklist
When you've finished the wiring, visually check that:
• Each component is securely mounted and able to withstand rough sea conditions.
• All the cables are correctly installed; and
• any cable shield mesh is correctly configured,
• all cable entry points are watertight, and
• water can't leak into the scanner.
Now you are ready to interface to your choice of display head.
 Loading...