55Installing a Cascade System
8.1.1 Piping Sizes and Considerations
When plumbing a cascade system, consider the following pipe
diameters and flow rates. Note that flow rates above 4 ft/s may
cause pipe erosion or velocity noise. These specifications may vary
depending on installation conditions.
NHB-110
Qty
Flow Rate (GPM)
@ 20°F T
Recommended
Boiler Pipe Sizes (2-4 ft/s)
2 20.4 1- 1/2"
3 30.6 2"
4 40.8 2"
5 51 2- 1/2"
6 61.2 2- 1/2"
7 71.4 3"
8 81.6 3"
9 91.8 3- 1/2"
10 102 3- 1/2"
11 112.2 3- 1/2"
12 122.4 3- 1/2"
13 132.6 4"
14 142.8 4"
15 153 4"
16 163.2 4"
NHB-150
Qty
Flow Rate (GPM)
@ 20°F T
Recommended
Boiler Pipe Sizes (2-4 ft/s)
2 27.6 2"
3 41.4 2"
4 55.2 2- 1/2"
569 3"
6 82.8 3"
7 96.6 3- 1/2"
8 110.4 3- 1/2"
9 124.2 3- 1/2"
10 138 4"
11 151.8 4"
12 165.6 4"
13 179.4 5"
14 193.2 5"
15 207 5"
16 220.8 5"
8.2 Connecting the Communication Cables
Up to 16 boilers can be connected with Navien Ready-Link
communication cables. Select one of the boilers in the cascade
system as the master boiler, and then connect the other boilers to
it as slaves. Before making any connections, ensure that the power
is turned off to all boilers.
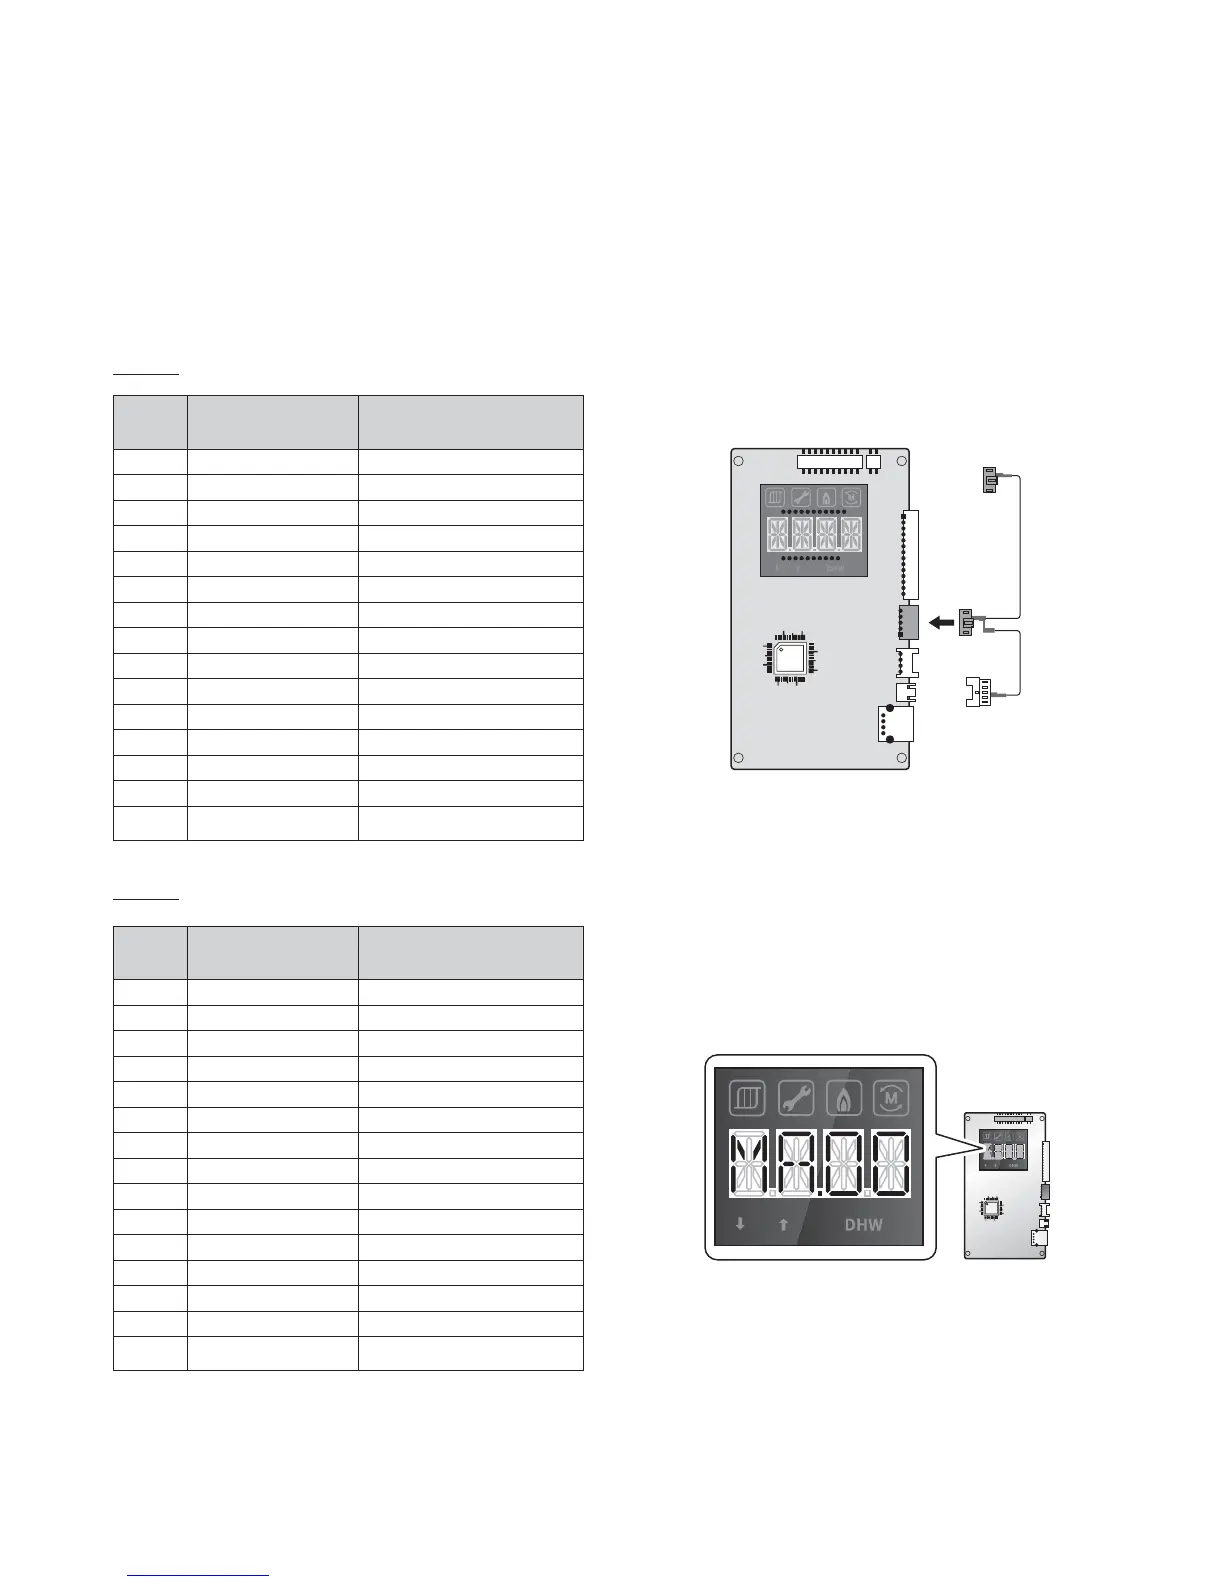
Connect the Ready-Link cables to the J6 ports on the right side of
the front panel:
psi
O/R
S
R
8.2.1 Configuring the Communication Settings
After connecting the Ready-Link communication cables, restore
power to the boiler and turn on all boilers using the Power button.
To configure the communication settings:
1. On the master boiler, press and hold the Diagnostic and Up(+)
buttons for more than 5seconds. “MA.00” will appear on the
display to confirm that this boiler is set as the master.
psi
O/R
S
R
psi
O/R
S
R
 Loading...