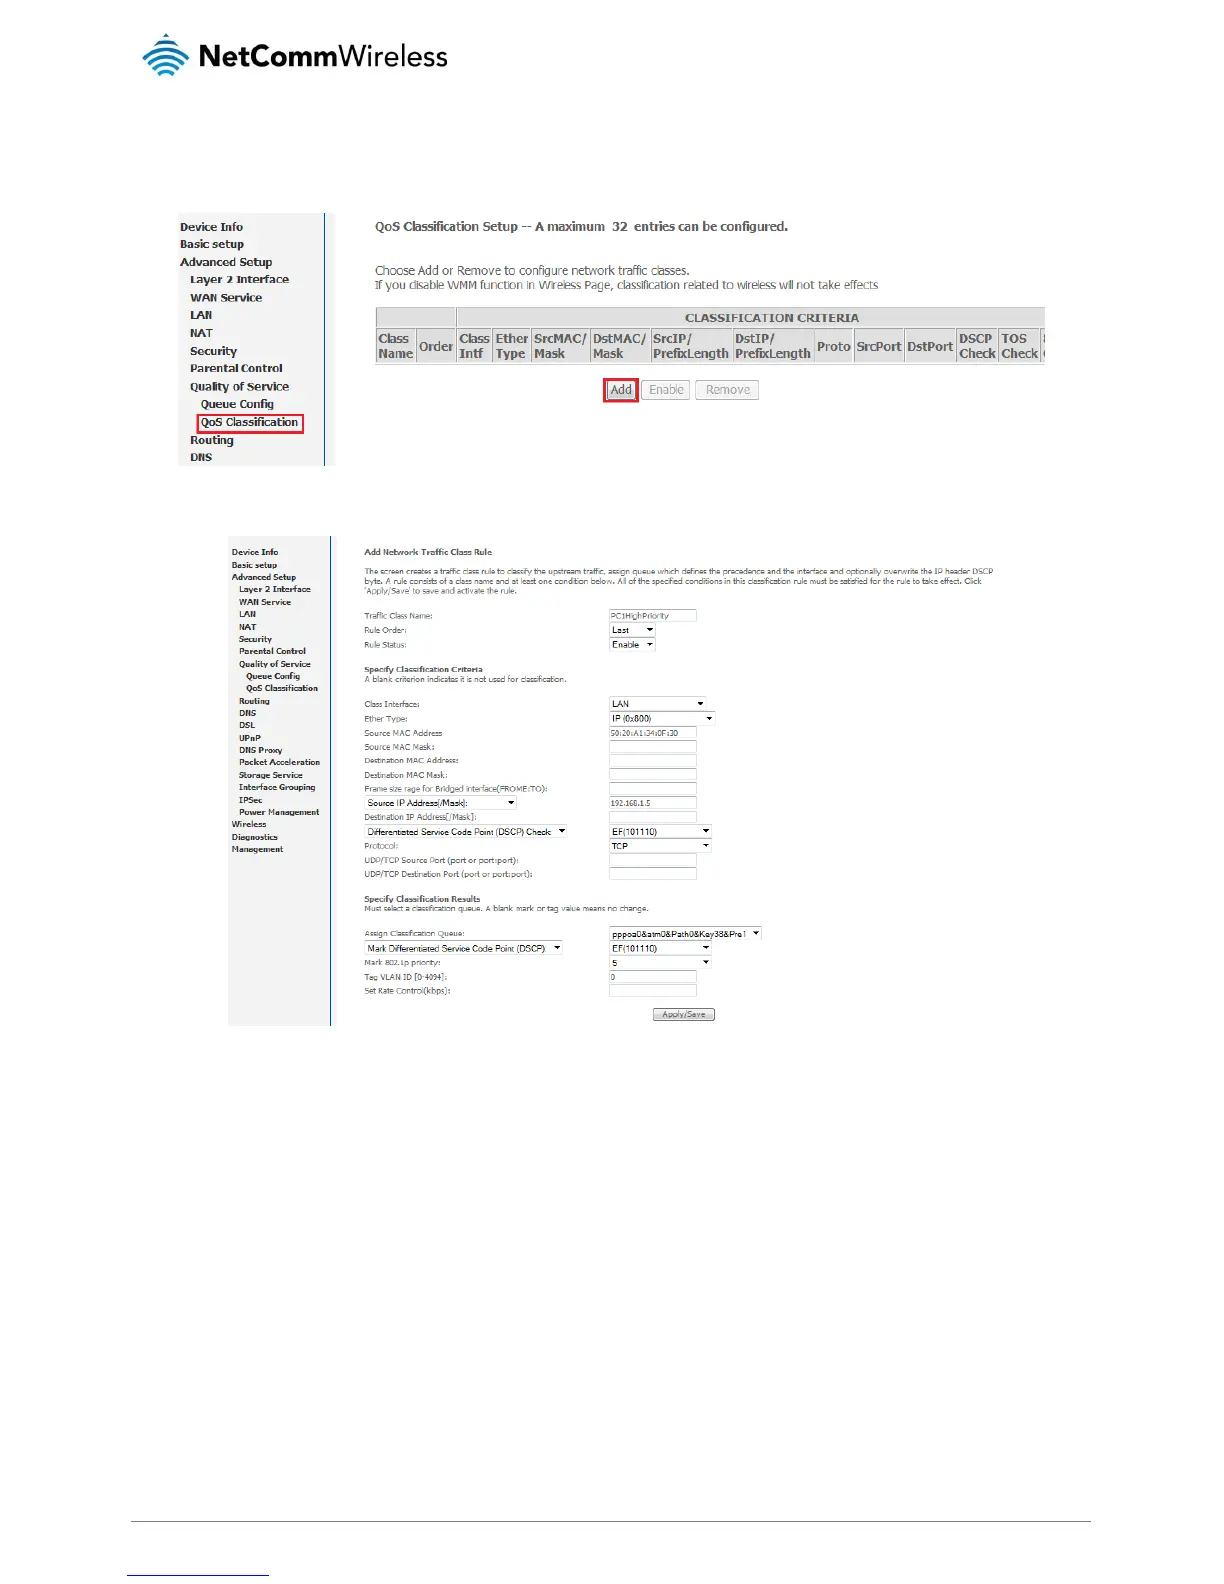
igh Priority QoS Classification
a) Select Advanced > Quality of Service > QoS Classification.
b) Click the Add button.
c) Enter a Traffic Class Name reflecting the High Priority QoS rule, e.g. PC1HighPriority.
d) Leave the Rule Order as Last.
e) Set the Rule Status to Enable.
f) Set the Class Interface according to how the device connects to the router. In the example above, LAN is selected. Other
options are Wireless, Local and USB.
g) Set the Ether Type to IP(0x800). Other options include ARP(0x8086), Ipv6(0x86DD), PPPoE_DISC(0x8863), 8865(0x8865),
8866(0x8866), 8021Q(0x8100).
h) Enter the Source MAC Address of the device, the unique 12 character signature with every 2 characters separated by a
colon(:), that you previously entered to reserve the device's IP address.
i) Enter the Source IP Address of the device that you previously entered into the Static IP Lease List, in the range of
192.168.1.x In the example above the IP address is 192.168.1.5.
j) Enter a Destination MAC Address if the connection is to a single device. This is useful for VPN connections. If you wish the
destination MAC address to be any address leave the field blank.
k) Enter a Destination IP Address if the connection is to a single device. This is useful for VPN connections. If you wish the
destination IP address to be any address leave the field blank.
 Loading...