7
EN
7
PROGRAMMING
7.1 - Preset functions
The RUN control unit has a number of programmable functions. These func-
tions are set to a configuration which should satisfy most automations.
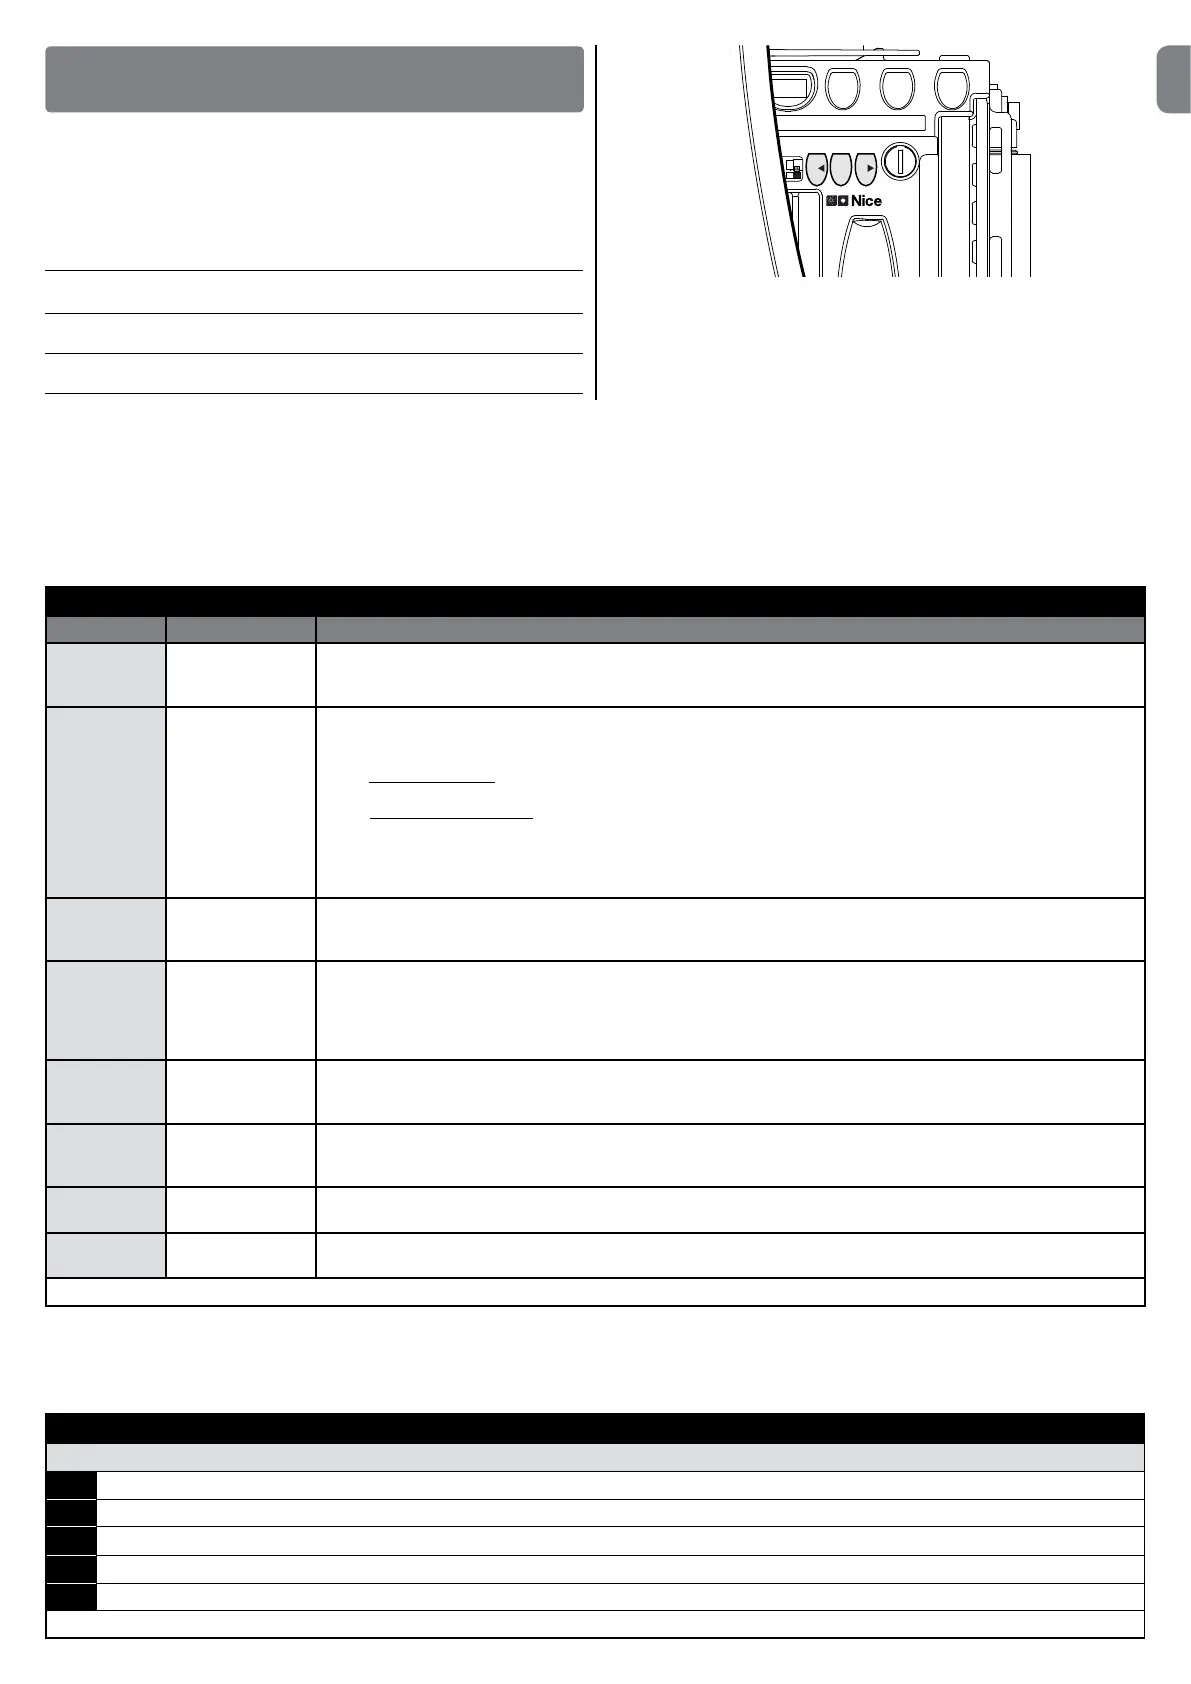
7.2 - Programming keys
The RUN control unit features three keys that can be used to command the
control unit both during tests and programming.
Open The “OPEN” key enables the user to control the openings of the
s gate or move the programming point upwards
Stop The “STOP” key enables the user to stop the manoeuvre, or when
Set pressed for 5 seconds enables access to programming mode
Close The “CLOSE” key enables the user to close the door or scroll
t down through the programming steps
Stop
Set
Close
Open
SCA
Flash
Bluebus
Stop
L1 L2 L3 L4 L5 L6 L7 L8
1.6A T
7.3 - Programming
On the RUN control unit, a number of programmable functions are available. The functions are adjusted using 3 keys on the control unit: [s] [Set] [t] and are
displayed by 8 leds: L1….L8.
The programmable functions available on RUN are set out on 2 levels:
Levelone: the functions can be adjusted in ON-OFF (active or inactive) modes. In this case, each of the leds L1….L8 indicates one function; if it is lit the function
is active, if it is OFF, the function is not active; see Table 6.
Leveltwo: the parameters can be adjusted on a scale of values (from 1 to 8).In this case, each of the leds L1….L8 indicates the set value (there are 8 possible
settings). Please refer to Table 8.
TABLE6-Programmablefunctions:level1
Led Function Description
L1 Automatic clo-
sure
This function causes the door to close automatically after the programmed time has lapsed. The factory set Pause Time
is 30 seconds, but can be changed to 5, 15, 30, 45, 60, 80, 120 or 180 seconds. If the function is inactive, functioning
will be “semi-automatic”.
L2 Close After
Photo
This function enables the gate to be kept open for the necessary transit time only.In fact the “Photo” always causes an
automatic closure with a pause time of 5s (regardless of the programmed value). The action changes depending on
whether the “Automatic closing” function is active or not.
When Automatic Closing is inactive: The gate always arrives to the totally open position (even if the Photo disengages
first). On release of Photo, automatic closure is activated with a pause of 5s.
When AUTOMATIC CLOSING is active: the opening manoeuvre stops immediately after the photocells have disen-
gaged. After 5 seconds, the gate will begin to close automatically.
The “Close after photo” function is always disabled in manoeuvres interrupted by a Stop command.
If the “Close after photo” function is inactive the pause time is that which has been programmed or there is no automatic
closing if the function is inactive.
L3 Always Close The “Always Close” function will trigger, and the gate will close if an open gate is detected when the power supply re-
turns. For safety reasons, the manoeuvre is preceded by 5s of flashing. If the function is inactive when the power supply
returns, the gate will remain still.
L4 Stand-By This function enables the user to lower consumption to a very minimum. It is particularly useful in cases when the buffer
battery is being used. If this function is active, the control unit will switch the BLUEBUS output (and consequently the de-
vices) and all the LEDs off one minute after the end of the manoeuvre. The only LED which will remain on is the BLUEBUS
LED which will simply flash more slowly. When a command arrives, the control unit will reset to complete functioning. If
this function is inactive, there will be no reduction in the consumption.
L5 Peak If this function is activated, the gradual acceleration at the beginning of each manoeuvre will be disconnected. It enables
the peak thrust and is useful whenever static friction is high, e.g. if snow or ice are blocking the gate. If the thrust is inac-
tive, the manoeuvre will start with a gradual acceleration.
L6 Pre-flashing With the pre-flashing function, a 3 second pause is added between the flasher switching on and the beginning of the
manoeuvre in order to warn the user, in advance, of a potentially dangerous situation. If pre-flashing is inactive, the
flasher will switch on when the manoeuvre starts.
L7 “Close” becomes
“Open partially”
When this option is selected, all Close commands (CLOSE input or wireless control) actuate Partial Open (see led L6,
table 8).
L8 “Slave”mode With this option, ROBUS becomes a Slave: this allows you to synchronise two motors on opposing panels with one as
Master and one as Slave; for further information, see par. 8.1.5 RUN “Slave” mode.
During normal operation, leds L1….L8 are on/off in relation to the status of the respective function; for instance, L1 is on when “Automatic Closing” is active.
7.4 - Level one programming (ON-OFF functions)
Bydefault,level1functionsareallsettoOFF,butcanbemodiedatanytimeasdescribedinTable6.Takecareduringmodicationprocedures,asthereisa
maximum time interval of 10 seconds between pressing one key and another; otherwise the system exits the procedure automatically memorising the changes
made up to that time.
TABLE 7
Changing ON-OFF functions
01. Press and hold the “Set” key for about 3 seconds;
02. Release “Set” when led L1startsashing;
03.
Press “s” or “t”tomovetheashingledtothefunctionyouwishtomodify;
04. Press “Set”tochangethefunction'sstatus:(shortashing=OFF;longashing=ON);
05. Wait 10 seconds (max.) to leave programming.
Note – Points 3 and 4 can be repeated during the same programming phases in order to set other functions to ON or OFF.

 Loading...