English – 21
Before you connect the device to the “FLASH” output, make sure you have programmed the correct function. If not, you may
damage the device or its control unit.
6.6.4 - Level two programming (adjustable parameters)
The adjustable parameters are factory set as shown in the table 10 with “
” However, they can be changed at any time, as shown in Table
11. Follow the procedure carefully as there is a maximum time of 10 seconds between pressing one key and another. If more time lapses, the
OQNBDCTQDVHKKjMHRG@TSNL@SHB@KKX@MCLDLNQHYDSGDLNCHjB@SHNMRL@CDTOSNSG@SRS@FD
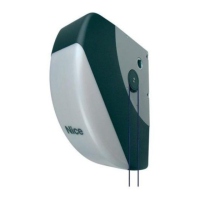
Table 11 - Procedure to change the adjustable parameters
01. Press and hold Set for roughly 3 s
SET
3S
02. Release the Set key when L1 LED starts flashing
L1
SET
03. Press keys S or T to move the flashing LED to the “input LED” which represents the parameter which is
to be modified.e
O
04. Press and hold the Set key; the Set key must be kept pressed during steps 5 and 6
SET
05. Wait approx. 3 seconds, after which the LED representing the current level of the parameter which is to be
modified will light up.
3S
06. Press keys S or T to move the LED which represents the parameter value.
O
07. Release the key Set
SET
08. Wait 10s to exit programming on elapse of the maximum time interval.
10S
Note: Points 3 to 7 can be repeated during the same programming phases in order to adjust other parameters
6.7 - Memorization of transmitters
Each radio transmitter is recognised by the radio receiver by means of a “code” which is different from that of any other transmitter It is thus
necessary to carry out the “memorisation” procedure by means of which the user prepares the receiver to recognise each single transmitter.
Transmitters can be memorised in 2 modes: Mode 1 and Mode 2 (paragraphs 6.7.1 and 6.7.3).
6.7.1 - Memorizzazione trasmettitore in Modo 1
(M SGHR LNCD SGD ETMBSHNMNE SGDSQ@MRLHSSDQ JDXRHR jWDC @MCD@BG JDX
corresponds to the command in the control unit shown in Table 12; A
single stage is carried out for each transmitter, during which all the
transmitter keys are memorised. It does not matter which key is pressed
during this stage and only one place in the memory is used. A transmitter
can normally only control a single automation in Mode 1
Note: single-channel transmitters only have a T1 key, two channel tran-
smitters only have T1 and T2 keys.
Table 12 - Commands available in Mode 1
Key Command
Key T1 SbS
Key T2 Partial opening
Key T3 Open
Key T4 Close
6.7.2 - Procedure for Mode 1 memorisation
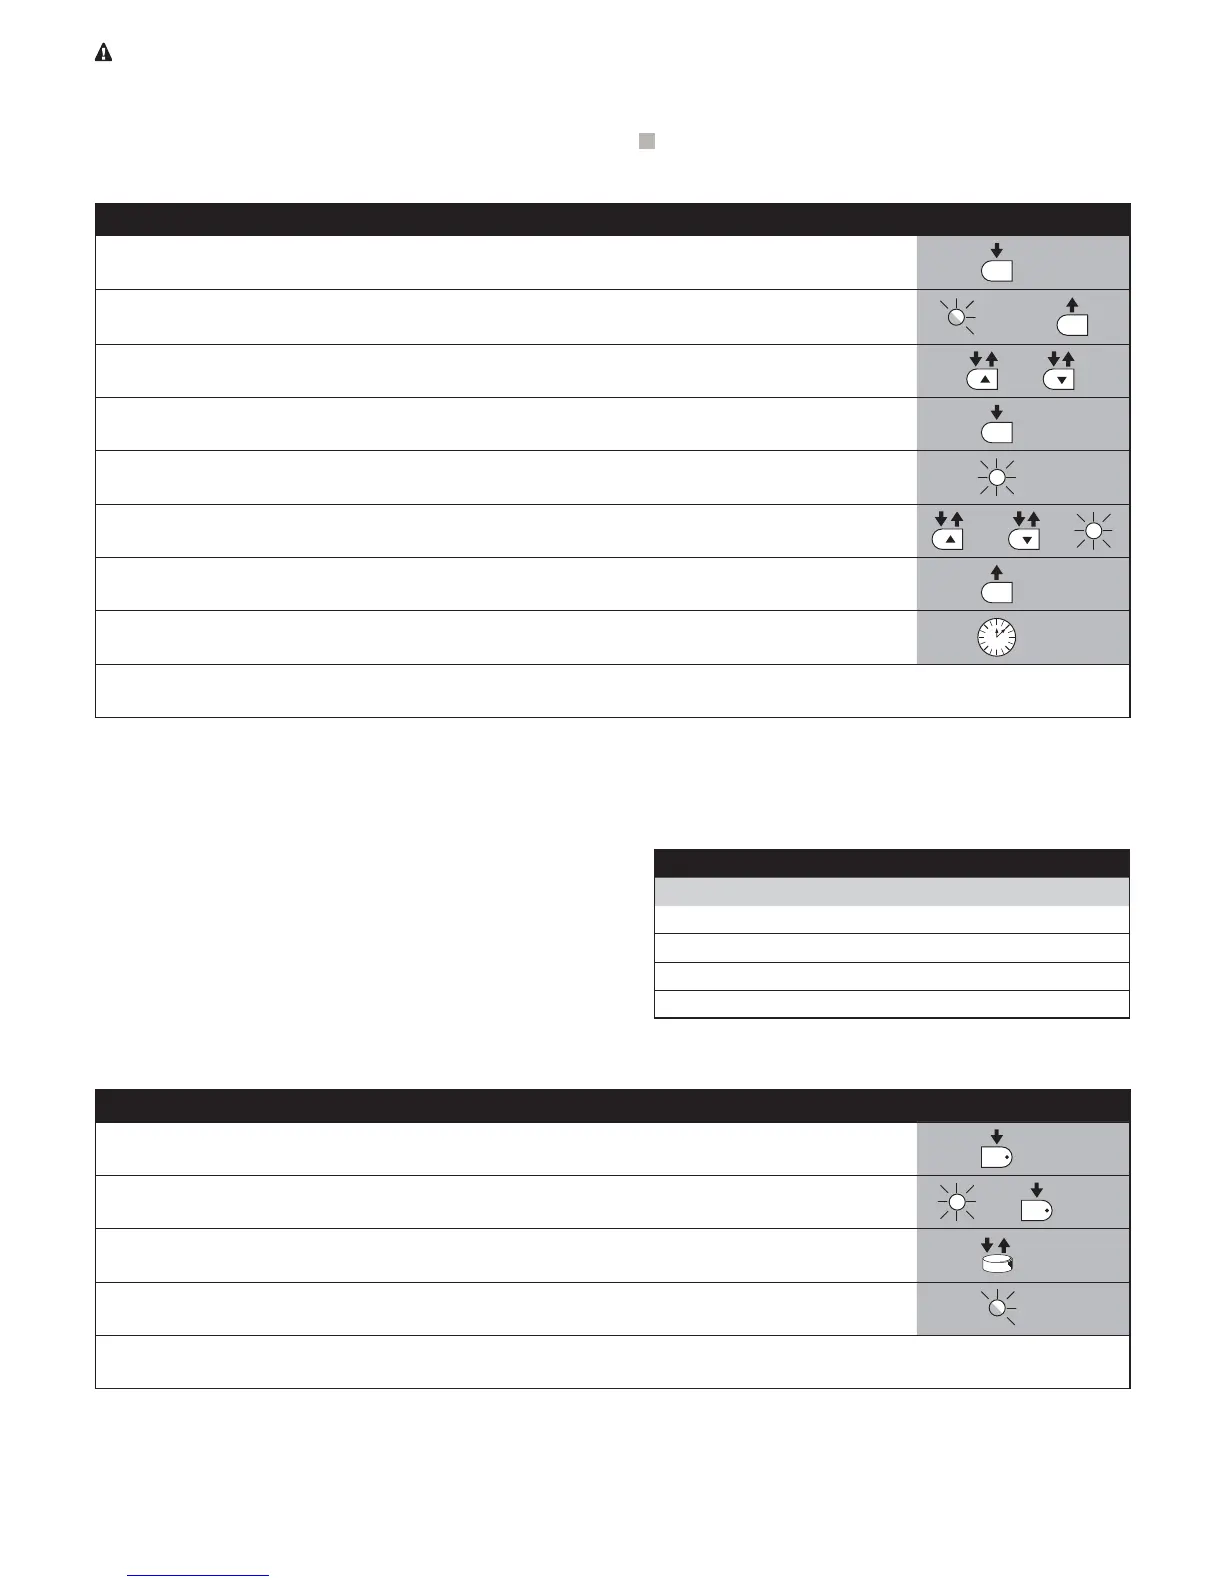
Table 13 - Procedure to memorize the key of a transmitter in mode 1
01. Press the key on the receiver and hold it down (approx. 3s)
3S
02. Release the key when the LED on the receiver lights up
03. Within 10s, press any key on the radio transmitter to be memorized and hold it down for at least 3s
3S
04. If the memorization procedure is successful, the LED on the receiver will flash 3 times.
X3
If there are other transmitters to be memorized, repeat step 3 within the next 10 s,
otherwise the memorization stage will terminate automatically.
 Loading...