Chapter 1 Assembly
6
Assembly
5
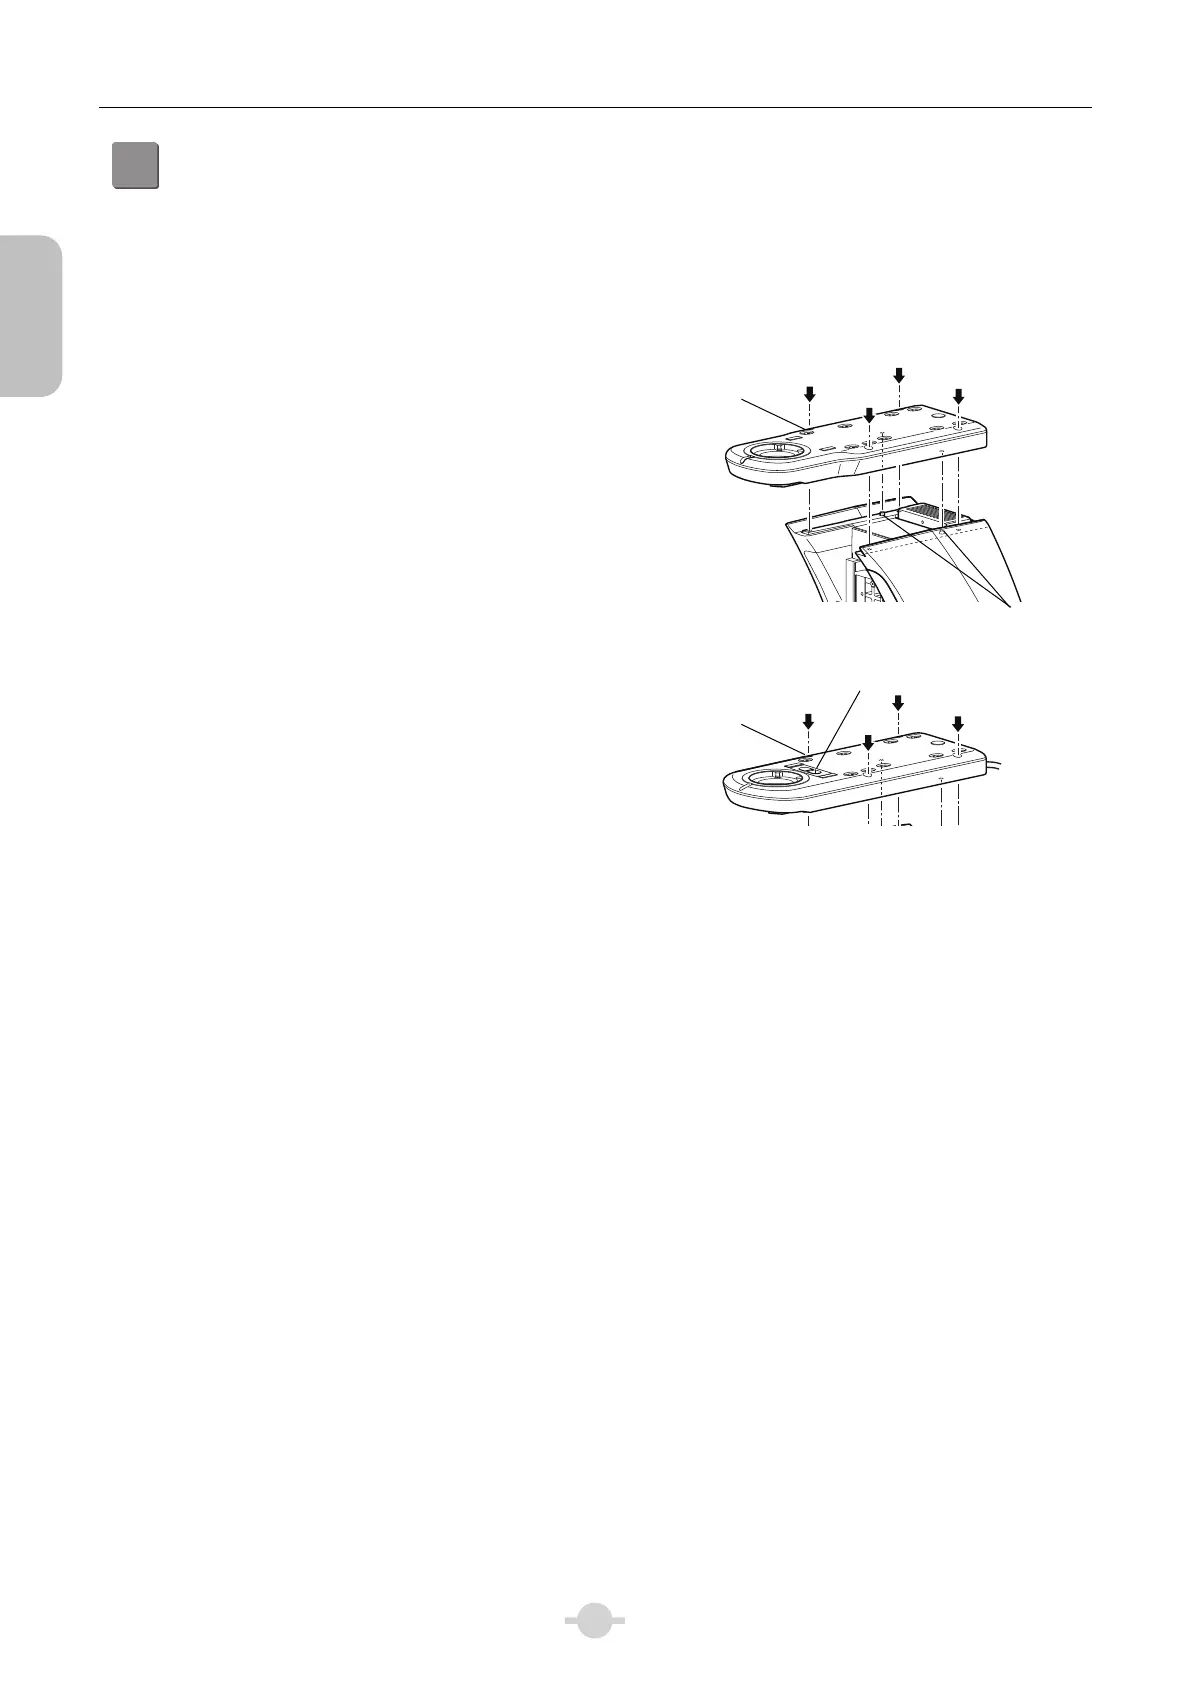
Attach the standard arm/contact arm.
The attachment procedure is the same for standard arm
and contact arm. To use the motorized accessories,
attach the contact arm. The contact arm has a contact.
When attaching a motorized device on the arm, remove
the contact cover beforehand.
Tool: Hex wrench (4 mm across flats)
(1) Place the arm while aligning it with the two
positioning pins on the main body and tighten the
four fixing screws.
(2) When using contact arm, connect the cable from the
CONTACT ARM1 connector to the CONTACT ARM1
connector on the control box B.
(3) Connect the cable from the CONTACT ARM2
connector to the CONTACT ARM2 connector on the
control box B.
(Standard arm)
(Contact arm)
Attaching the arm
rm fixing screw
Positioning pin
rm fixing screw
Contact cover

 Loading...