Chapter 1 Assembly
8
Assembly
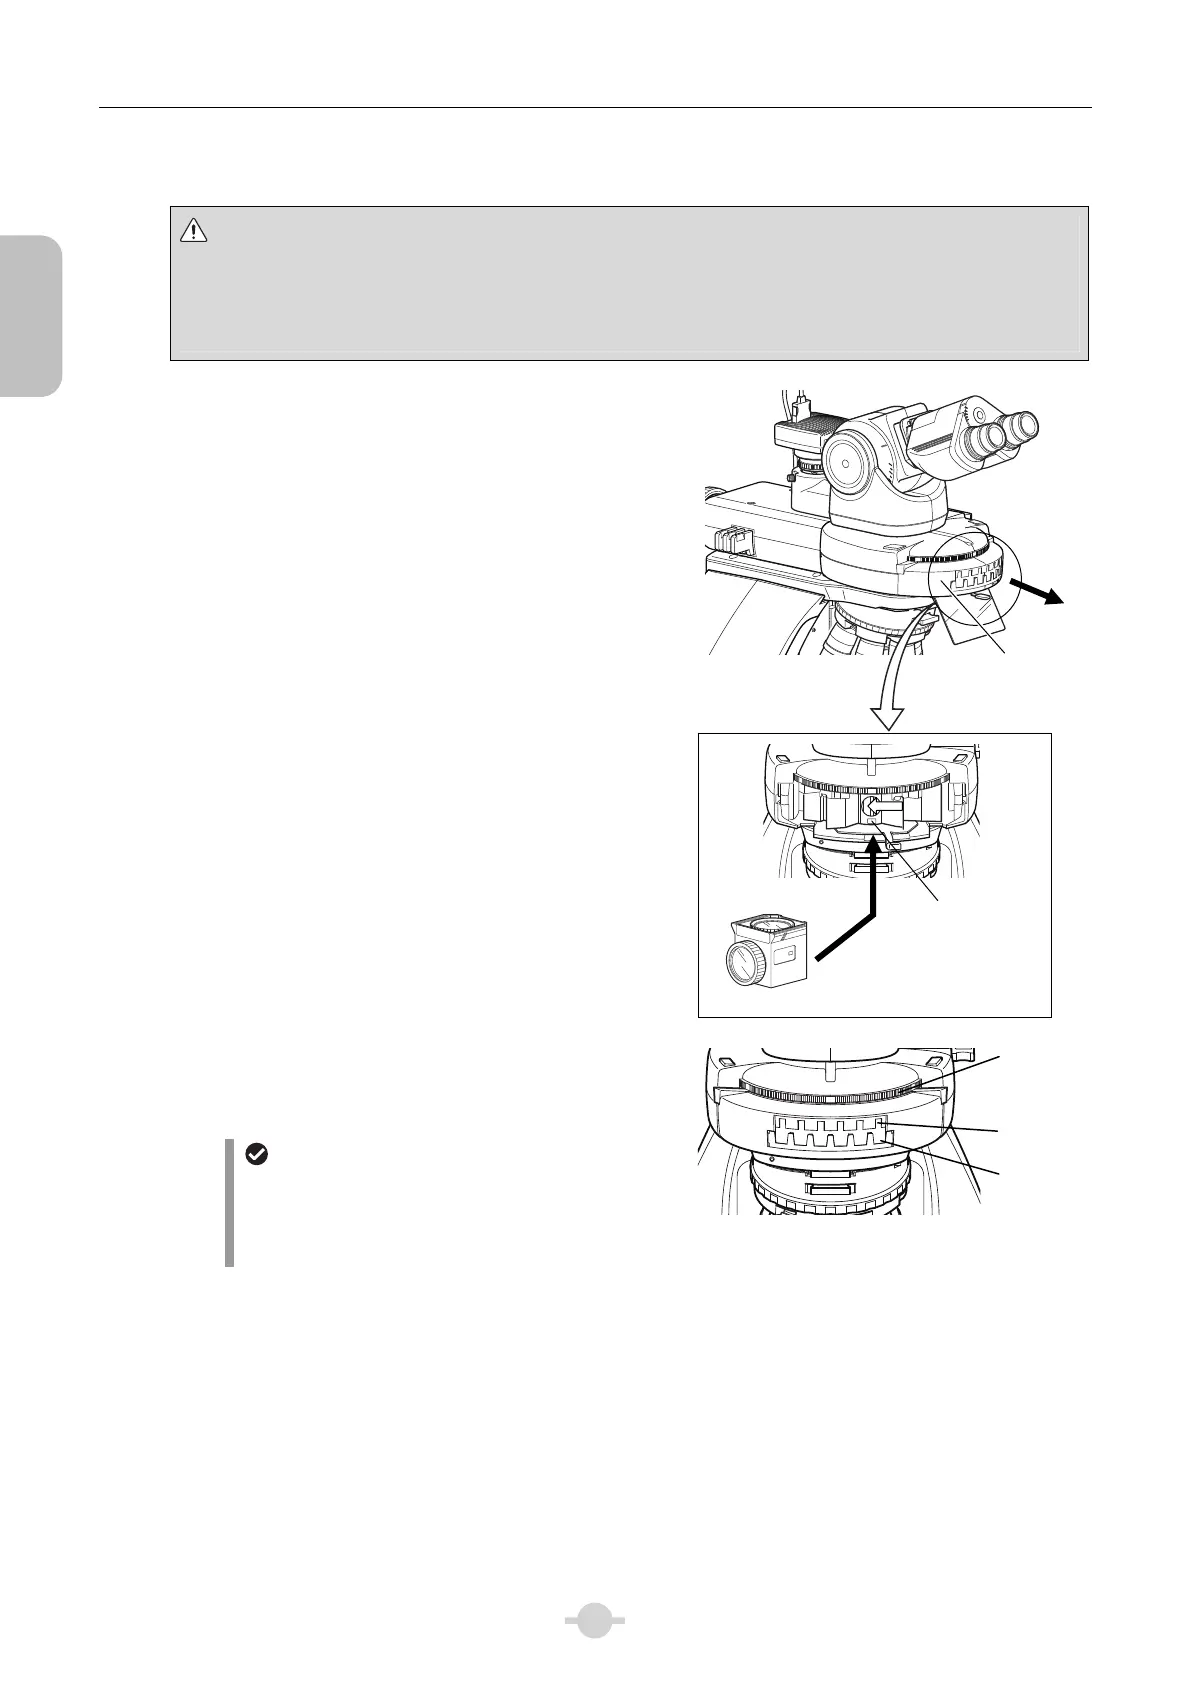
■ Attaching a filter cube
Precautions for attaching and removing the cube
• Be sure to check that the light source is turned off before attaching or removing the cube.
• Be sure to check that the power switch for microscope main body is turned off and then attach the cube by
rotating the cube switchover turret. Also for the motorized epi-fluorescence cube turret, attach it by manually
rotating the inside turret.
(1) Pull out the filter cube replacement cover on the
front of the epi-fluorescence cube turret to remove it.
(2) Attach the filter cube to the slot.
(3) Insert the filter cube nameplate into the slot cover
window.
Insert into the same address window as the address
shown inside the slot.
5
6
1
A
λ
6
1
5
4
3
2
1
ND4
ND8
ND16
A
1
2
3
5
UV-2A
EX 330-380
DM 400
BA 420
(4) Turn the cube switchover turret to attach the filter
cubes in the remaining slots and also insert the
nameplates.
For bright-field microscopy
For bright-field microscopy, be sure to make the
address 1 empty.
For motorized/intelligent epi-fluorescence cube
turret, only address 1 can be set to [OPEN].
(5) Restore the slot cover back to its original position.
A
λ
2
6
Attaching a filter cube
Filter cube
replacement
slot cover
Filter cube
ddress
indication
Nameplate
window
Cube
switchover
turret
ddress
indication

 Loading...