If space permits, you can
assemble the entire inlet line
by joining two sections of
tubing with a stop coupling
before dropping the
assembly into the access
hole. (Remember to only
glue the outside of the
tubing when joining two
pieces of PVC tubing.)
Oftentimes, tight attic
spaces require you to begin your drop and then join the
second section of tubing. Of course, the order of assembly,
and the length of tubing required, depend on your attic space
and your wall height.
Whatever the case, insert
the completed inlet line
into the access hole and
thread it down inside the
wall. The inlet line should
be long enough so that it
extends above the joists
in the attic; at this height, it
can be easily connected
to the branch and truck
lines. When cutting the
inlet tubing to length, remember that your inlet will be placed
18” (458 mm) above the floor.
For a basement installation,
assemble the tubing to
the inlet flexible tubing in
the same way and insert
it into the access hole. A
basement inlet line is
necessarily shorter because
it must only reach 18”
(458 mm) from the floor
to the inlet. Most of the
time, basement inlet lines
are more easily installed
by two people after the
inlet hole has been cut in
the interior wall. See
“Installing the Inlet.”
Complete all your inlet lines, and then proceed to your inlet
installations.
WALL INLET INSTALLATION
The wall inlet design allows you to work outside the wall—
where assembly is easy and all the parts you need are accessible.
First, you make a cutout into in the wall and locate the flexible
tubing attached to the inlet line which you previously threaded
into the wall. Then, you attach the flexible tubing to the inlet
mounting plate, assemble the other inlet parts, and make the
wiring connections. You place the inlet assembly into the wall
cutout, sandwiching the wall between the inner and outer
parts, and secure the inlet tightly to the wall with two screws.
Assemble and install the wall inlet as shown in the illustrations
and as explained in the next few pages. Be careful and
patient as you make your first cutout and install your first
inlet—following the procedure step by step—and the other
inlets will be easy to install in very little time.
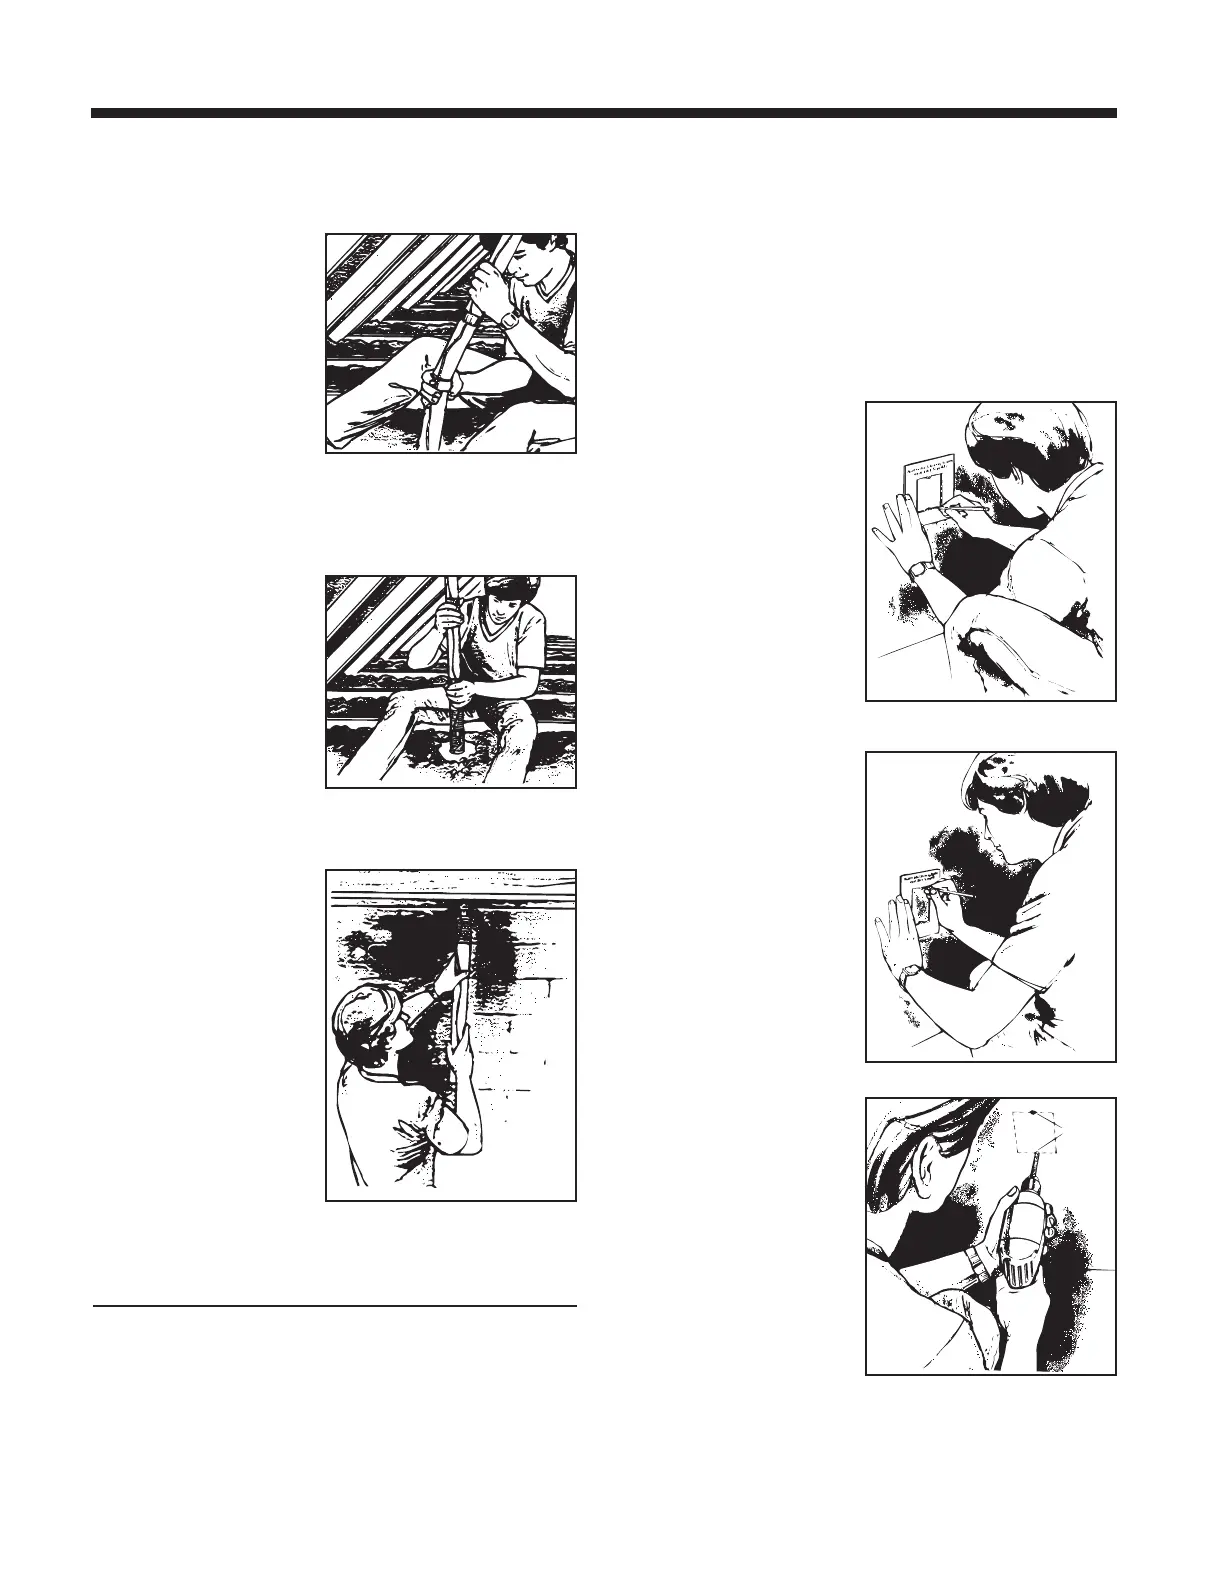
Making the Wall Inlet Cutout
The wall inlet should be
located 18” (458 mm)
on-center from the floor
and directly in line with
the attic or basement inlet
tubing hole you have
already drilled in the wall
plate or header. The wall
inlet cutout must be
exactly 3⅞” (98 mm) high
by 2⅞” (73 mm) wide. It is
crucial that you make an
accurate cutout, and we
have supplied a template
to help you.
Place the template
against the wall so that it
is 18” (458 mm) on-center
from the floor. Use a level
along the top edge of the
template to make sure it
is square to the wall.
Mark your wall for the
cutout by tracing around
the inside of the template.
Then use your pencil to
mark the screw hole
locations through punched
holes at the top and
bottom of the template.
Remove the template
from the wall.
Use an awl or ice pick to
punch pilot holes where
you marked the two hole
locations. Now, drill two
3/8” (10 mm) diameter
holes, using the pilot
holes as the centers.
Make sure to locate and
drill these holes exactly
as marked with the
template.
page 9
 Loading...