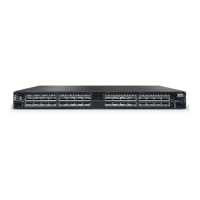
3.
4.
5.
While your installation partner is supporting the system’s weight, perform steps 3, 4 and 5:
On the rear side of the cabinet, install the two blades (B) in the selected rack unit, using four
M6 screws (C). Do not tighten the screws yet.
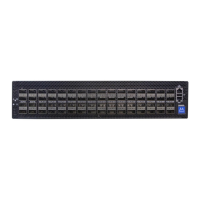
Attaching the Rails to the Rack
Slide the two blades into the left and right rails, and adjust them to fit your rack's depth. Use
four M6 screws (D) to fix the blades into the rack. Do not tighten the screws yet.
Sliding the Blades in the Rails
Secure the system in the rack by tightening the 8 screws inserted in Step 3 and Step 4 with a
torque of 4.5±0.5 Nm.
SN2100/SN2010 Side by Side Mounting Rail Kit
The installation process is demonstrated on an SN2100 system, but applies to the SN2010
series as well.
A designated rail kit for the SN2100/SN2010 systems can be purchased separately.
This section is relevant to short-depth systems that allow such a form of installation only.
 Loading...