9.
10.
•
•
•
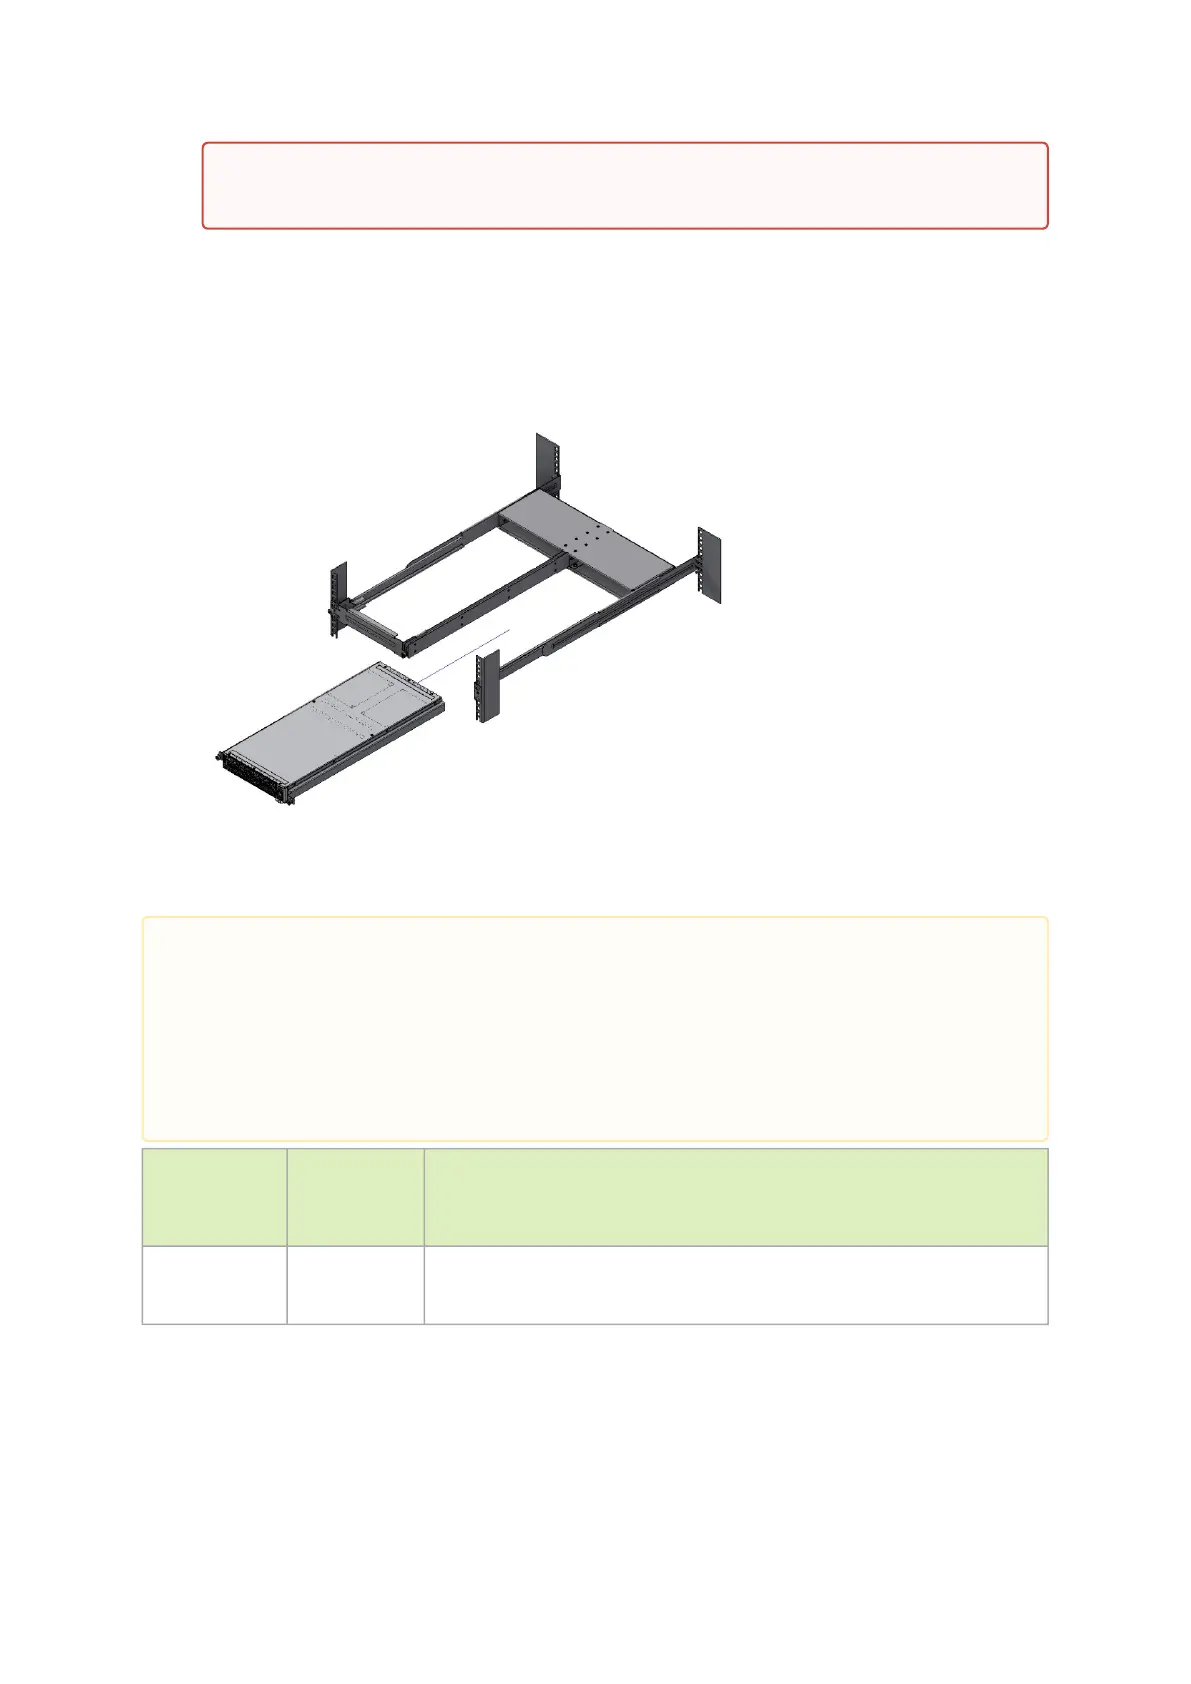
Remove the blank cover from the selected slot in the frame, and mount the system by sliding
its mounting blades into the frame. Repeat this step to install an additional system in the
other side of the frame, if needed.
Tighten the capture nuts to secure the system in the frame. The recommended torque on the
right screw is 3.0-3.36 Nm while on the left screw recommended torque is 0.89-0.98 Nm.
Sliding the System’s Blades in the Rails
SN2100/SN2010 Static Single Switch Rail Kit
Kit Part
Number
Kit Legacy
Part
Number
Rack Size and Rack Depth Range
930-9BRKT-00JI-
000
MTEF-KIT-E Rack installation static kit for SN2100/SN2010 systems short depth 1U half-
width switches, allows installation of a single switch into standard depth
racks.
The following parts are included in the rail kit (see figure below):
16 flat head 4-40 screws (A)
8 M6 spring steel cage nuts (B)
8 M6 pan head screws (C)
Do not remove both of the blank covers at the same time. When no system is
installed, at least one of them should be present to support the frame’s partition.
The installation process is demonstrated on an SN2100 system, but applies to the SN2010
series as well.
This rail kit is not included with the SN2100/SN2010 systems, and can be purchased
separately.
This section is relevant to short-depth systems that allow such form of installation only.
 Loading...