Using OLYMPUS Master
40
EN
Windows
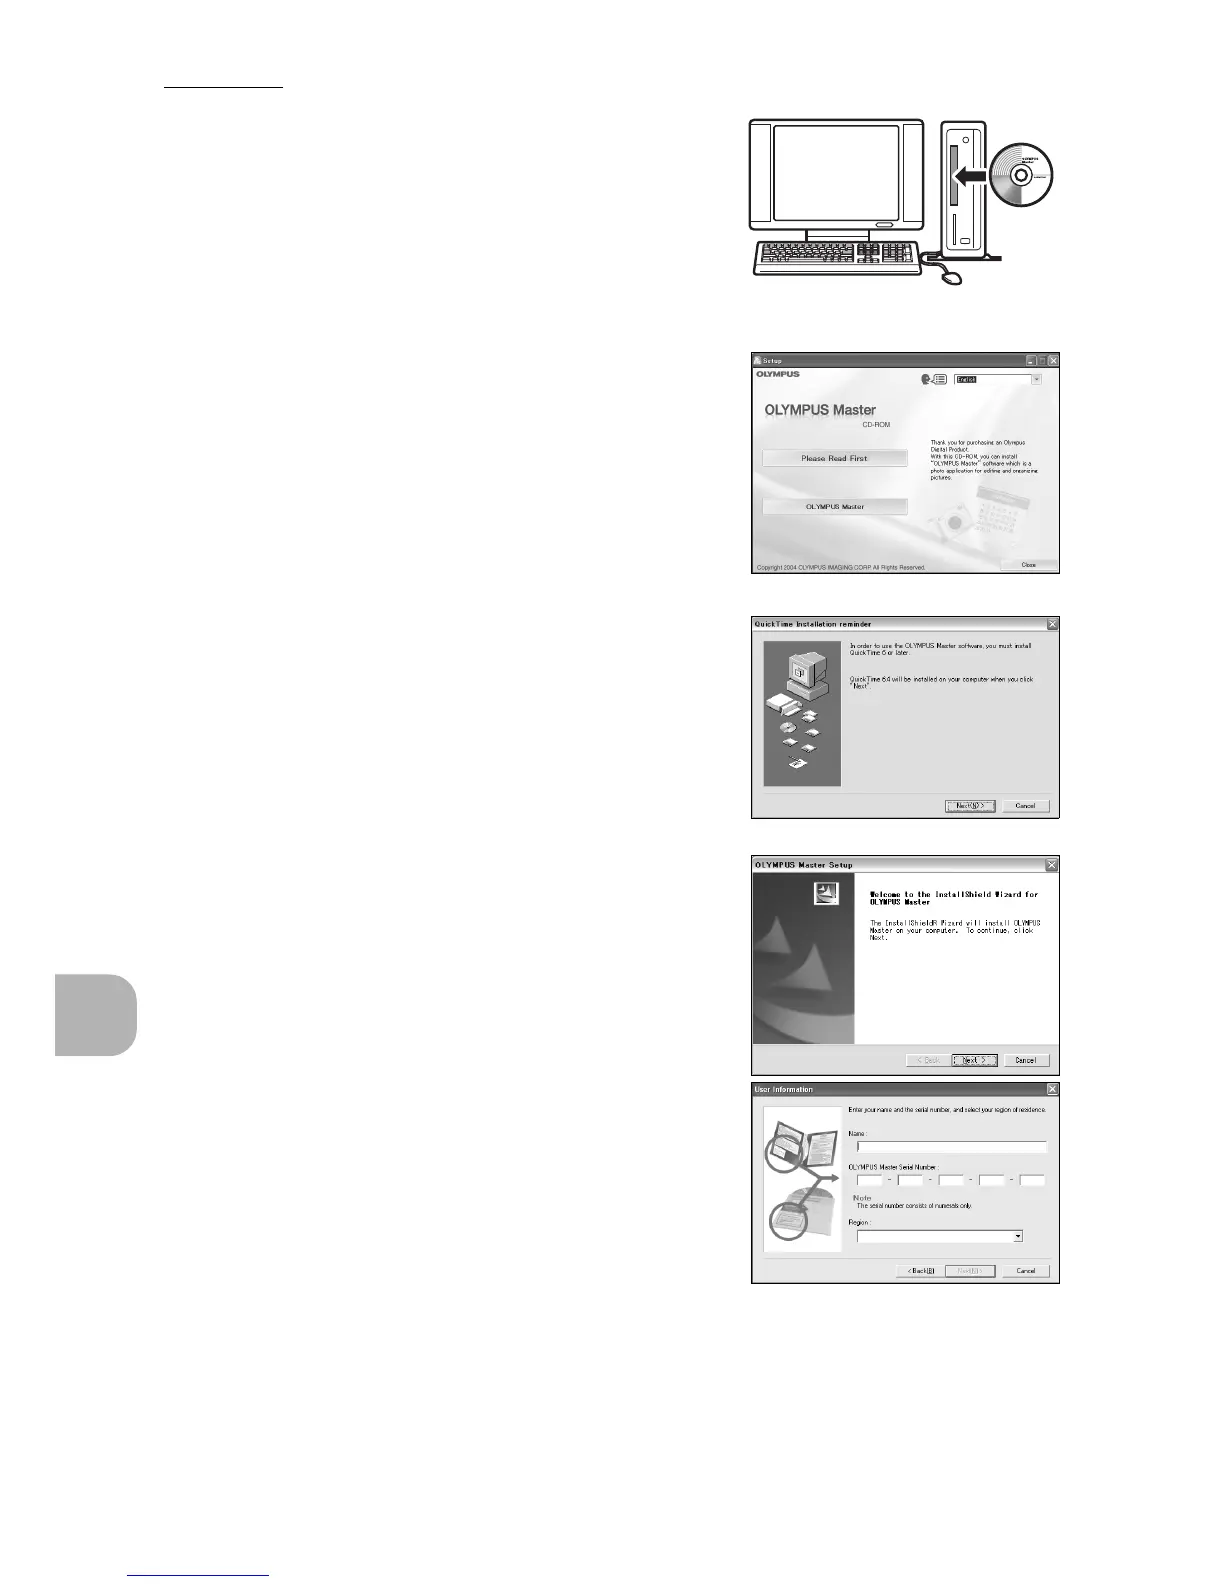
1 Insert the CD-ROM into the CD-ROM
drive.
• The OLYMPUS Master setup screen is
displayed.
• If the screen is not displayed, double-click
the “My Computer” icon and click the
CD-ROM icon.
2 Click “OLYMPUS Master”.
• The QuickTime installation screen is
displayed.
• QuickTime is required to use OLYMPUS
Master. If the QuickTime screen is not
displayed, QuickTime 6 or later is already
installed on the computer. In this case, go to
Step 4.
3 Click “Next” and follow the on-screen
instructions.
• When the QuickTime licensing agreement is
displayed, read the agreement and click
“Agree” to proceed with the installation.
• The OLYMPUS Master installation screen is
displayed.
4 Follow the on-screen instructions.
• When the OLYMPUS Master licensing
agreement is displayed, read the agreement
and click “Yes” to proceed with the
installation.
• When the “User Information” dialog box is
displayed, enter your “Name” and
“OLYMPUS Master Serial Number”; select
your region and click “Next”. Refer to the
sticker on the CD-ROM package for the
serial number.
• When the DirectX licensing agreement is
displayed, read the agreement and click
“Yes”.
• A screen asking whether or not you want to install Adobe Reader is
displayed. Adobe Reader is required to read the OLYMPUS Master
instruction manual. If this screen is not displayed, Adobe Reader is already
installed on your computer. To install Adobe Reader, click “OK”.
 Loading...