Home
Omron
Controller
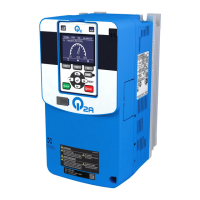
Q2A-A4005-AAA
Omron Q2A-A4005-AAA Technical Manual
4
of 1
of 1 rating
844 pages
Give review
Manual
Specs
To Next Page
To Next Page
To Previous Page
To Previous Page
Loading...
1
1.12
q:
Q2P
ACK
P
ARAMETERS
468
SIEPYEUOQ2A01A
AC
Drive
Q2A
T
echnical
Manual
1
1.12
q:
Q2P
ACK
P
ARAMETERS
◆
q1-01
to
q8-40:
Q2pack
Parameters
No.
(Hex.)
Name
Description
Default
(Range)
q1-01
to
q8-40:
(1600
to
17E7)
Reserved
for
Q2pack
These
parameters
are
reserved
for
use
with
Q2pack.
Refer
to
“
Q2pack
Operation
Manual
”
.
V/f
CL-V/f
OLV
CLV
AOLV
OLV/PM
OLV/PM
AOLV/PM
CLV/PM
EZOLV
467
469
Table of Contents
Default Chapter
3
Table of Contents
3
Preface and General Precautions
13
Safety Information
14
General Safety Precautions
14
I.1 Safety Information
14
Warning Label Content and Location
16
Legal Information
17
Warranty and Exclusion of Liability
17
About Registered Trademarks
17
I.2 Legal Information
17
1 Receiving
19
Model Number and Nameplate Check
20
Nameplate
20
How to Read Type Designations
20
Features and Advantages of Control Methods
23
2 Mechanical Installation
27
Safety Precautions
28
Installation Environment
31
Installation Position and Distance
32
Moving the Drive
34
Vertical Suspension
34
Horizontal Suspension
34
Remove and Reattach the Keypad
36
Remove the Keypad
36
Reattach the Keypad
36
Install the Keypad to a Control Panel or Another Device
37
Connect the Keypad from a Remote Location
37
Install Outside of Control Panel
37
Install Inside Control Panel
38
External Dimensions of Keypad
41
Removing/Reattaching Covers
42
Remove the Front Cover of Drive Models 4002 - 4168
42
Reattach the Front Cover of Drive Models 4002 - 4168
42
Remove the Front Cover of Drive Models 4208 - 4675
43
Reattach the Front Cover of Drive Models 4208 - 4675
44
Change the Drive Enclosure Type
46
Attach the Protective Cover of Drive Models 4002 - 4060
46
Attach the Protective Cover of Drive Models 4075
47
Attach the Protective Cover of Drive Models 4089 - 4103
49
Attach the Protective Cover of Drive Models 4140 - 4168
51
Attach the Protective Cover of Drive Models 4208 - 4296
54
Attach the Protective Cover of Drive Models 4371
56
Installation Methods
59
3 Electrical Installation
63
Safety Precautions
64
Standard Connection Diagram
67
Main Circuit Wiring
70
Motor and Main Circuit Connections
70
Configuration of Main Circuit Terminal Block
71
Main Circuit Terminal Functions
74
Wire Selection
75
Main Circuit Terminal and Motor Wiring
75
Main Circuit Terminal Block Wiring
80
Wiring the Main Circuit Terminal Block for Drive Models 4002 - 4168
80
Wiring the Main Circuit Terminal Block for Drive Models 4208 - 4675
83
Control Circuit Wiring
85
Control Circuit Connection Diagram
85
Control Circuit Terminal Block Functions
86
Control Circuit Terminal Configuration
89
Wiring the Control Circuit Terminal
89
Switches and Jumpers on the Terminal Board
92
Control I/O Connections
93
Pulse Train Output (Terminal PO)
93
Set Sinking Mode/Sourcing Mode
94
Set Input Signals for MFAI Terminals AI1 to AI3
94
Set MFAI Terminal AI3 to PTC Input
95
Set Output Signals for MFAO Terminals AO1, AO2
95
Switch on Termination Resistor for Modbus Communications
96
Connect the Drive to a PC
97
External Interlock
98
Braking Resistor Installation
99
Install a Braking Resistor: ERF-Type
99
Install a Braking Resistor Unit: LKEB-Type
99
Install a Braking Unit Connection: CDBR-Type
100
Connect Braking Units in Parallel
100
Dynamic Braking Option Overload Protection
101
Drive Wiring Protection
102
Dynamic Braking Option, Motor Protection
103
Improve the Power Factor
105
Connect an AC Reactor
105
Connect a DC Reactor
105
Prevent Switching Surge
106
Decrease Noise
107
Connect a Noise Filter to the Input Side (Primary Side)
107
Connect a Noise Filter to the Output Side (Secondary Side)
107
Protect the Drive During Failures
109
Branch Circuit Protection for 400 V Class (ND)
109
Branch Circuit Protection for 400 V Class (HD)
110
Wiring Checklist
111
Motor Application Precautions
113
Precautions for Existing Standard Motors
113
Precautions for PM Motors
114
Precautions for Specialized Motors
114
Notes on the Power Transmission Mechanism
115
4 Startup Procedure and Test Run
117
Safety Precautions
118
Component Names and Functions
119
Operator Display
121
Keypad Mode and Menu Displays
121
Start-Up Procedures
123
Flowchart A: Connect and Run the Motor with Minimum Setting Changes
123
Sub-Chart A-1: Induction Motor Auto-Tuning and Test Run Procedure
124
Sub-Chart A-2: PM Motor Auto-Tuning and Test Run Procedure
124
Sub-Chart A-3: EZ Open Loop Vector Control Test Run Procedure
126
Items to Check before Starting up the Drive
127
Check before Energizing the Drive
127
Check after Energizing the Drive
127
Keypad Operation
128
Use the HOME Screen
128
Show the Standard Monitor
129
Set Custom Monitors
129
Show Custom Monitors
130
Set the Monitors to Show as a Bar Graph
130
Show Monitors as Bar Graphs
131
Set the Monitors to Show as Analog Gauges
131
Display Monitors as an Analog Gauge
131
Set Monitoring Items to be Shown as a Trend Plot
132
Show Monitor Items as a Trend Plot
134
Change Parameter Settings
134
Examine Manual Setup Parameters
135
Save a Backup of Parameters
135
Write Backed-Up Parameters to the Drive
136
Verify Keypad Parameters and Drive Parameters
136
Delete Parameters Backed up to the Keypad
137
Check Modified Parameters
137
Restore Modified Parameters to Defaults
138
Show Fault History
138
Auto-Tuning the Drive
138
Set the Keypad Language Display
139
Set the Date and Time
140
Set Parameters Using the Q2 Wizard
140
Start Data Logging
141
Set Data to Log
141
Set Backlight to Automatically Turn off
142
Show Information about the Drive
143
Write Automatically Backed-Up Parameters to the Drive
143
Auto-Tuning
144
Auto-Tuning for Induction Motors
144
Auto-Tuning for PM Motors
145
EZ Tuning
147
Control Tuning
148
Precautions before Auto-Tuning
149
Test Run
153
No-Load Test Run
153
Do a No-Load Test Run
153
Actual-Load Test Run
153
Do an Actual-Load Test Run
154
Fine Tuning During Test Runs (Adjust the Control Function)
155
V/F Control and Closed Loop V/F Control
155
Open Loop Vector Control Method
155
Closed Loop Vector Control Method
157
Advanced Open Loop Vector Control Method
157
Fine-Tuning Open Loop Vector Control for PM Motors
158
Advanced Open Loop Vector Control Method for PM
159
Closed Loop Vector Control Method for PM
159
EZ Open Loop Vector Control Method
159
Test Run Checklist
161
5 Standards Compliance
163
Safety Precautions
164
European Standards
166
EU Declaration of Conformity
167
CE Low Voltage Directive Compliance
172
EMC Directive
181
UL Standards
190
Area of Use
190
Wire the Main Circuit Terminal Block
190
Low Voltage Wiring for Control Circuit Terminals
200
Drive Motor Overload and Overheat Protection
201
China Rohs Compliance
207
对应中国Rohs指令
208
Safe Disable Input
209
Safe Disable Specifications
209
Safety Precautions
209
Using the Safe Disable Function
210
6 Network Communications
213
Field Bus Network Support
214
Modbus Communications
215
Configure Master/Slave
215
Communication Specifications
215
Communication with the PLC
215
Modbus Drive Operations
217
Communications Timing
217
Message Format
218
Examples of Messages for Commands/Responses
220
Enter Command
224
Self-Diagnostics
224
Communications Data Table
225
Error Codes
245
7 Troubleshooting
247
Safety Precautions
248
Types of Faults, Minor Faults, Alarms, and Errors
250
List of Fault, Minor Fault, Alarm, and Error Codes
251
Faults
254
Minor Faults/Alarms
273
Parameter Setting Errors
284
Auto-Tuning Errors
289
Backup Function Operating Mode Display and Errors
293
Diagnosing and Resetting Faults
294
Fault and Power Loss Occur at the same Time
294
Fault Occurs Without Power Loss
294
Fault Reset
294
Troubleshooting Without Fault Display
295
The Parameter Settings will Not Change
295
The Motor Does Not Rotate after Entering Run Command
295
The Motor Rotates in the Opposite Direction from the Run Command
296
The Motor Rotates in Only One Direction
296
The Motor Is too Hot
296
The Correct Auto-Tuning Mode Is Not Available
297
The Motor Stalls During Acceleration or Accel/Decel Time Is too Long
297
Command
298
The Motor Speed Is Not Stable When Using a PM Motor
298
There Is too Much Motor Oscillation and the Rotation Is Irregular
298
Deceleration Takes Longer than Expected When Dynamic Braking Is Enabled
299
The Load Falls When a Brake Is Applied
299
Energized
299
Residual Current Monitoring/Detection (RCM/RCD) Trips During Run
299
Motor Rotation Causes Unexpected Audible Noise from Connected Machinery
300
Motor Rotation Causes Oscillation or Hunting
300
PID Output Fault
300
The Starting Torque Is Not Sufficient
300
The Motor Rotates after the Drive Output Is Shut off
300
The Output Frequency Is Lower than the Frequency Reference
301
The Motor Is Making an Audible Noise
301
The Motor will Not Restart after a Loss of Power
301
8 Periodic Inspection and Maintenance
303
Safety Precautions
304
Inspection
306
Recommended Daily Inspection
306
Recommended Periodic Inspection
306
Maintenance
309
Replace a Cooling Fan and Circulation Fan
311
Replace a Fan (Models 4007 to 4012)
311
Replace a Fan (Models 4018, 4023)
312
Replace a Fan (Models 4031, 4038)
315
Replace a Fan (Models 4044 to 4075)
317
Replace a Fan (Models 4089 to 4296)
319
Replace Fans (Models 4371, 4389)
322
Replace Fans (Models 4453 to 4675)
328
Replace the Drive
336
About the Control Circuit Terminal Block
336
Notes on Wiring the Main Circuit Terminal Block
336
Remove the Control Circuit Terminal Block
338
Wire a New Drive
338
Connect the Control Circuit Terminal Block
340
Replace the Keypad Battery
342
Storage Guidelines
343
9 Disposal
345
Safety Precautions
346
Disposal Instructions
347
10 Specifications
349
Drive Duty Modes
350
Model Specifications (400 V Class)
351
Drive Specifications
357
Drive Derating
360
Carrier Frequency Settings and Rated Current Values
360
Open Loop Vector Control Method
361
Altitude Derating
363
Drive Watt Loss
364
Drive Exterior and Mounting Dimensions
367
Open Chassis Type (IP20)
367
Enclosed Wall-Mounted Type (UL Type 1)
376
Knock-Out Hole Dimensions (UL Type 1)
384
4002 To 4023
384
4208 To 4296
387
Peripheral Devices and Options
388
11 Parameter List
393
How to Read the Parameter List
394
A: Initialization
395
A1: Initialization
395
A2: Manual Selection
396
B: APPLICATION
397
B1: OPERATION MODE SELECT
397
B2: DC INJ / SHORT CKT BRAKE
398
B3: SPEED SEARCH
399
B4: TIMER
400
B5: PID CONTROL
401
B6: DWELL FUNCTION
404
B7: DROOP CONTROL
404
B8: ENERGY SAVING
404
B9: ZERO SERVO
405
C: Tuning
406
C1: Accel / Decel
406
C2: Jerk Control
406
C3: Slip Compensation
407
C4: Torque Compensation
408
C5: Asr - Speed Regulation
408
C6: Duty and Carrier
410
D: REFERENCE
411
D1: FREQUENCY REFERENCE
411
D2: REFERENCE LIMITS
412
D3: JUMP FREQUENCY
412
D4: FREQUENCY UP/DOWN
413
D5: TORQUE CONTROL
413
D6: FIELD WEAKENING / FORCING
414
D7: OFFSET FREQUENCY
414
E: Motor
415
E1: V/F Parameter Motor 1
415
E2: Motor 1 Parameters
416
E3: V/F Parameter Motor 2
416
E4: Motor 2 Parameters
417
E5: Pm Motor Settings
417
E9: Simple Vector Settings
418
F: Options
419
F1: Encoder
419
F2: Analog Input
421
F3: Digital Input
421
F4: Analog Output
422
F5: Digital Output
423
F6: Communications
423
F7: Ethernet
427
H: Terminals
430
H1: Digital Inputs
430
H2: Digital Outputs
435
H3: Analog Inputs
441
H4: Analog Outputs
443
H5: Modbus Ports
444
H6: Pulse Input Output
445
H7: Virtual Input Output
446
L: Protection
448
L1: Motor Protection
448
L2: Power Loss Ride through
448
L3: Stall Prevention
450
L4: Speed Detection
451
L5: Fault Restart
452
L6: Torque Detection
452
L7: Torque Limit
454
L8: Drive Protection
454
L9: Drive Protection 2
456
11.10 N: SPECIAL
457
N1: HUNTING PREVENTION
457
N2: AFR - AUTO FREQ REGULATION
457
N3: HIGHSLIP/OVEREXCITATION BRAKE
458
N4: ADV. OPEN LOOP VECTOR TUNING
458
N5: FEED FORWARD CONTROL
459
N6: ONLINE TUNING
459
N7: SIMPLE VECTOR TUNING
460
N8: PM MOTOR CONTROL TUNING
460
11.11 O: KEYPAD
463
O1: KEYPAD DISPLAY
463
O2: KEYPAD OPERATION
464
O3: COPY FUNCTION
465
O4: MAINTENANCE MONITORS
466
O5: DATA LOGGER
467
11.12 Q: Q2PACK PARAMETERS
468
Q1-01 to Q8-40: Q2Pack Parameters
468
11.13 R: Q2PACK JOINTS
469
R1: Q2PACK JOINTS
469
11.14 T: Autotuning
470
T0: Tune Mode
470
T1: Induction Motor
470
T2: Pm Motor
471
T3: Asr
472
T4: Simple Vector
472
11.15 U: Monitors
473
U1: Status
473
U2: Fault
475
U3: Fault History
476
U4: Maintenance
477
U5: Pid
480
U6: Advanced
480
U8: Q2Pack Monitors
482
11.16 A1-02 [Control Method] Dependent Parameters
483
11.17 E1-03 [V/F Pattern Selection] Dependent Parameters
486
E3-01 [M2 Control Method Selection] Dependent Parameters
488
11.19 Defaults by Drive Model and Duty Rating ND/HD
489
Class
489
11.20 Parameters Changed by PM Motor Code Selection
496
Yaskawa SSR1 Series IPM Motors (Derated Torque)
496
Yaskawa SST4 Series IPM Motors (Constant Torque)
501
12 Parameter Details
507
A: Initialization
508
A1: Initialization
508
A2: Manual Selection
513
B: APPLICATION
515
B1: OPERATION MODE SELECT
515
B2: DC INJ / SHORT CKT BRAKE
527
B3: SPEED SEARCH
530
B4: TIMER
538
B5: PID CONTROL
539
B6: DWELL FUNCTION
555
B7: DROOP CONTROL
556
B8: ENERGY SAVING
557
B9: ZERO SERVO
562
C: Tuning
564
C1: Accel / Decel
564
C2: Jerk Control
569
C3: Slip Compensation
570
C4: Torque Compensation
574
C5: Asr - Speed Regulation
576
C6: Duty and Carrier
584
D: REFERENCE
588
D1: FREQUENCY REFERENCE
588
D2: REFERENCE LIMITS
594
D3: JUMP FREQUENCY
594
D4: FREQUENCY UP/DOWN
596
D5: TORQUE CONTROL
602
D6: FIELD WEAKENING / FORCING
606
D7: OFFSET FREQUENCY
607
E: Motor
609
E1: V/F Parameter Motor 1
609
E2: Motor 1 Parameters
616
E3: V/F Parameter Motor 2
619
E4: Motor 2 Parameters
621
E5: Pm Motor Settings
623
E9: Simple Vector Settings
626
F: Options
629
F1: Encoder
629
F2: Analog Input
636
F3: Digital Input
637
F4: Analog Output
641
F5: Digital Output
643
F6: Communications, F7: Ethernet
646
H: Terminals
666
H1: Digital Inputs
666
Multi-Function Digital Input Setting Values
669
H2: Digital Outputs
688
Multi-Function Digital Output Setting Value
697
H3: Analog Inputs
711
Multi-Function Analog Input Setting Values
717
H4: Analog Outputs
723
H5: Modbus Ports
726
H6: Pulse Input Output
730
H7: Virtual Input Output
733
L: Protection
737
L1: Motor Protection
737
L2: Power Loss Ride through
743
L3: Stall Prevention
753
L4: Speed Detection
762
L5: Fault Restart
764
L6: Torque Detection
766
L7: Torque Limit
771
L8: Drive Protection
774
L9: Drive Protection 2
782
N: SPECIAL
783
N1: HUNTING PREVENTION
783
N2: AFR - AUTO FREQ REGULATION
785
N3: HIGHSLIP/OVEREXCITATION BRAKE
786
N4: ADV. OPEN LOOP VECTOR TUNING
789
N5: FEED FORWARD CONTROL
792
N6: ONLINE TUNING
795
N7: SIMPLE VECTOR TUNING
795
N8: PM MOTOR CONTROL TUNING
797
12.10 O: KEYPAD
804
O1: KEYPAD DISPLAY
804
O2: KEYPAD OPERATION
810
O3: COPY FUNCTION
814
O4: MAINTENANCE MONITORS
815
O5: DATA LOGGER
818
12.11 T: Autotuning
824
T0: Tune Mode
824
T1: Induction Motor
824
T2: Pm Motor
827
T3: Asr
829
T4: Simple Vector
830
13 Glossary
833
Index
834
Revision History
842
Other manuals for Omron Q2A-A4005-AAA
Manual
26 pages
4
Based on 1 rating
Ask a question
Give review
Questions and Answers:
Need help?
Do you have a question about the Omron Q2A-A4005-AAA and is the answer not in the manual?
Ask a question
Omron Q2A-A4005-AAA Specifications
General
Brand
Omron
Model
Q2A-A4005-AAA
Category
Controller
Language
English
Related product manuals
Omron Q2A-A4004-AAA
26 pages
Omron Q2A-A4007-AAA
26 pages
Omron Q2A-A4023-AAA
26 pages
Omron Q2A-A4018-AAA
26 pages
Omron Q2A-A4031-AAA
26 pages
Omron Q2A-A4038-AAA
26 pages
Omron Q2A Series
26 pages
Omron CQM1
312 pages
Omron CP1E PLC
4 pages
Omron NX-SL5500
626 pages
Omron G9SP Series
53 pages
Omron R88D-KN series
570 pages
 Loading...