18
Powering Up and Setting the Clock—Continued
If you cannot set the clock by using the ACCUCLOCK
function, you can set it manually. In this case, the
ACCUCLOCK function will not automatically cali-
brate the clock each day.
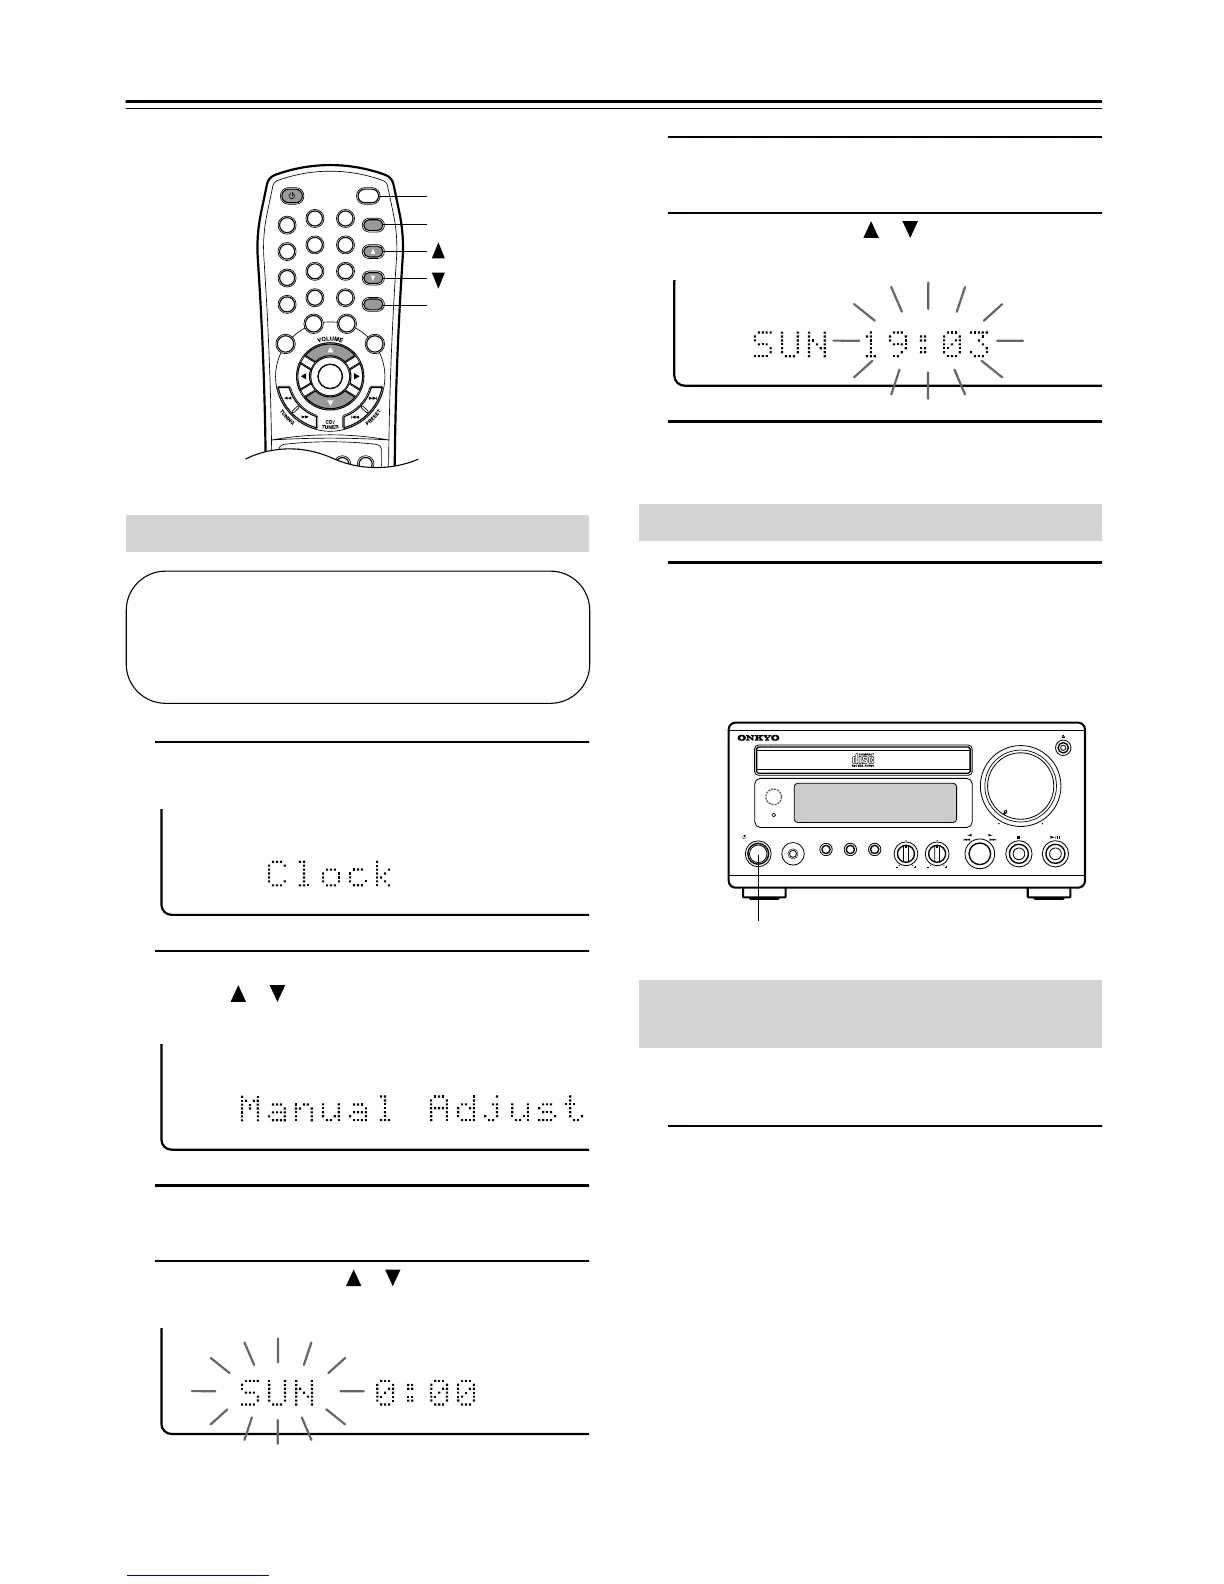
1
Press the [TIMER] button repeatedly until
“Clock” appears.
2
Press the [ENTER] button and use the Up/
Down [ ]/[ ] buttons to select “Manual
Adjust.”
3
Press the [ENTER] button.
The day of the week flashes.
4
Use the Up/Down [ ]/[ ] buttons to select
a day.
5
Press the [ENTER] button.
The time flashes.
6
Use the Up/Down [ ]/[ ] buttons to set
the time.
7
Press the [ENTER] button to set the clock.
“Adjusted” appears on the display.
1
Press the [CLOCK CALL] button.
The date and time appear on the display.
Press the [CLOCK CALL] button again to return to the
previous display.
You can set the CR-505DAB so that the time is displayed
while the CR-505DAB is in Standby mode.
1
With the CR-505DAB turned on, press and
hold the CR-505DAB’s [STANDBY/ON] but-
ton for more than 2 seconds.
To turn off the time display, repeat this procedure.
Note:
Setting the CR-505DAB to display the time will slightly
increase the power consumption in Standby mode.
Setting the Clock Manually
AMFMDAB
DIRECT
CD
 Loading...