EasyManua.ls Logo

Panasonic lumix DMC-LX10 User Manual

Panasonic lumix DMC-LX10
308 pages
To Next Page IconTo Next Page
To Previous Page IconTo Previous Page
Page #55 background image
55
SQW0740
Recording mode
Taking pictures with automatic settings (Intelligent Auto Mode)
Recording images by changing the brightness (exposure) or
colour tone
Recording mode:
Setting brightness (exposure)
1
Press to display the setting screen
Each press of [Fn1] switches between defocus control operation (→56) and operation finish.
2
Rotate the rear dial to adjust brightness (exposure)
Press in the brightness setting screen to set the exposure
bracket. (→131)
OFF
Setting colouring
1
Press to display the setting screen
2
Rotate the rear dial to adjust colour
Press [MENU/SET] to return to the recording screen.
With touch screen operations
Touch [ ]
Touch the item you want to set
[ ]: Colouring
[ ]: Brightness (exposure)
Drag the slide bar to set
Press [MENU/SET] to return to the recording screen.
The colour setting will return to the default level (centre point) when this unit is turned off or the
camera is switched to another Recording mode.

Table of Contents

Other manuals for Panasonic lumix DMC-LX10

Question and Answer IconNeed help?

Do you have a question about the Panasonic lumix DMC-LX10 and is the answer not in the manual?
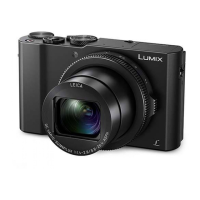
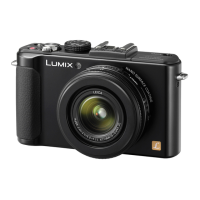
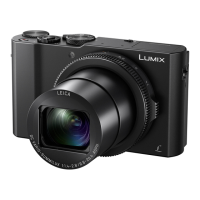
Panasonic lumix DMC-LX10 Specifications

General IconGeneral
Megapixels20.1 MP
LensLEICA DC VARIO-SUMMILUX
Optical Zoom3x
ISO Range125-12800 (expandable to 80-25600)
Image Stabilization5-axis Hybrid O.I.S.
Built-in FlashYes
ConnectivityWi-Fi
Sensor1.0" MOS Sensor
Shutter Speed60-1/4000 sec
Display3.0-inch LCD (1, 040K dots), touchscreen
Video Resolution4K UHD (3840 x 2160) at 30p/24p
Battery LifeApprox. 260 shots
Weight310 g (10.9 oz)
Dimensions105.5 x 60.0 x 42.0 mm

Summary

Before Use

Setting the menu

Calling frequently-used menus instantly (Quick Menu)

Assigning frequently used functions to the buttons (Function buttons)

Taking pictures with automatic settings (Intelligent Auto Mode)

Taking pictures by setting the aperture value (Aperture-Priority AE Mode)

Recording panorama pictures (Panorama Shot Mode)

Taking Pictures with different picture effects (Creative Control Mode)

Registering your own settings and recording (Custom Mode)

Taking pictures with Auto Focus

Taking front-on pictures of people (Face/Eye Detection)

Taking pictures by locking the focus and/or exposure (AF/AE Lock)

Setting the ISO Sensitivity

Adjusting the White Balance

Recording 4K Photos

Selecting pictures from 4K burst file and saving

Adjusting the focus after recording ([Post Focus]/[Focus Stacking])

Selecting a Drive Mode

Creating stop motion animation [Stop Motion Animation]

Correcting jitter

Taking pictures with flash

Setting the Flash Functions

Recording Motion Picture/4K Motion Picture

Deleting pictures

[Rec]

Sensitivity

Guides on setting ISO sensitivity for controlling light exposure and noise.

[Motion Picture]

High Speed Video

Instructions for recording high-speed video to create slow-motion playback effects.

Continuous AF

Explains how to manage focus during video recording.

[Custom]

Q.MENU

Allows customization of the Quick Menu settings.

[Setup]

Wi-Fi

Contains settings for Wi-Fi connectivity and setup.

Reset

Resets various camera settings to their default values.

[Playback]

RAW Processing

Guides on developing and editing RAW image files directly on the camera.

Wi-Fi

Connecting to a smartphone

Connecting directly ([Direct])

Storing recorded still pictures and motion pictures on your PC

Printing

Q&A Troubleshooting

Related product manuals