47
VL-SVN511BX/VL-SVN511CX/VL-SVN511CX1
10.1.3. When replacing BBIC and X'tal
Preparation:
1. PC setting refer to “Things to do after replacing IC (P.46).
2. Supply AC 230V to Power supply unit (PS241).
Note:
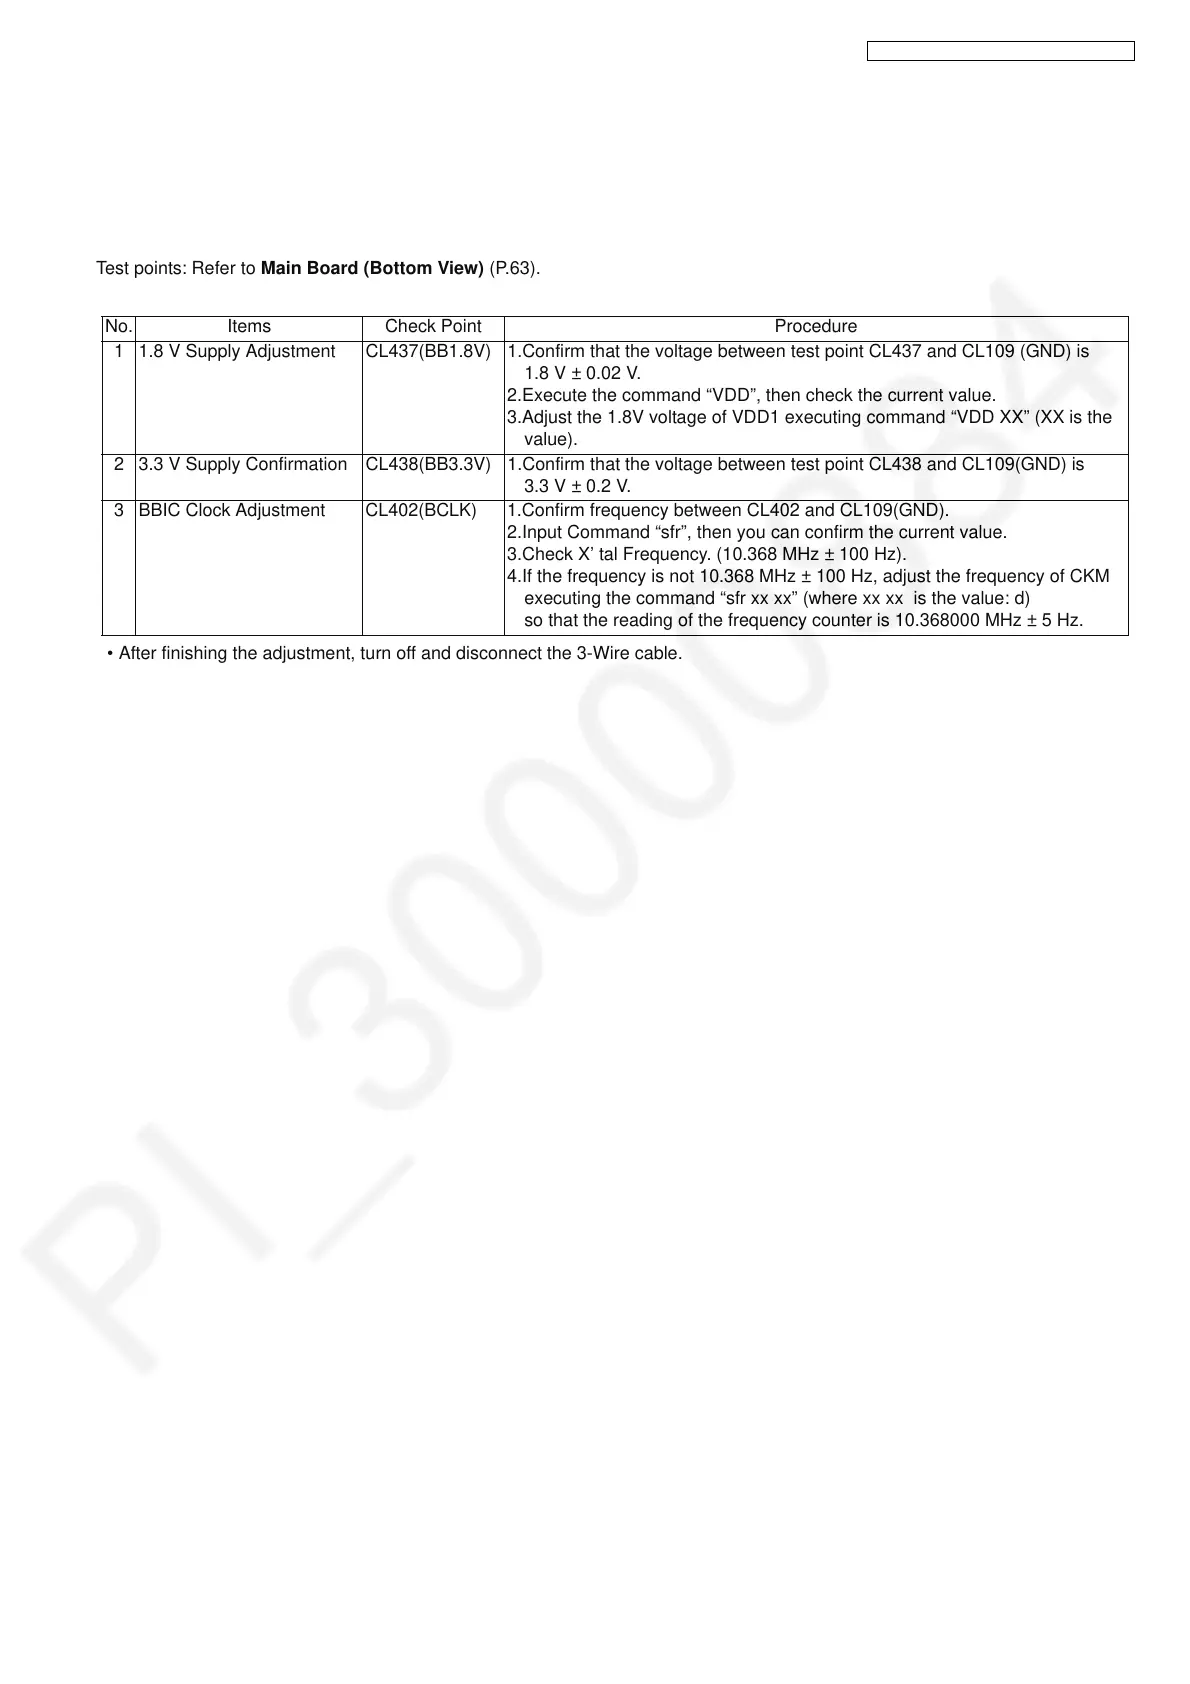
Test points: Refer to Main Board (Bottom View) (P.63).
• After finishing the adjustment, turn off and disconnect the 3-Wire cable.
No. Items Check Point Procedure
1 1.8 V Supply Adjustment CL437(BB1.8V) 1.Confirm that the voltage between test point CL437 and CL109 (GND) is
1.8 V ± 0.02 V.
2.Execute the command “VDD”, then check the current value.
3.Adjust the 1.8V voltage of VDD1 executing command “VDD XX” (XX is the
value).
2 3.3 V Supply Confirmation CL438(BB3.3V) 1.Confirm that the voltage between test point CL438 and CL109(GND) is
3.3 V ± 0.2 V.
3 BBIC Clock Adjustment CL402(BCLK) 1.Confirm frequency between CL402 and CL109(GND).
2.Input Command “sfr”, then you can confirm the current value.
3.Check X’ tal Frequency. (10.368 MHz ± 100 Hz).
4.If the frequency is not 10.368 MHz ± 100 Hz, adjust the frequency of CKM
executing the command “sfr xx xx” (where xx xx is the value: d)
so that the reading of the frequency counter is 10.368000 MHz ± 5 Hz.
 Loading...