47
6.2. Use Web server to manage printer
You can use the embedded Web server to manage printer.
1. Check basic printer information, including product name, printer status, and laser toner cartridge
status.
2. Set up the network protocol parameters supported by printer.
3. The wireless network connection of the printer can be configured, and the wireless network can
be turned on/off.
4. Set up mail server client and acquire printer state via E-mail notification.
5. It supports to configure e-mail address and FTP address to scan the file to be scanned directly to
E-mail box or FTP server.
6.2.1. IP address setup
You need to connect your printer to network before IP address setup.
1. In case of wired network model, connect the printer to wired network by connecting to its network
interface with network cable.
2. In case of wireless network model, the printer can be connected to wireless network via wireless
network setup tools (please refer to Section 5.1).
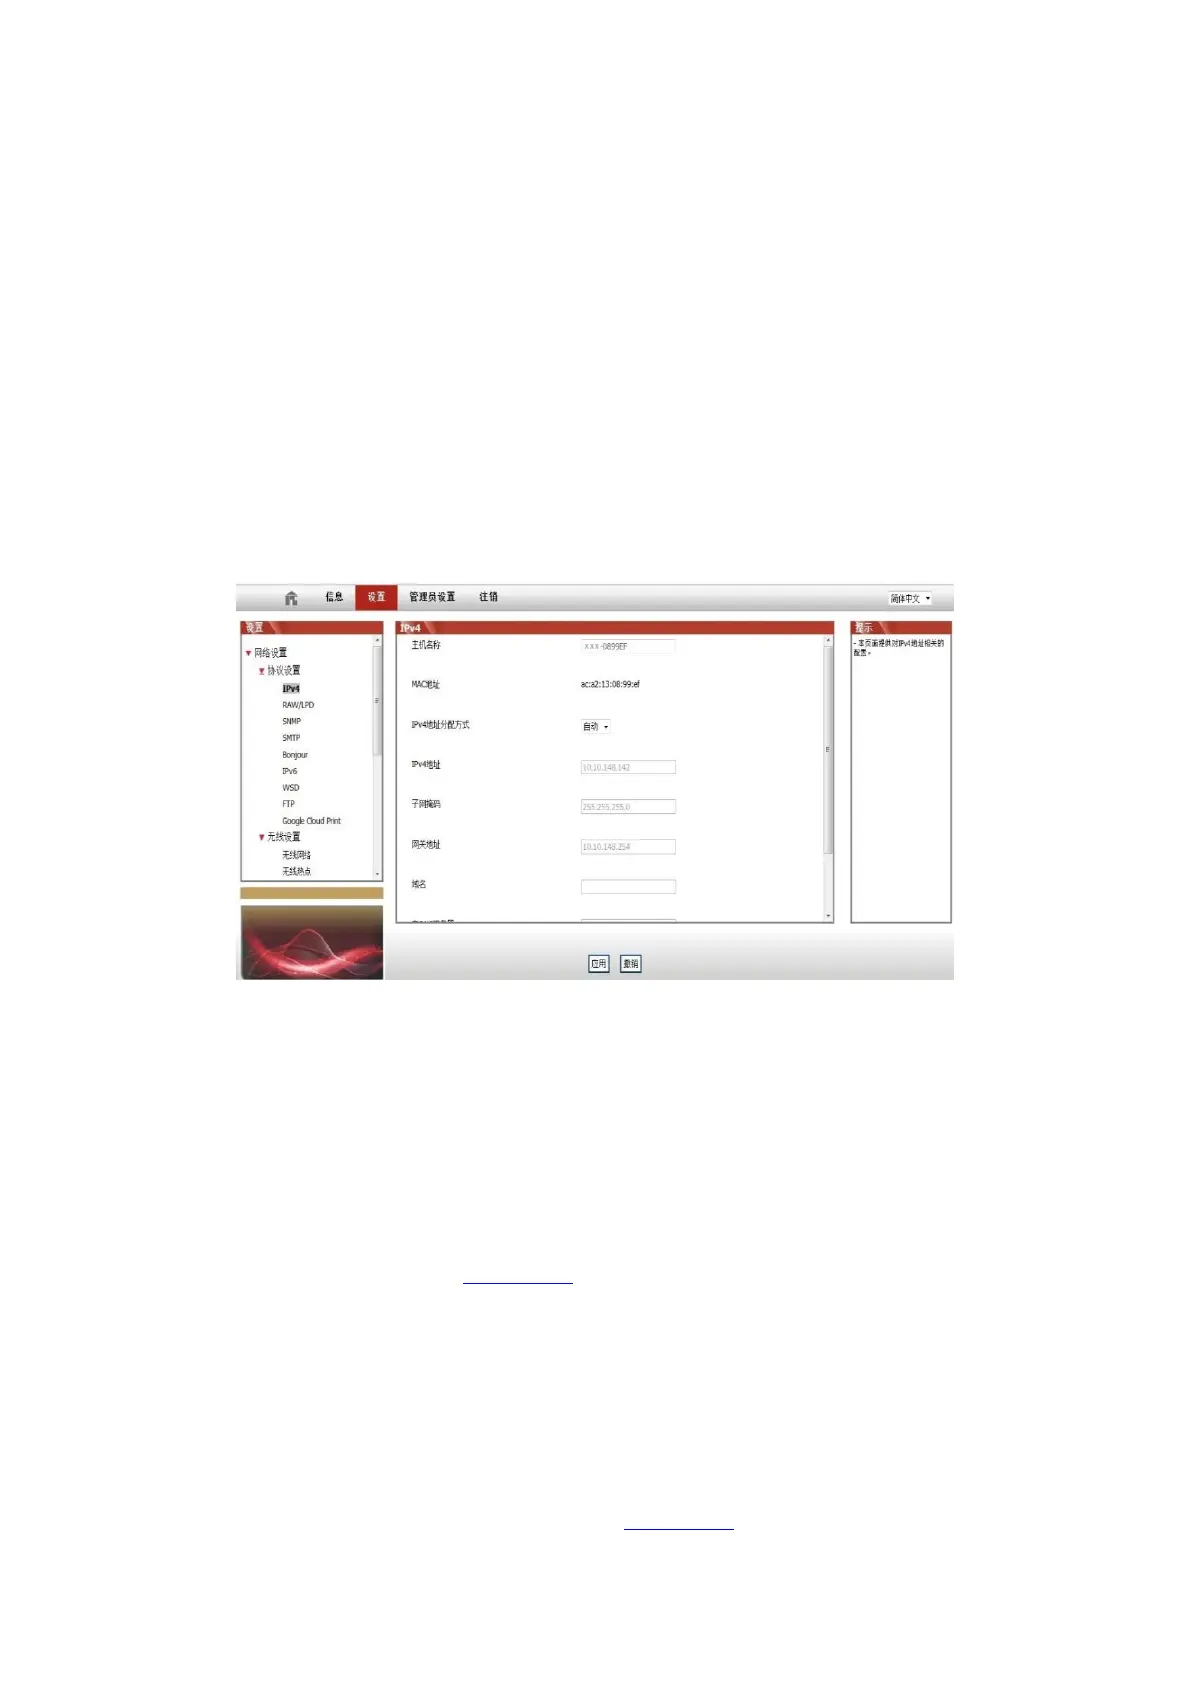
6.2.1.1. IPv4 setup
IPv4 address of the printer is divided into DHCP auto assignment and manual setting, and the
DHCP auto assignment function is on by default. You can set up the IPv4 address of printer
manually to set up fixed IPv4 address for the printer.
1. Turn on printer power to connect printer to network.
2. Log in the embedded Web server (please refer to Section 6.1 for login method).
3. Click “Settings” – “Network settings” – “Protocol Settings” – “Wired IP Configuration”.
 Loading...