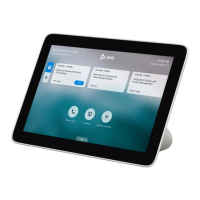
Set up the Poly TC10 for the First Time as a Standalone Device
As a standalone device, you can use the TC10 as a Zoom Rooms controller or a Zoom Rooms scheduler.
Task
1 Power up the Poly TC10 with Power over Ethernet (PoE).
2 If a Poly TC10 software update is available, select Update.
The Poly TC10 updates and restarts.
3 Select a language and select Continue.
4 The device detects the LAN network. Select Continue.
5 Select Use as a standalone device, then Continue.
6 Select the system time format and time zone. Select Continue.
7 Select Zoom Rooms, then Continue.
The Zoom Room app installs and launches.
8 Select Sign in.
9 Sign in to the Poly TC10 with a Zoom account login or an activation code for your Zoom Room. A user with
administrator access can generate this code in Zoom Rooms Management.
Note: You can also pair your Poly TC10 to a Zoom Room account by signing in to your Zoom Room account in a web
browser. Enter the pairing code displayed on the devices here: https://zoom.us/pair.
10 Select the Zoom Room that you want to control.
Note: The activation code is unique to each Zoom Room so this step isn't required if you sign in with an activation
code.
11 Select Room Controller or Scheduling Display and select Next.
The Poly TC10 is paired and ready to control the Zoom Room app.
Configuring Network Settings
If your environment uses DHCP, after plugging it into a LAN port in the room with your video system, the Poly TC10
automatically connects to your primary network.
You can also manually configure the network settings if, for example, your environment needs static IP addresses or the
DHCP server is offline.
Note: Network settings are available prior to pairing with a codec or in standalone mode.
Related Links
Setting Up the Poly TC10 on page 12
Manually Configure IPv6 Address Settings
Your system gets its IP address information automatically by default. However, you can manually configure the IPv6
address settings.
Task
1 In the device local interface, go to Settings > Network.
2 Turn the Enable IPv6 setting on.
3 Turn the Obtain Automatically Using DHCP setting off.
4 Configure the following settings:
13
 Loading...