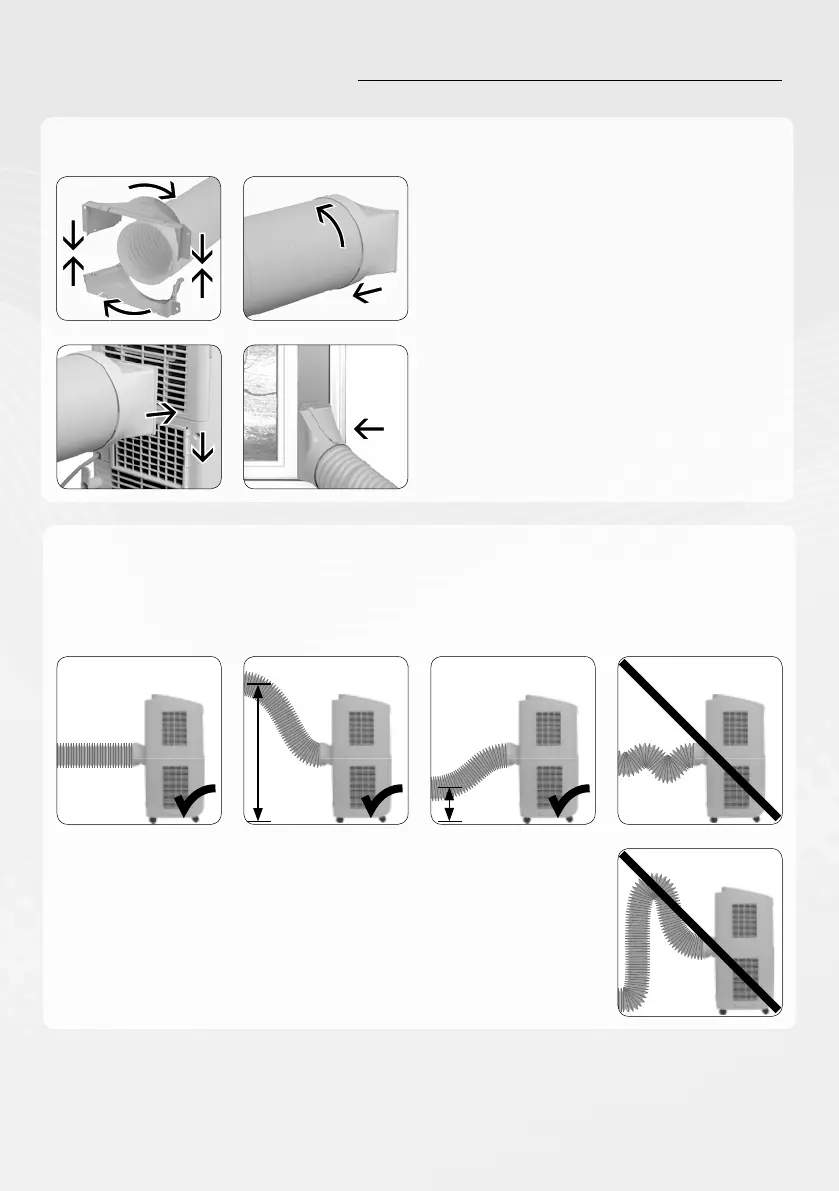
HEAT DISCHARGE PIPE
Install heat discharge pipe
Installation
Assembly:
1. Connect joint a and b by pressing tightly.
Observe the connecting points of a and b.
Fix the joint on the heat discharge pipe by
rotating gently clockwise.
2. Fix joint c on the other side of the heat
discharging pipe by rotating gently
clockwise.
3. Insert joint c with the „TOP“-side upwards
into the groove until it clicks into place.
1.
3. 4.
2.
For ecient cooling, the heat discharge pipe should be kept as short and as curveless as possible
to ensure a smooth heat discharge.
max. 130 cm
min.
40 cm
The length of the heat discharge pipe should not exceed 1 m.
When installing the appliance to a wall, make sure the outlet hole is
about 40 cm to 130 cm from the floor.
Do not prolong it by connecting it with another heat discharge pipe.
Do not bend excessively, as this may cause malfunctioning.
 Loading...