Chapter 2 Installation
Power Supply Requirements
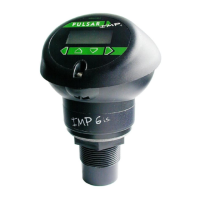
The IMP+
IMP+IMP+
IMP+ operates from a DC supply of 11 –30V and will typically draw
less than 0.06A.
All electronic products are susceptible to electrostatic
shock, so follow proper grounding procedures during
installation.
The compact one-piece construction of the IMP+
IMP+IMP+
IMP+ can be mounted easily
using the integral nose thread (1.5" or 2" BSP/ NPT, dependent on model).
When choosing a location to mount the Imp, bear in mind the following:
• For access to the LCD display and programming buttons it is
recommended that you mount it in an area which is easily
accessible.
• The ultrasonic signal path should be free of falling material and
obstructions such as pipes, beams etc.
• The IMP 3 should be mounted at least 20cm (0.66 feet) above the
maximum level of the material and be perpendicular to the surface.
Whilst the IMP 6 and 10 should be mounted at least 30cm (0.98
feet) above the maximum level of the material and be perpendicular
to the surface.
• The ambient temperature is between -20ºC and 65ºC.
• There should be no high voltage cables or electrical inverters close
by.

 Loading...