Chapter 2: Installation 19
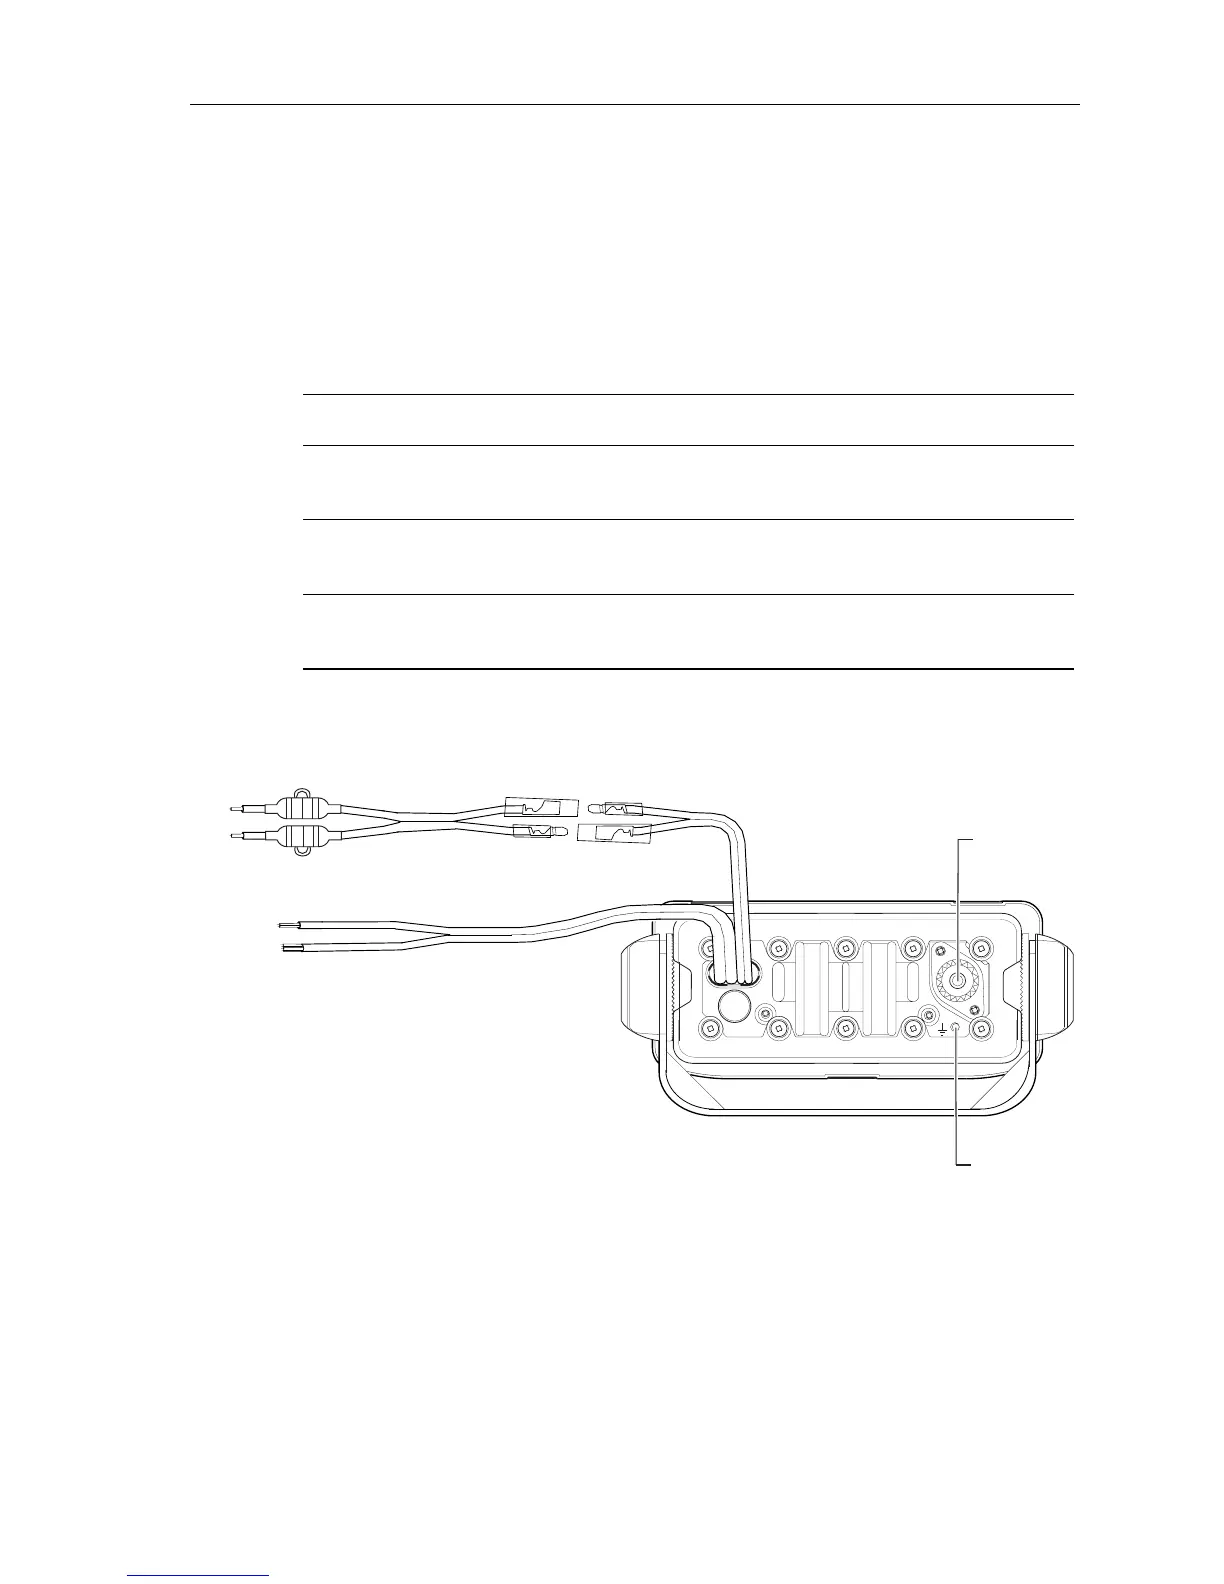
2.3 Cable Connections
The radio has bullet connectors for power and cable connectors for attaching the
optional Microphone Relocation Kit. The remaining wires are for attaching
NMEA, and an optional external speaker or hailer horn. Connect the wires as
shown in the following table. Other connections are discussed in the ensuing
sections.
Make cable connections as shown in the figures that follow.
The ends of the external speaker wires are clipped at the factory so that no bare
metal is exposed. You must strip back the insulation before installation. If you are
not connecting an external speaker, leave the wires insulated. If you have stripped
back a wire that you will not be connecting, clip the bare wire down to the
insulation.
Color Signal Connects to
Gray
Purple
NMEA IN +
NMEA IN –
GPS
Blue
Brown
NMEA OUT +
NMEA OUT –
Chartplotter display unit (A Series, C Series, etc.)
Yellow
Green
SPEAKER +
SPEAKER –
Optional remote speaker, Raymarine part no. E46006
Antenna
Power
NMEA In / Out
fuses
Ground
D10526-1
External Speaker
 Loading...