3 Replacement of Main Parts
41
3
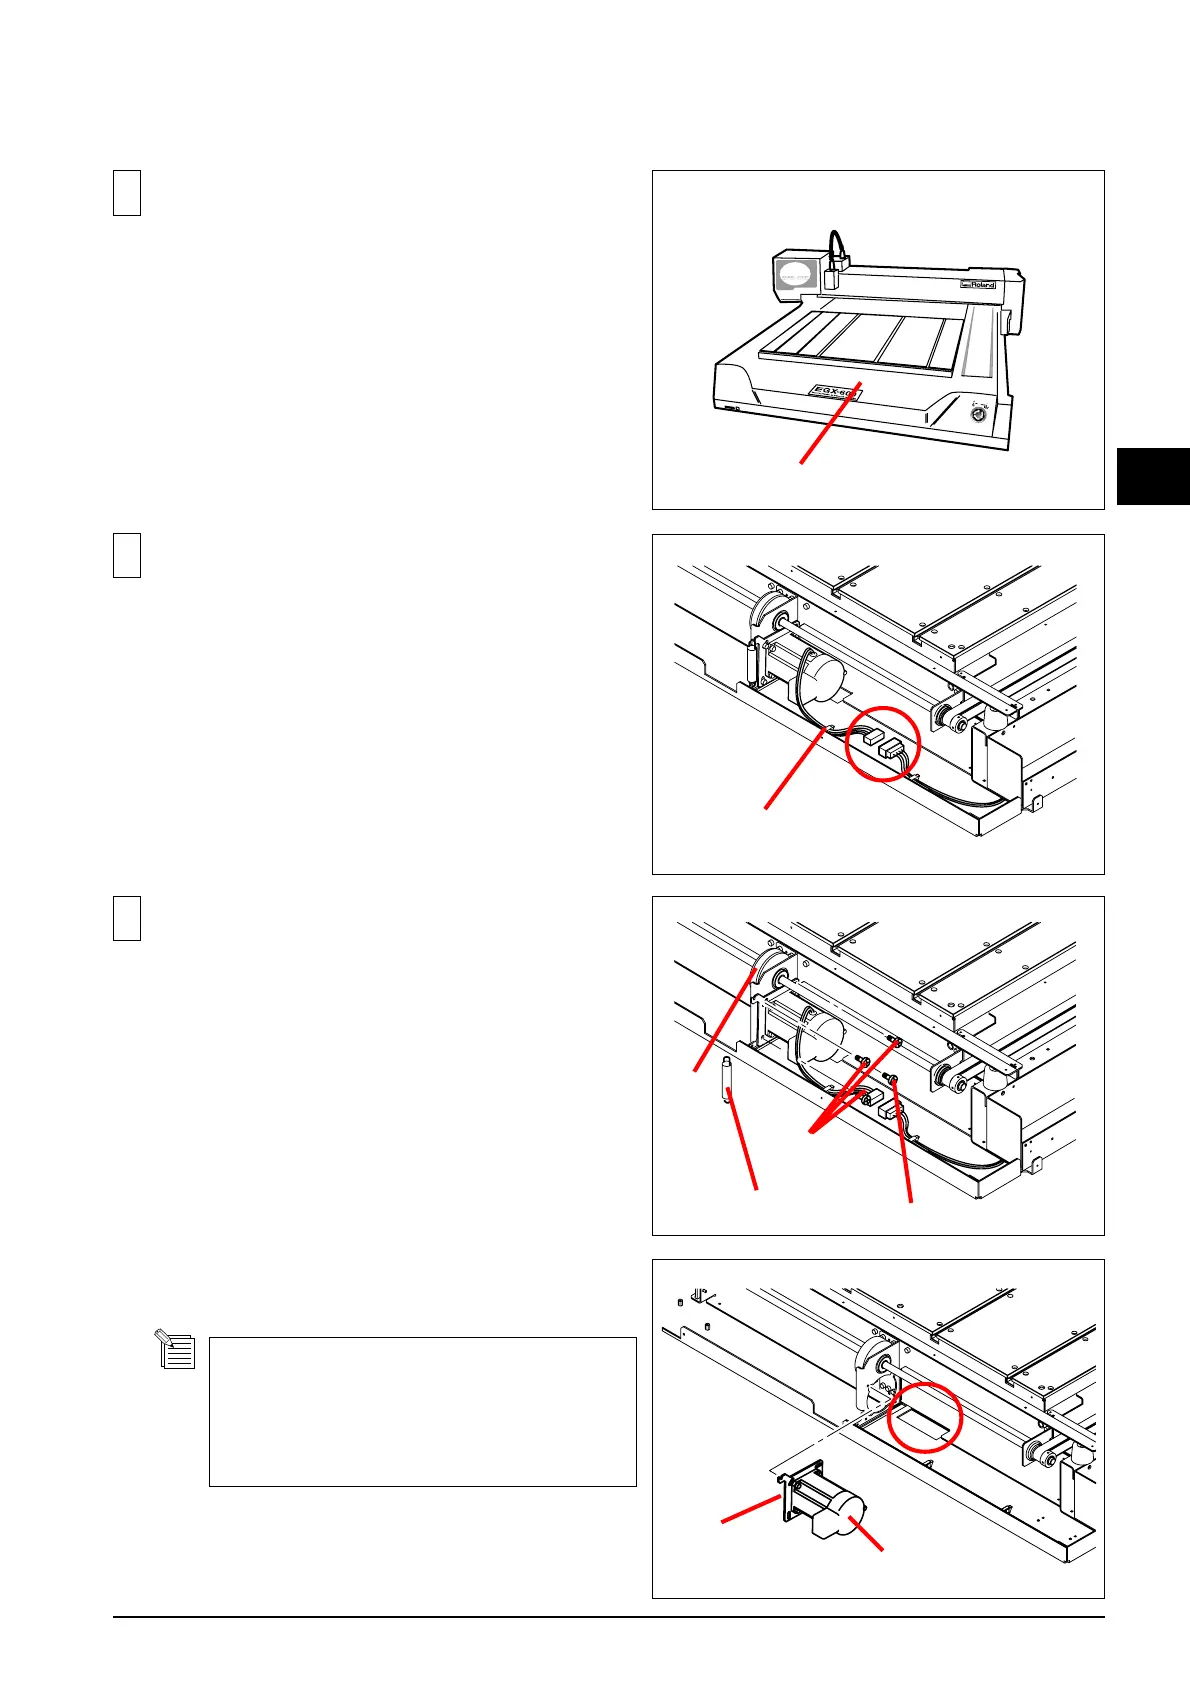
Remove the Spring and the screws fixing the Flange.
3
Disconnect the Y Motor Cable.
Then, remove the Y Motor together with the Flange from the
Drive Belt.
2
3-3 Y Axis Motor _Repalcement (Referential Time : 20 minutes)
Y Motor Cable
Drive
Belt
There is the collar on the lower right side of the
flange. Be careful not to lose it.
When it is difficult to remove the lower right
screw, you can remove it from the base of the
machine.
Spring
Screw with the collar
Screws
Y Motor
Flange
Remove the Front Cover.
1
Front Cover
 Loading...