99
Overview
Appendix
USB Memory
Song Player
Digital Recorder
Synthesizer
Selecting Sounds Perform. Functions Editing/Eects Other Settings
Rec/Play/Edit Eects Rhythm Pattern
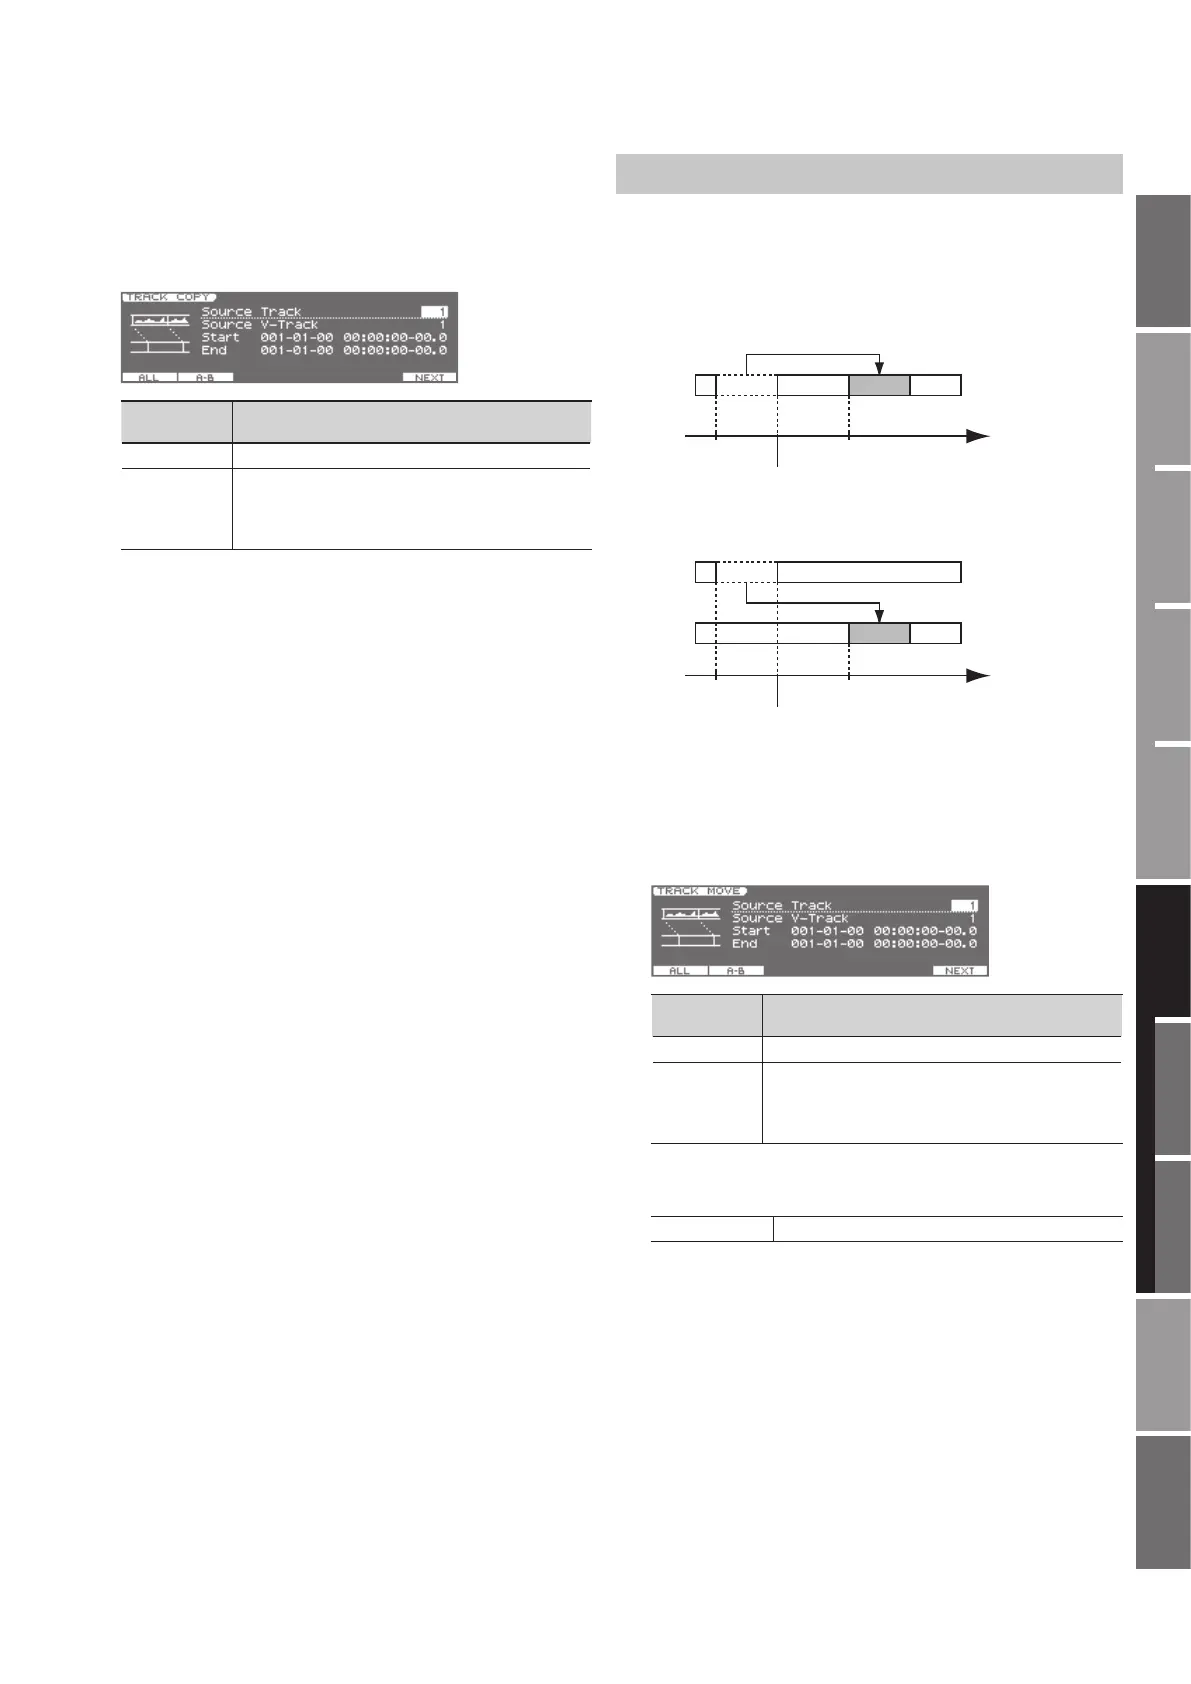
1. Choose Recorder Menu g 2. Track Edit g Track Copy
(p. 98).
The TRACK COPY screen will appear.
2. Specify the Source Track, Source V-Track, Start and End for
the Copy operation, and press the [6] (NEXT) button.
Function
Button
Edit Region
[1] (ALL) The edit region will be the entire track you specied.
[2] (AB)
The edit region will be the region between the points A
and B you specied.
If you want to copy/move/erase the A–B region, you must
set point A and point B beforehand (p. 90).
3. Specify the destination Target Track, Target V-Track, To and
Repeat (the number of times to copy the data) for the Copy
operation, and press the [6] (EXEC) button.
The display will ask “Copy OK?”
4. If you’re sure you want to execute, press the [5] (EXEC)
button. If you decide to cancel, press the [6] (CANCEL)
button.
Track Move (Moving Data)
This operation moves the data of the specied region (or the entire
track) to another location.
* Following this operation, the original location of the moved data
will be empty (containing no data).
Example 1: Moving within the same track
START
END
TO Time
Example 2: Moving to a dierent track
START
END
TO Time
1. Choose Recorder Menu g 2. Track Edit g Track Copy
(p. 98).
The TRACK MOVE screen will appear.
2. Specify the Source Track, Source V-Track, Start and End for
the Move operation, and press the [6] (NEXT) button.
Function
Button
Edit Region
[1] (ALL) The edit region will be the entire track you specied.
[2] (AB)
The edit region will be the region between the points A
and B you specied.
If you want to copy/move/erase the A–B region, you must
set point A and point B beforehand (p. 90).
3. Specify the destination Target Track, Target V-Track and To
for the Move operation, and press the [6] (EXEC) button.
To The move-destination time location or measure
The display will ask “Move OK?”
4. If you’re sure you want to execute, press the [5] (EXEC)
button. If you decide to cancel, press the [6] (CANCEL)
button.
 Loading...