154
Chapter 11. Other Settings
Here’s how to make settings for the MIC INPUT jack, and specify the reverb that will be applied to the connected mic.
1.
Press [MENU].
The Top Menu window will appear.
2.
Use [ ] [ ] to select “2. Mic Input Setting,” and press [ENTER].
The MIC INPUT SETTING screen will appear.
3.
Use the cursor buttons to select the parameter that you want to
change.
4.
Use the VALUE dial or [DEC] [INC] to change the value.
If you want to save the changes you made, press [7 (WRITE)]. If
you want to exit without saving, press [EXIT] or [6 (EXIT)].
You can also access the MIC INPUT SETTING screen by holding
down [SHIFT] and pressing MIC IN [REVERB].
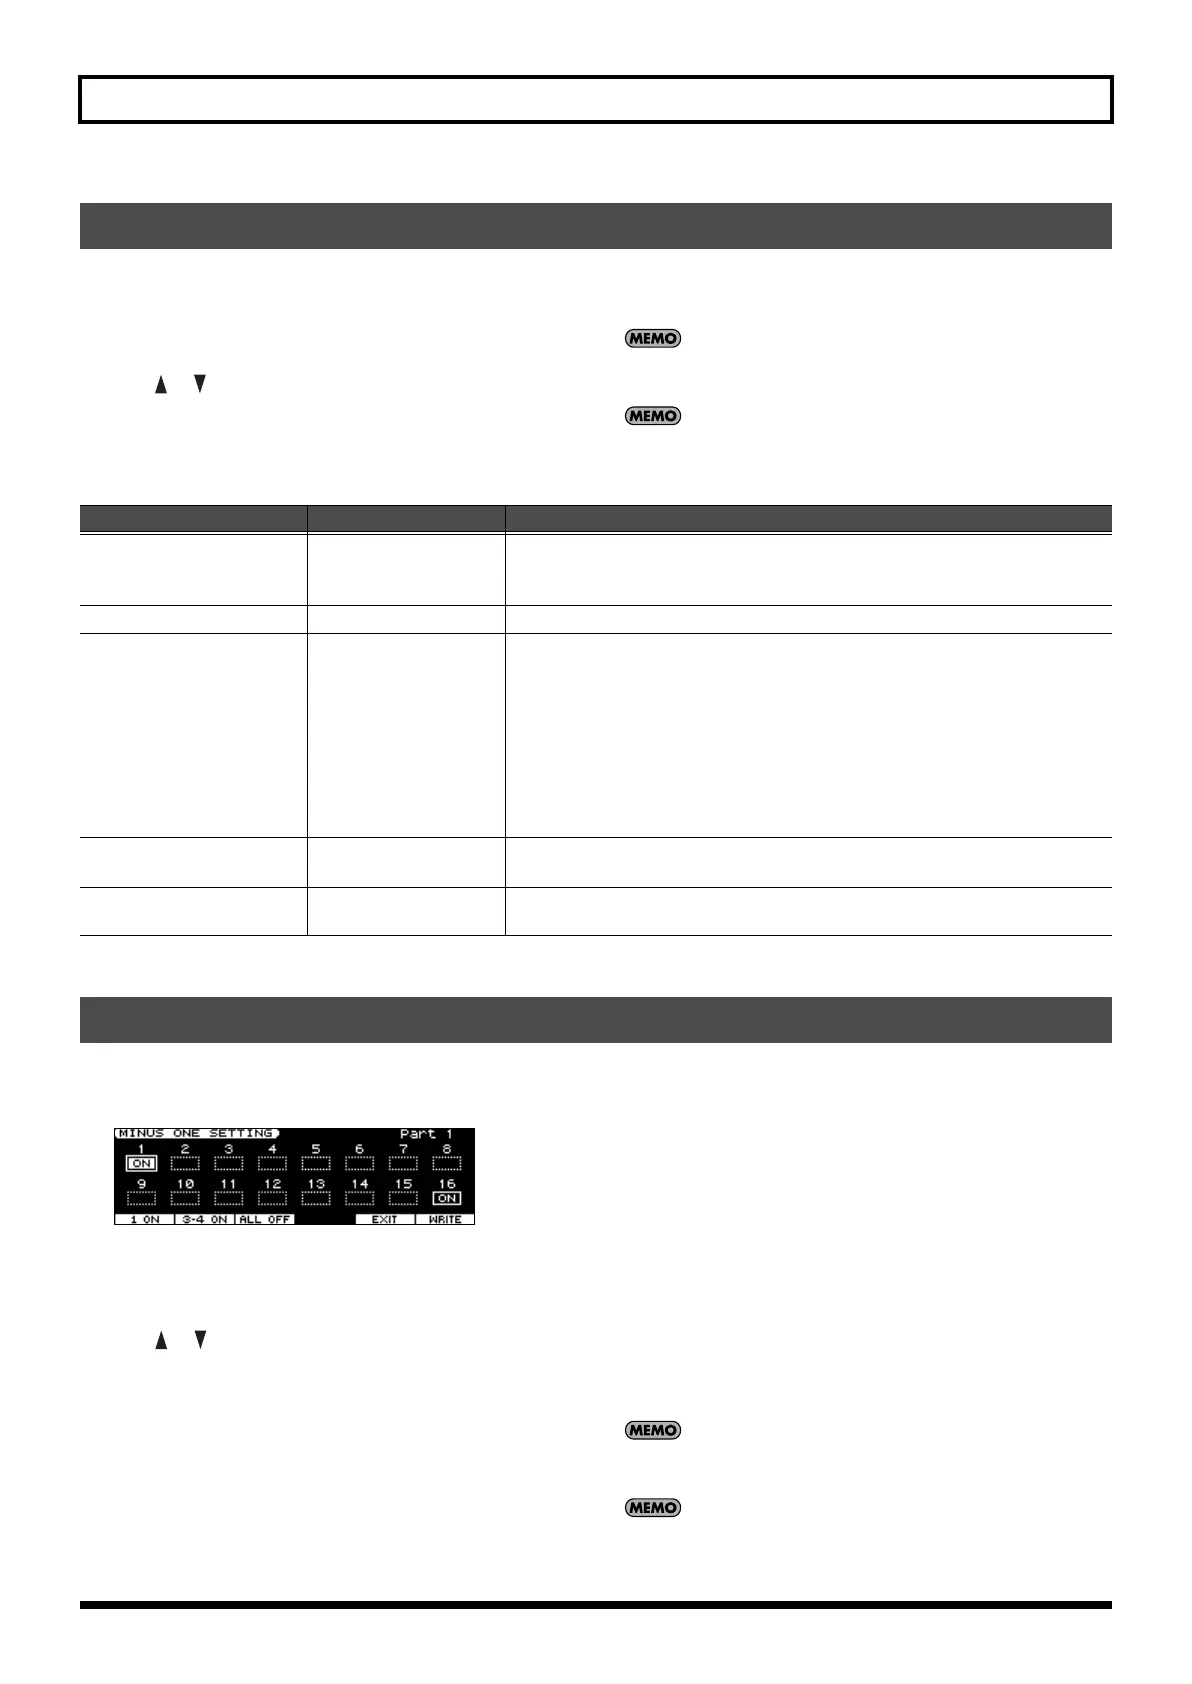
Here you can specify the parts that will be muted by Minus One (p. 73) when playing back an SMF song.
Parts for which this setting is ON will be muted.
fig.disp-
1.
Press [MENU].
The Top Menu window will appear.
2.
Use [ ] [ ] to select “3. Minus One Setting,” and press
[ENTER].
The MINUS ONE SETTING screen will appear.
3.
Use the cursor buttons to select to the part that you want to
change.
4.
Use the VALUE dial or [DEC] [INC] to turn the setting on or off.
You can also use the following function buttons to turn the setting
on/off.
• Pressing [2 (1 ON)] will turn part 1 on.
• Pressing [3 (3-4 ON)] will turn part 3 and part 4 on.
• Pressing [4 (ALL OFF)] will turn all parts off.
If you want to save the changes you made, press [7 (WRITE)]. If
you want to exit without saving, press [EXIT] or [6 (EXIT)].
You can also access the MINUS ONE SETTING screen by
holding down [SHIFT] and pressing [C.CANCEL/MINUS ONE].
Detailed Settings for the MIC INPUT (MIC Input Setting)
Parameter
Value Explanation
Phantom Power
OFF, ON
Turn this ON if you want to use phantom power.
* This setting cannot be saved. When the power is turned on, this will be set to
“OFF.”
Mic-In Reverb Level
0–127
Amount of reverb that is applied to the sound of the mic.
Mic-In Reverb Type
ROOM1, ROOM2,
STAGE1, STAGE2,
HALL1, HALL2, DELAY,
PAN-DELAY
Type of reverb/delay
ROOM1:
Short, high-density reflections
ROOM2:
Short, low-density reflections
STAGE1:
Greater amount of late reverberation
STAGE2:
Stronger early reflections
HALL1:
Clear-sounding reverberation
HALL2:
Rich-sounding reverberation
DELAY:
Conventional delay
PAN-DELAY:
Delay that moves the reflections between left and right
Mic-In Reverb Time
0–127
Length of the reverberation (when Mic-In Reverb Type is ROOM1–HALL2)
Delay time of the delay (when Mic-In Reverb Type is DELAY or PAN-DELAY)
Mic Mode
ALL, VOCODER ONLY
Specifies whether the sound from the mic will be output at all times (ALL) or only if
MFX (p. 84) is set to “79:VOCODER” (VOCODER ONLY).
Detailed Settings for Minus-One (Minus One Setting)
JUNO-STAGE_e.book 154 ページ 2008年10月17日 金曜日 午後12時27分

 Loading...