2222
Other functions
Adding the sounds (IMPORT TONE)
Tones that you download or tones that you exported from
another unit can be imported into the RD-08 as added tones.
* Here explain how to import user tones. If you want to import/
install a sound pack
refer to “Sound Pack Install Manual” (PDF).
Saving Tones to a USB Flash Drive
* If you’re using the USB ash drive for the rst time, format it using
the RD-08.
“Formatting a USB ash drive (FORMAT USB MEMORY)” (p. 24)
1. By downloading or by using the export function
of another unit, obtain an SVZ le containing the
tones that you want to import, and place the le on
your computer.
2. Connect the USB ash drive to your computer.
3. Save the SVZ le in the ROLAND/SOUND folder of
the USB ash drive.
4. Disconnect the USB ash drive from your computer,
and connect it to the RD-08.
Importing Tones into the RD-08
1. Press the [MENU] button.
2. Use the cursor [ä] [å] buttons to select “UTILITY”,
and then press the [ENTER] button.
3. Use the cursor [ä] [å] buttons to select “IMPORT
TONE”, and then press the [ENTER] button.
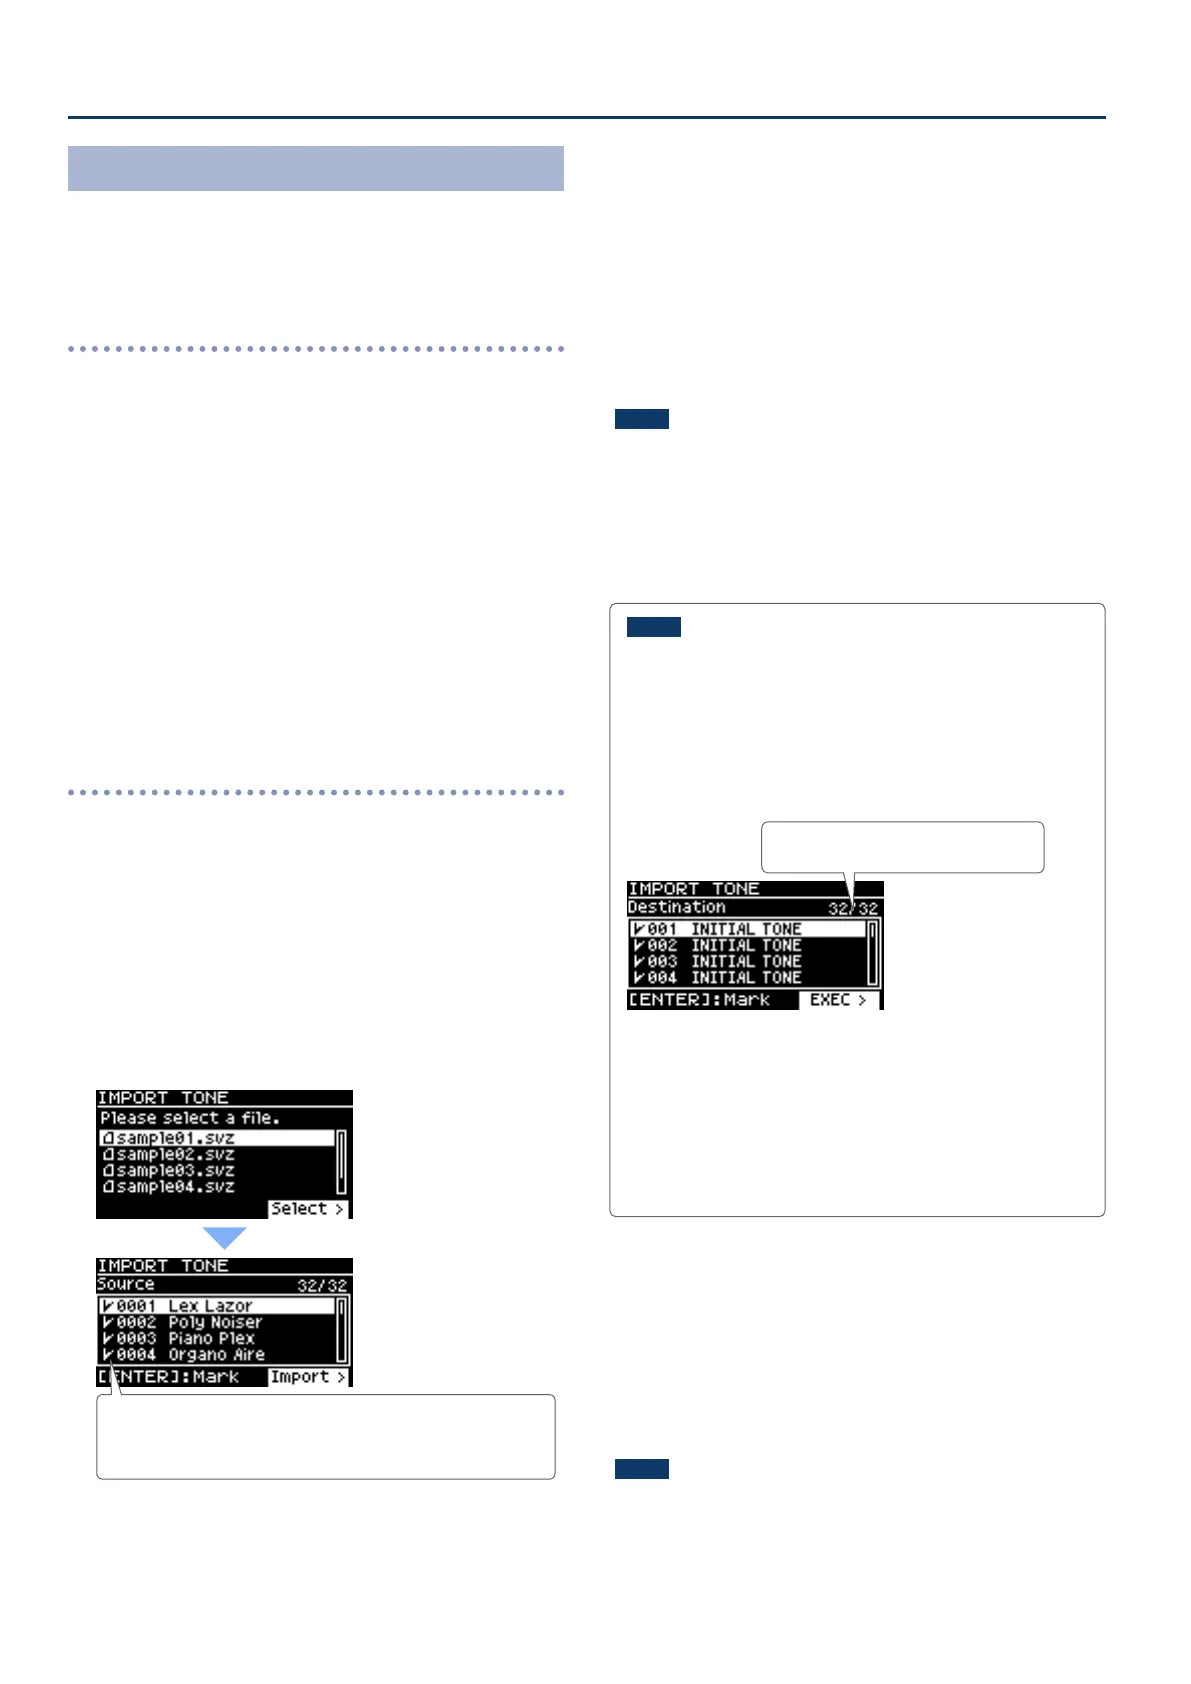
4. Use the cursor [ä] [å] buttons to select the le that
contains the tone(s) that you want to import, and
then press the cursor [æ] button.
According to the number of tones that can be imported, the
tones to be imported will be selected automatically (check marks
are assigned automatically).
5. Use the cursor [ä] [å] buttons to select the tone
that you want to import, and then use the [ENTER]
button to add a check mark.
Instead of using the [ENTER] button, you can also use the [INC]
[DEC] buttons to assign check marks. To select or de-select all
tones, hold down the [SHIFT] button and press the [INC] [DEC]
buttons.
To select or de-select a specic range of tones, press the [ENTER]
button at the beginning of the range; then at the end of the
range, hold down the [SHIFT] button and press the [ENTER]
button.
NOTE
Drum kit tones cannot be imported.
6. Press the cursor [æ] button.
7. Use the cursor [ä] [å] buttons to select the import-
destination tone, and then press the [ENTER]
button to add a check mark.
NOTE
¹ An “ * ” is displayed for tones used in scene.
¹ An indication of “NEW” is shown for newly imported tones.
¹ Be aware that the import-destination tone you select will be
overwritten.
¹ If the import-destination has fewer tones than the import-
source, not all of the selected tones will be imported.
The number of tones is shown in the upper right of the screen.
Number of import-destination/
import-source tones
¹ If there is a tone named “INITIAL TONE”, it is automatically
selected as the import-destination tone (a check mark is
added automatically).
If you want to keep that tone, clear the check mark.
8. Press the cursor [æ] button.
A conrmation message appears.
If you decide to cancel, press the [EXIT] button.
9. To execute, use the cursor [æ] button to select “OK”,
and then press the [ENTER] button.
When import is completed, the message “Import Tone
Completed!” appears.
NOTE
Never turn o the power or remove the USB ash drives while the
screen indicates “Executing...”.
 Loading...