3 x Installation
26
FA ROTEX Solaris - 08/2007
8. If several mounting rails are being used: Separate them again.
9. Push the individual mounting rails into the preassembled slide blocks of the roof mounting bracket from the side.
10. If several mounting rails are being used: Rejoin the rails, using both splicing plates and all the screws supplied.
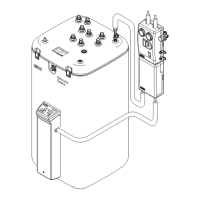
11. Tighten the self-locking nuts with which the slide blocks have been attached to the roof mounting brackets. Take care to
align the mounting rail parallel to the edges of the roof tiles (Fig. 3-52 to Fig. 3-54).
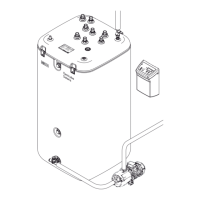
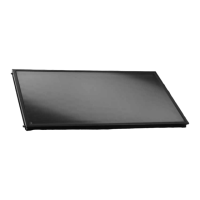
12. Height adjustment for levelling the mounting rails
– For solar panels with connections on the same side (up to 3 solar panels), the mounting rail must be exactly horizontal
(this ensures automatic solar panel ventilation and draining when the pump stops).
– For solar panels with connections on opposite sides (more than 3 solar panels), the mounting rail must be installed with
a slight gradient to the return flow coupling (water feed at lower solar panel coupling). Counter-gradients must be
avoided.
13. Replace the row of roof tiles.
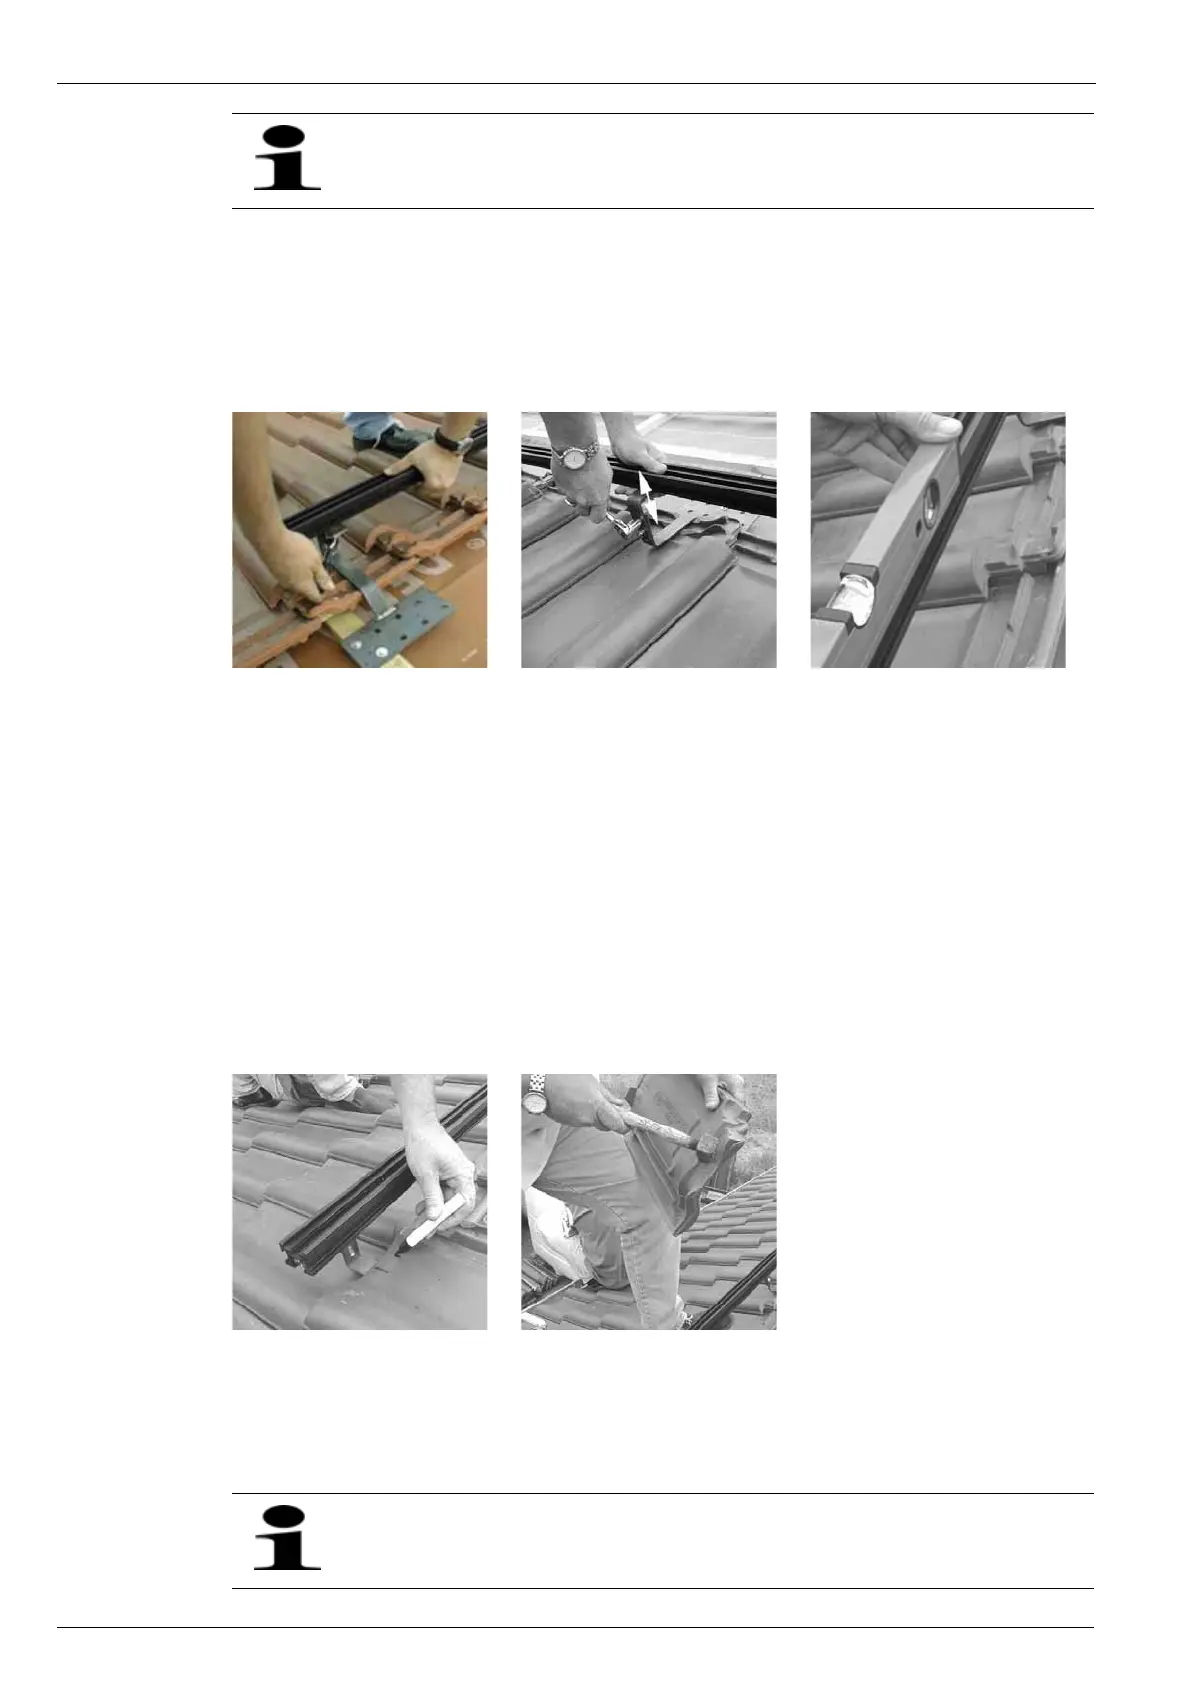
14. Mark the positions where the roof mounting brackets emerge under the tiles (Fig.3-55).
15. Knock out the lower tile webs at the marked exit points for the mounting brackets or remove them with the cutting grinder
(Fig. 3-56).
16. Install the upper mounting rails at a distance of Y
1
from the lower mounting rails (Fig.3-57) (in the same manner as described
for the lower mounting rail). Make sure that the upper and lower mounting rails provide a plane-parallel mounting surface
for the solar panels.
The mounting brackets must not press onto the roof tiles below, or raise the roof tiles above.
Fig. 3-52 Align the mounting rails and
screw tightly to the upper part
of the roof mounting brackets
Fig. 3-53 Height adjustment
of the mounting bracket
Fig. 3-54 Levelling the mounting rails
Fig. 3-55 Mark the exit position of the
mounting bracket on the roof tile
Fig. 3-56 Remove the lower roof tile web
Loosley tighten the self-locking nuts of the slide blocks in the upper mounting rails, so that the rail can be
levelled out precisely after mounting the first solar panel.
 Loading...