11
02
Installation & Network Connection
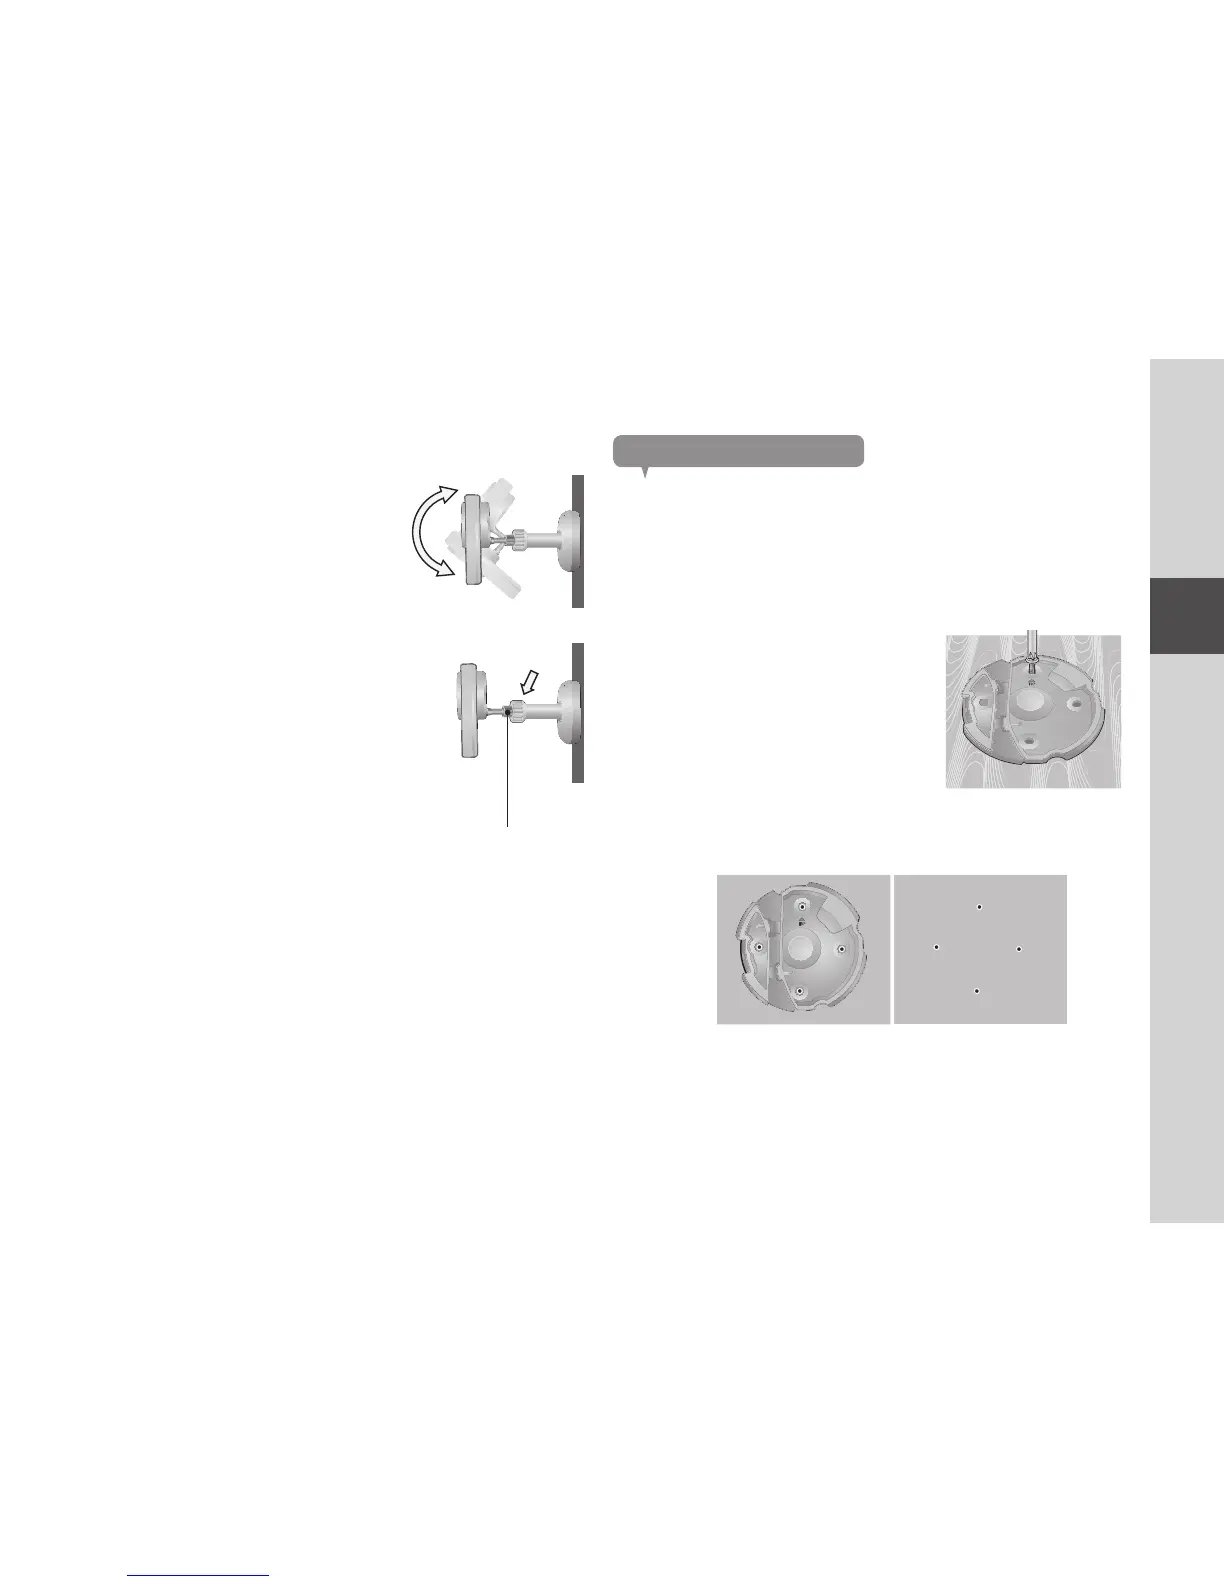
Adjusting the Angle
1. Adjust the camera’s shooting angle as
appropriate.
n
` Do not put excessive force. Otherwise, it may
cause damage to the camera.
2. Turn the part shown in the figure clockwise to
lock the bracket’s ball hinge and fix the
shooting angle.
3. Turn it counterclockwise to unlock the ball
hinge and adjust the shooting angle.
J
` Turning the camera counterclockwise while the
bracket body is locked may turn the bracket knob
too, and fail to fix it. In such cases, turn the
bracket knob clockwise.
Wall Mounting with Screws
n
` For more information about step of Separating the wall-mount bracket, refer to “Wall
Mounting Using Double-sided adhesive tape”.
Assembling
1. Take out screws (M3xL20) and Anchor (Φ5x25) from the zipper bag.
2. On a wooden wall, use screws to fix the
wall-mount bracket as shown in the figure.
Place the wall-mount bracket on the desired
spot while setting its [▲ TOP] mark towards
direction of 12 o’clock and fasten screws
through the 4 holes using screwdriver.
3.
If fixing on a concrete wall, use screws and anchors to fix wall-mount bracket
.
First, mark on the wall as shown in the figure below.
UNLOCK ◀ ▶
LOCK
UNLOCK
◀ ▶
LOCK
Bracket knob
TOP

 Loading...