22
HDD OPERATION
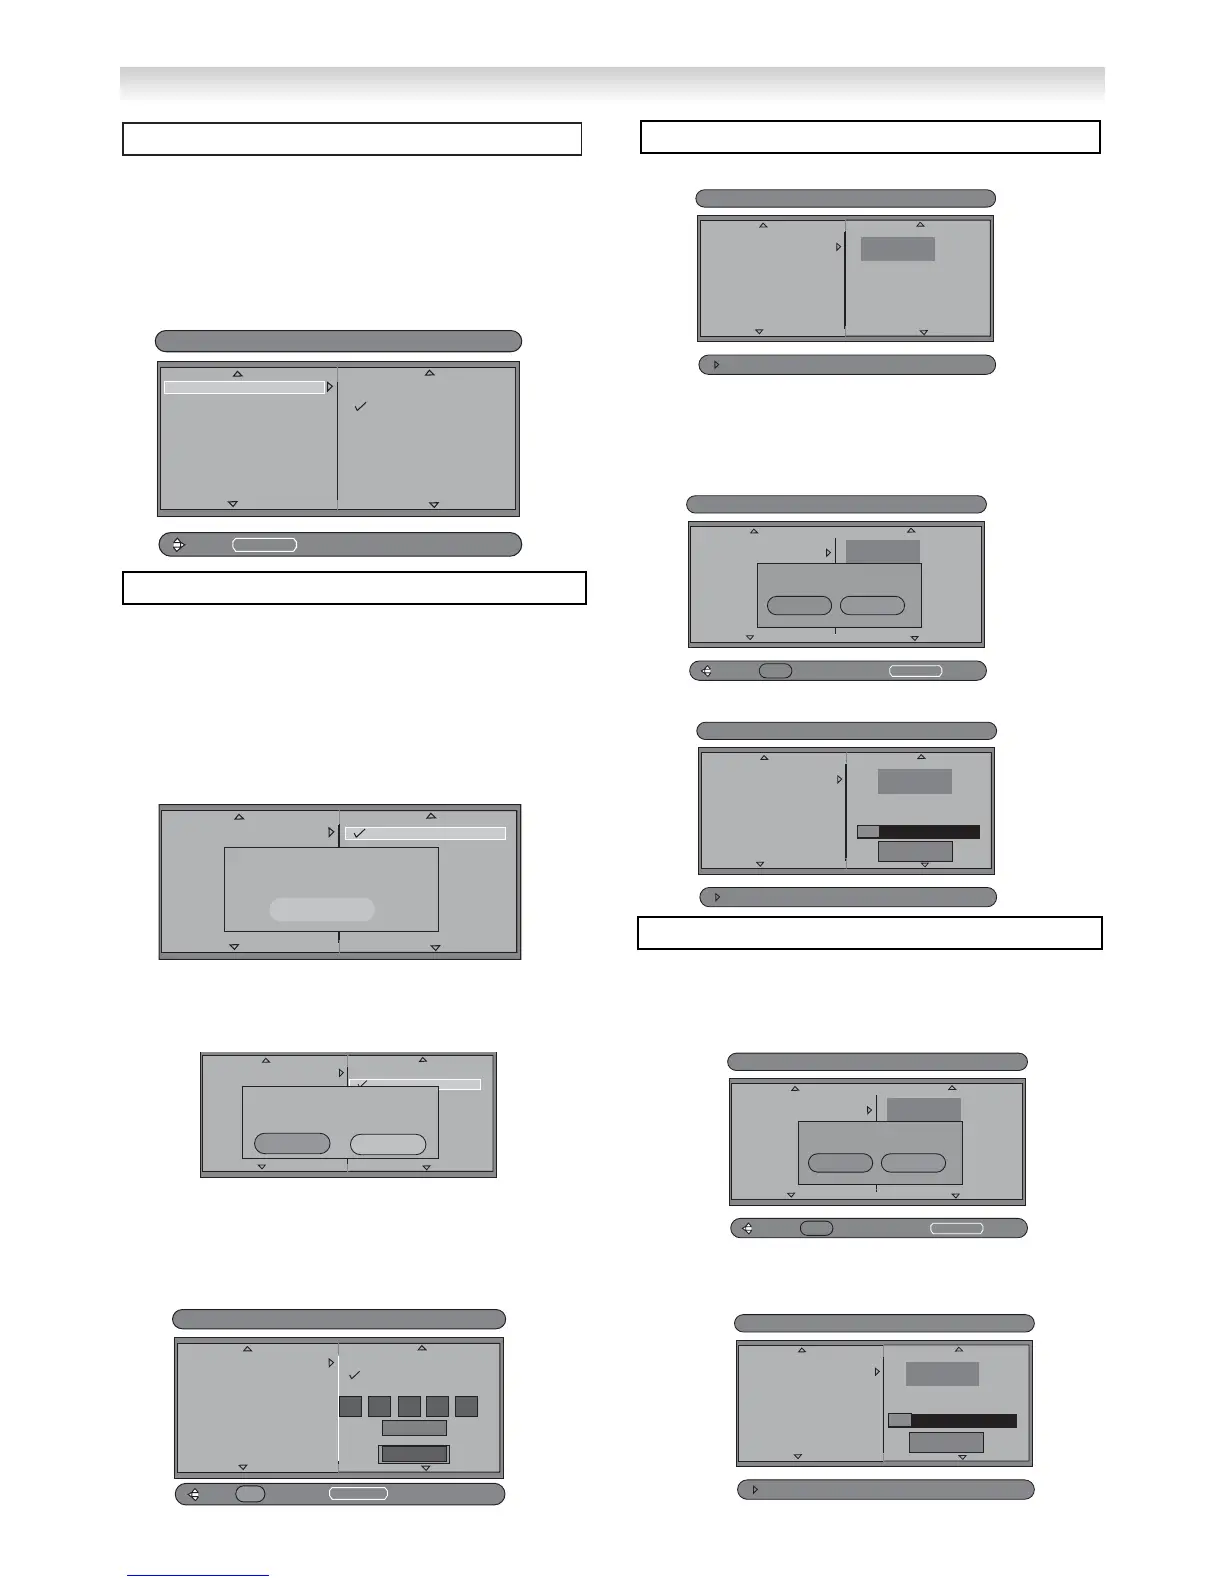
You can define the initial setup of the HDD operation from the HDD
Setup menu or change the settings of other items to suit your prefer-
ences.
To launch the
HDD Setup menu press the HDD Menu button on the
remote control.
The HDD menu window will appear press the
e or d on the remote
control to move the highlighted bar to the desired item. Press the
8
button on the remote to activate the currently selected menu item. To
confirm the selection press the
OK button.
Enter the HDD Setup Menu and select set time by using the e or d
buttons. Set Time has two options Automatic and Manual time
adjust. Select the options by using the e or d buttons and then the
OK button.
● Automatic time will adjust the time automatically via the
antenna . This will show the progress of gathering the Date, once
found the date and Time will be displayed. If the time data is not
available a message will appear on the screen and time will have to
be entered in manually.
● Manual time
To select manual press e or d buttons until it
becomes highlighted press the OK button. A message
will appear
Summer time can be turned on or off by using the
7or 8 buttons and the OK button.
To adjust the time use the numeric (0-9) buttons on the remote or by
using the e or d buttons. To move to the next position use the 7
or 8 buttons. To save or cancel the options select the SAVE/ Cancel
on the menu by using the 7or 8 buttons.
Formating the Hard disk all the information stored will be deleted.
Select the HDD Menu buttonto open Hdd Setup. Press the e or d
buttons to select Format and the 8 button to highlight START. Press
OK button.
To confirm Format select yes or no using the 7 or 8 buttons and
then the OK button, the following display will appear.
When formating is in progess do not power off the set.
The scandisk function will scan the disc and check for any errors
Select Scan disk by using the e or d buttons. Select Start and a
confirmation message will appear. Select Yes or no using the 7 or 8
buttons on the remote and then the OK button.
Once scaning starts the following screen appears, do not Power off
the set
 Loading...