EasyManuals Logo

Sanyo PLC-XF46N User Manual

Sanyo PLC-XF46N
186 pages
To Next Page IconTo Next Page
To Previous Page IconTo Previous Page
Page #39 background imageLoading...
Page #39 background image
- 39 -
Projection lens &
Projection lens
Attachment parts
Attachment parts
C
C
B
Lens shift unit
B
B
B
Plate
A
A
A
A
Optical Unit Disassemblies
11
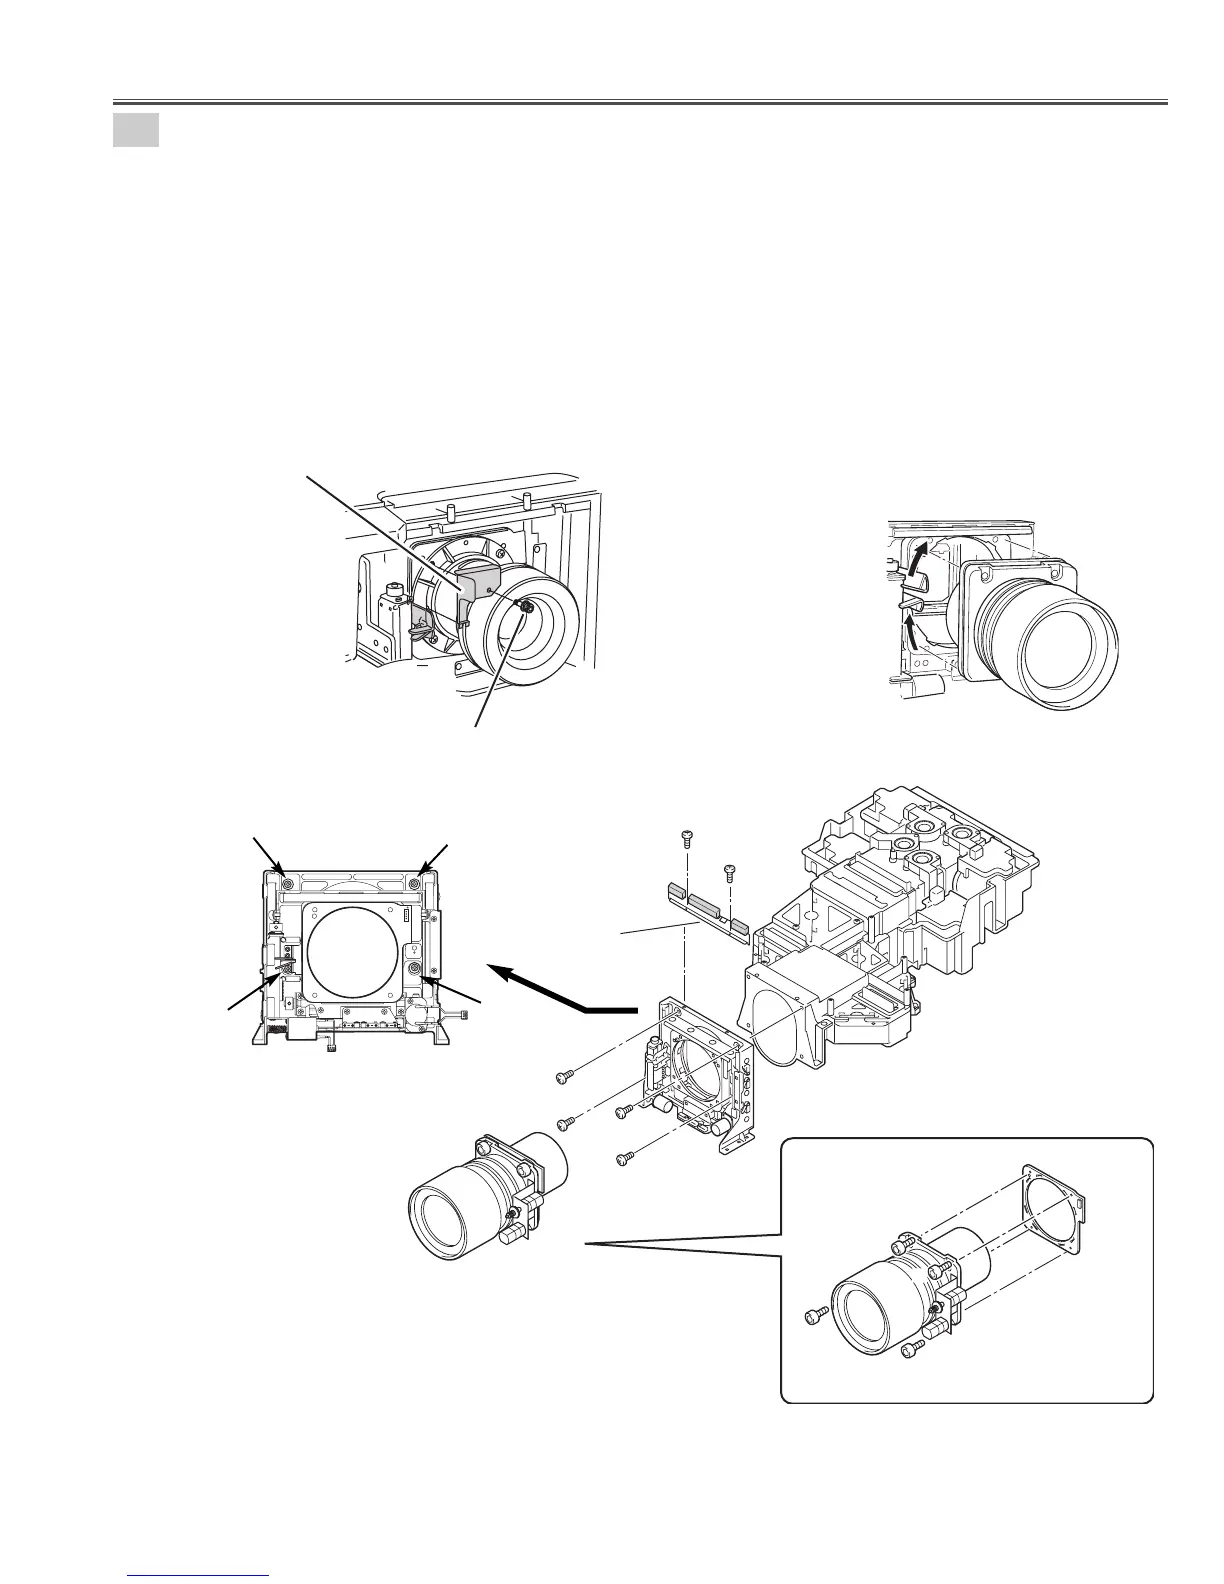
Projection lens and Lens shift unit removal.
1. Loosen the screw-D and remove the Safety Clamp. (See Fig. 11-a)
2. Slide the lens lock lever on the projector to "UNLOCK" (UPPER) position and detach
the Projection lens with Mount Parts to the Lens shift unit. (See Fig. 11-b)
(Refer to Lens replacement and Installation procedures manual)
3. Loosen 4 screws-A and remove the Projection lens.
4. Remove 4 screws-B and remove the Lens shift unit.
5. Remove 2 screws-C and remove the plate.
(See Fig.11, 11-c, 11-d)
Fig.11
Fig.11-d
Fig.11-c
B
B
B
B
Safety Clamp
Screw-D
Lens lock lever
Unlock(upper) position
Fig.11-b
Fig.11-a

Other manuals for Sanyo PLC-XF46N

Questions and Answers:

Question and Answer IconNeed help?

Do you have a question about the Sanyo PLC-XF46N and is the answer not in the manual?

Sanyo PLC-XF46N Specifications

General IconGeneral
BrandSanyo
ModelPLC-XF46N
CategoryProjector
LanguageEnglish

Related product manuals