Group No.
Item No.
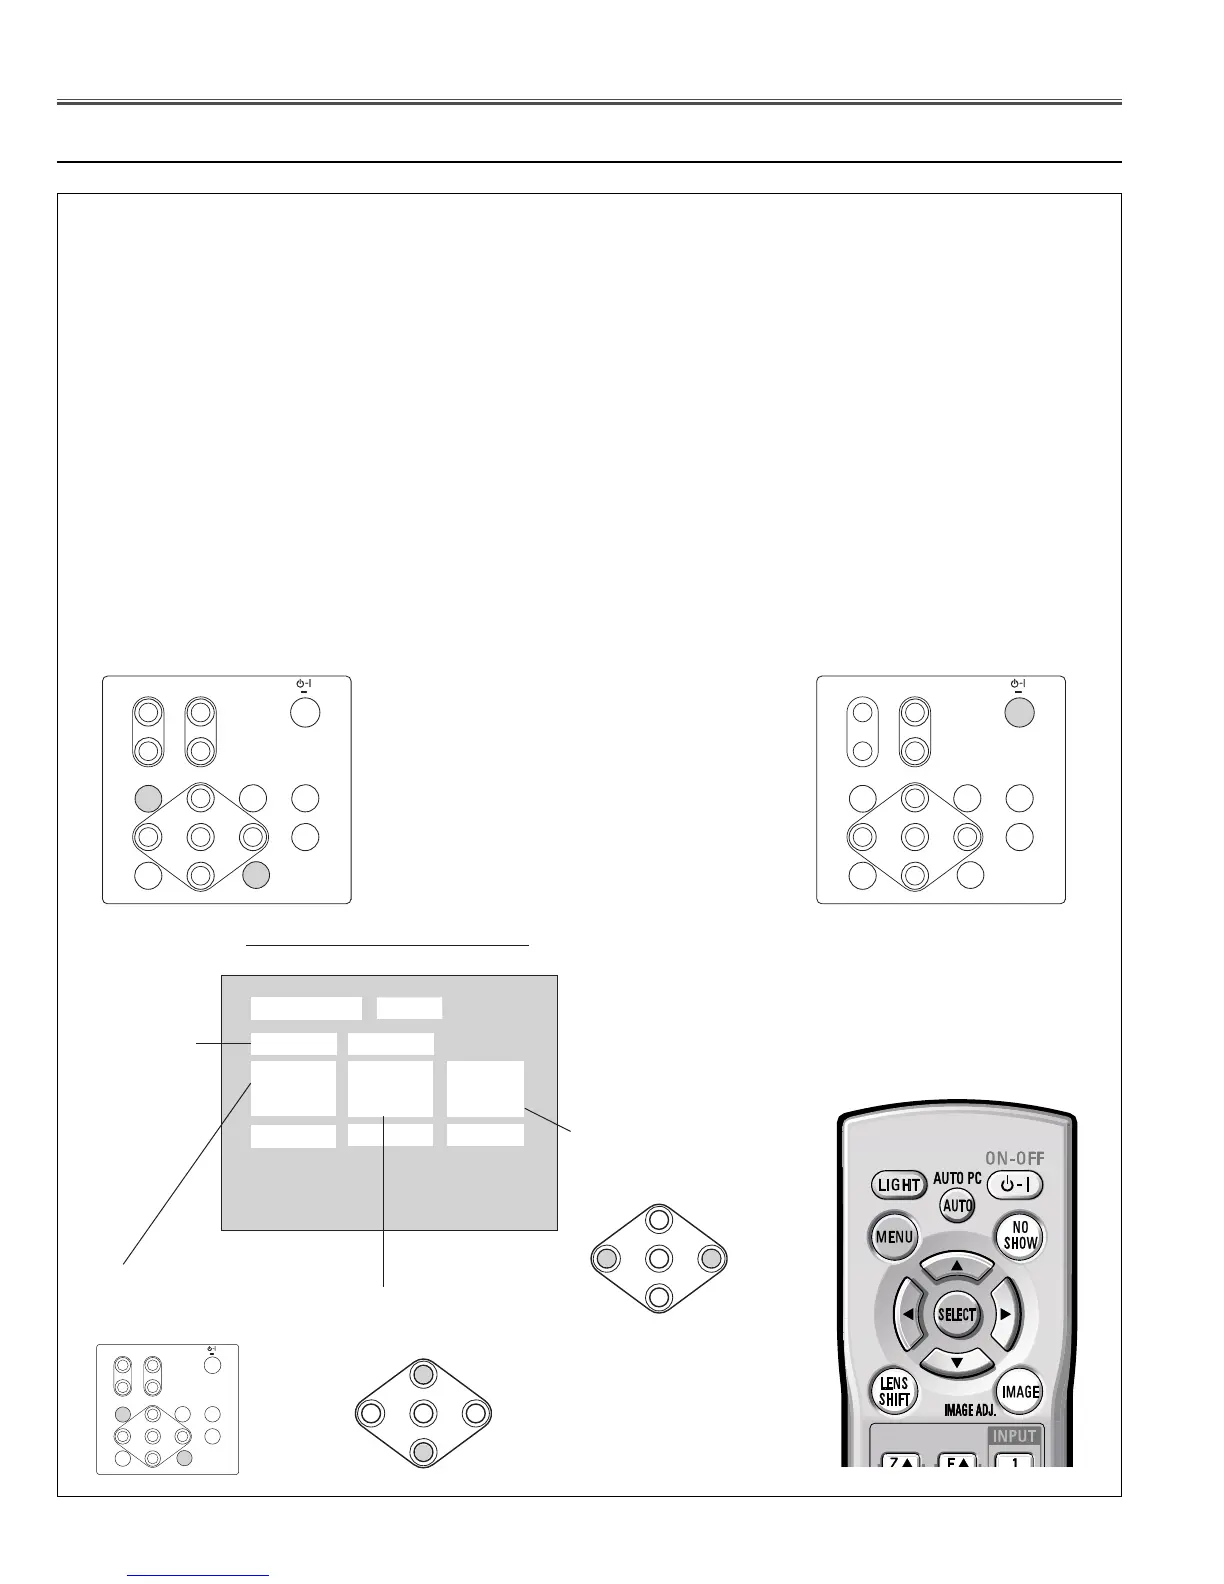
To enter "service mode"
Press "MENU" and "IMAGE" but-
tons on the projector simultaneous-
ly and hold for 3 seconds.
To adjust "service mode"
Adjust service data using the following
control buttons on the projector or the
remote control unit.
"MENU" . . . . . . . . Group No. increases.
"IMAGE" . . . . . . . . Group No. decreases.
"point UP" . . . . . . Item No. increases.
"point DOWN" . . . Item No. decreases.
"point RIGHT" . . . . Data value increases.
"point LEFT" . . . . . Data value decreases.
To exit "service mode"
Press "POWER ON-OFF" button
once on the projector or the remote
control unit to quit the service
mode.
Follow the procedures described below for the adjustments with service mode.
1. Turn the projector Power ON.
2. Enter Service adjustment menu.
Press and hold the MENU and IMAGE button on the projector simultaneously for more than 3 seconds, or press
and hold the MENU button on the remote control unit for more than 20 seconds. The service adjustment menu
appears on the screen.
3. Select Adjustment Group No. and Item No. which are to be adjusted.
Select Adjustment Group No. by pressing "MENU" and "IMAGE" buttons.
Press point UP (e) and DOWN (d) buttons to select Item No.
4. Adjust data value or change setting matter with point LEFT (7) and RIGHT (8) buttons.
5. Press POWER "ON-OFF" button once and close the service adjustment menu.

 Loading...