Home
Sony
Camcorder
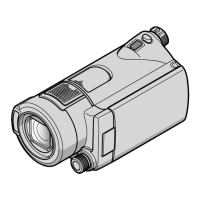
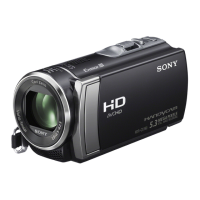
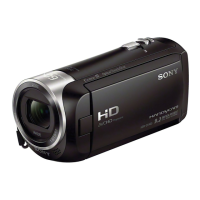
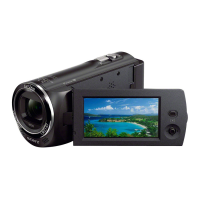
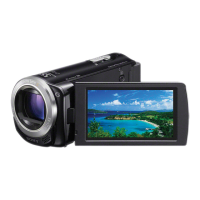
Handycam HDR-CX160
Sony Handycam HDR-CX160 User Manual
4
of 1
of 1 rating
72 pages
Give review
Manual
Specs
To Next Page
To Next Page
To Previous Page
To Previous Page
Loading...
{_
Notes
•
To
create
discs
or
use
other
flmctions
on
Windows
XR
hnage
Mastering
API
v2.0
fbr
Windows
XP
should
be
installed.
If
hnage
Mastering
API
v2.0
fbr
Windows
XP
has
not
been
installed
yet,
select
it
fl'om
required
programs
on
the
installation
screen
and
install
it
lbllowing
the
procedures
displayed.
(The
computer
must
be
connected
to
the
internet
lbr
the
installation.)
5bu
may
install
Image
Mastering
API
v2.0
fbr
Windows
XP
in
response
to
the
message
displayed
when
you
try
to
start
those
functions.
•
Operation
is
not
guaranteed
if
you
read
or
write
video
data
from
or
to
the
camcorder
using
software
other
than
the
supplied
"PMB2
For
the
infbrmation
on
the
compatibility
of
tile
software
you
are
using,
consult
the
manufhcturer
of
the
software.
To
disconnect
your
camcorder
from
the
computer
@
Click
the
_
icon
at
the
bottom
right
of
the
desktop
of
the
computer
_
[Safi.,ly
remove
USB
Mass
Storage
Device].
@
Touch
[Cancel]
_"
[Yes]
on
the
camcorder
screen.
@
Disconnect
the
USB
cable.
•
If
you
are
using
Windows
7,
the
_
icon
may
not
appear
on
the
desktop
of
the
computer.
In
this
case,
you
can
disconnect
the
camcorder
f]com
your
computer
without
fbllowing
the
procedures
described
above.
{_
Notes
•
Do
not
Ibrmat
the
internal
recording
media
of
the
camcorder
using
a
computer.
If
you
do
this,
the
camcorder
will
not
operate
correctly.
•
Do
not
insert
AVCHD
recording
discs
that
have
been
created
using
the
"PMB"
software
to
DVD
players
or
recorders,
as
these
devices
do
not
support
the
AVCHD
standard.
If
you
do,
you
may
not
be
able
to
remove
the
disc
fl'om
these
devices.
•
This
camcorder
captures
high
definition
f___otage
in
the
AVCHD
fbrmat.
Using
the
enclosed
PC
software,
high
definition
footage
can
be
copied
onto
DVD
media.
However,
DVD
media
containing
AVCHD
lbotage
should
not
be
used
with
DVD
based
players
or
recorders,
as
tile
DVD
player/recorder
may
lhil
to
eject
the
media
and
may
erase
its
contents
without
warning.
•
When
you
access
tile
camcorder
fl'om
the
computer,
use
the
supplied
software
"PMB"
or
the
pre-installed
software
"PMB
Portable2
Do
not
modii)_
the
files
or
lblders
on
tile
camcorder
fl'om
the
computer.
Tile
image
files
may
be
damaged
or
may
not
be
played
back.
•
Operation
is
not
guaranteed,
if
you
operate
tile
data
on
the
camcorder
f)com
tile
computer.
•
Tile
camcorder
automatically
divides
an
image
file
that
exceeds
2
GB
or
larger
and
saves
the
parts
as
separate
files.
All
image
files
may
be
shown
as
separate
files
on
a
computer,
however,
the
files
will
be
handled
properly
by
tile
import
function
of
the
camcorder
or
the
"PMB"
software,
and
also
by
the
playback
function
of
the
"PMB
Portable"
software.
•
Use
tile
supplied
"PMB"
software
when
you
import
long
movies
or
edited
images
from
the
camcorder
to
a
computer.
If
you
use
other
software,
the
images
may
not
be
imported
correctl>
•
When
you
delete
image
files,
lbllow
the
steps
on
page
35.
•
5_u
can
create
a
Blu
ray
disc
by
using
a
computer
with
a
Blu
ray
disc
burner.
Install
the
BD
Add-on
Software
fbr
"PMB2
_9
38
40
Table of Contents
Safety Instructions
3
Representative Plug of Power Supply Cord
4
Battery Pack
6
AC Adaptor
6
Note on the Power Cord (Mains Lead)
6
Read this First
6
Supplied Items
8
Using the Camcorder
8
Menu Items, LCD Panel, and Lens
8
About Language Setting
8
Notes on Playing Back
9
DVD Media Recorded with HD Image Quality (High Definition)
9
Notes on Battery Pack/Ac Adaptor
9
Note on the Camcorder/Battery Pack Temperature
9
Confirm the Model Name of Your Camcorder
10
If You Cannot Record/Play Back Images, Perform
10
About this Manual, Illustrations and On-Screen Displays
10
Notes on Optional Accessories
10
Table of Contents
11
Charging the Battery Pack
13
Step 1 : Charging the Battery
13
To Charge the Battery Using Your Computer
14
Charging Time
15
To Remove the Battery Pack
15
To Use a Wall Outlet (Wall Socket) as a Power Source
15
Notes on the AC Adaptor
16
Charging the Battery Pack Abroad
16
Turning the Power On, and Setting the Date and Time
17
Step 2: Turning the Power
17
Changing the Language Setting
19
To Turn off the Power
19
Preparing the Recording Media
20
To Check the Recording Media Settings
20
Step 3: Preparing the Recording
20
To Checkthe Recording
20
Inserting a Memory Card
21
Types of Usable Memory Card
21
To Eject the Memory Card
22
Copying Movies and Photos
22
Recording
23
Recording Movies
24
To Display Items on the LCD Screen Again
24
To Capture Smiles
24
Data Code During Recording
25
Shooting Photos
26
Selecting the Recording Mode
27
Playback on the Camcorder
28
Operating the Camcorder While Playing a Movie
30
To Adjust the Sound Volume of Movies
30
Performing Highlight Playback
31
Viewing Photos
31
List of Connection
32
Playing Images on a TV
32
Connecting to a Non-High-Definition 16:9 (Wide) or 4:3 TV
33
When You Connect with HDMI Cable
33
To Set the Aspect Ratio According to the Connected TV
33
When You Connect with A/V Connecting Cable with S-Video
33
When Connecting to Your TV Via a VCR
34
On "Photo TV HD"
34
Advanced Operations
35
Deleting Movies and Photos
35
To Delete All Movies/Photos in an Event at One Time
35
Saving Movies and Photos with a Computer
36
Useful Functions Available if You Connect the Camcorder to a Computer
36
Easy Uploading When Away from Home
36
Preparing a Computer
37
When Using a Macintosh
37
To Disconnect Your Camcorder from the Computer
39
Starting PMB (Picture Motion Browser)
40
Uploading Images to a Network Service
40
Starting up "PMB Portable"
40
Notes on "PMB Portable"
42
Saving Images with an External Device
43
The Devices on Which the Created Disc Can be Played Back
44
Saving Images on an External Media Device
45
Functions Available after Saving Images on an External Media Device
45
Devices that Cannot be Used as an External Media Device
45
Saving Desired Movies and Photos
47
Playing Back Images in the External Media Device on the Camcorder
47
To Perform Direct Copy Manually
47
Creating a Disc with the DVD Writer, Dvdirect Express
48
Performing Disc Burn Option
49
Playing Back a Disc on the DVD Writer
50
Creating an HD Disc with a DVD Writer Other than Dvdirect Express
51
Creating Standard Image Quailty (STD) Disc with Recorder, Etc
52
Customizing Your Camcorder
54
Using Menus
54
Operating Menus
54
Menu Lists
55
Getting Detailed Information from the "Handicam" Handbook
58
Troubleshooting
59
Self-Diagnosis Display/Warning Indicators
60
(Hdr-Cx160/Cx180)
60
Recording Time of Movies/Number of Recordable Photos
61
Expected Time of Recording and Playback with each Battery Pack
61
Expected Recording Time of Movies
62
Expected Number of Recordable Photos
63
Precautions
64
On Use and Care
64
When Not Using the Camcorder for a Long Time
64
Precaution on LCD Screen
64
On Charging the Pre-Installed Rechargeable Battery
65
Care and Storage of the Lens
65
Note on Disposal/Transfer of the Camcorder
65
Note on Disposal/Transfer of Memory Card
65
Specifications
66
Quick Reference
69
Screen Indicators
69
Parts and Controls
70
Index
72
4
Based on 1 rating
Ask a question
Give review
Questions and Answers:
Need help?
Do you have a question about the Sony Handycam HDR-CX160 and is the answer not in the manual?
Ask a question
Sony Handycam HDR-CX160 Specifications
General
Brand
Sony
Model
Handycam HDR-CX160
Category
Camcorder
Language
English
Related product manuals
Sony Handycam HDR-CX12
72 pages
Sony Handycam HDR-CX130
207 pages
Sony HANDYCAM HDR-CX150
109 pages
Sony Handycam HDR-CX110
212 pages
Sony Handycam HDR-CX190
155 pages
Sony Handycam HDR-CX190E
80 pages
HDR CX100 - Handycam Camcorder - 1080i
2 pages
HDR-CX110 - High Definition Flash Memory Handycam Camcorder
2 pages
Sony Handycam HDR-CX405
43 pages
Sony Handycam HDR-CX220
213 pages
Sony Handycam HDR-CX560
235 pages
Sony Handycam HDR-CX260V
191 pages
 Loading...