HT-X9000F/XF9000
9
front side
right side
left side
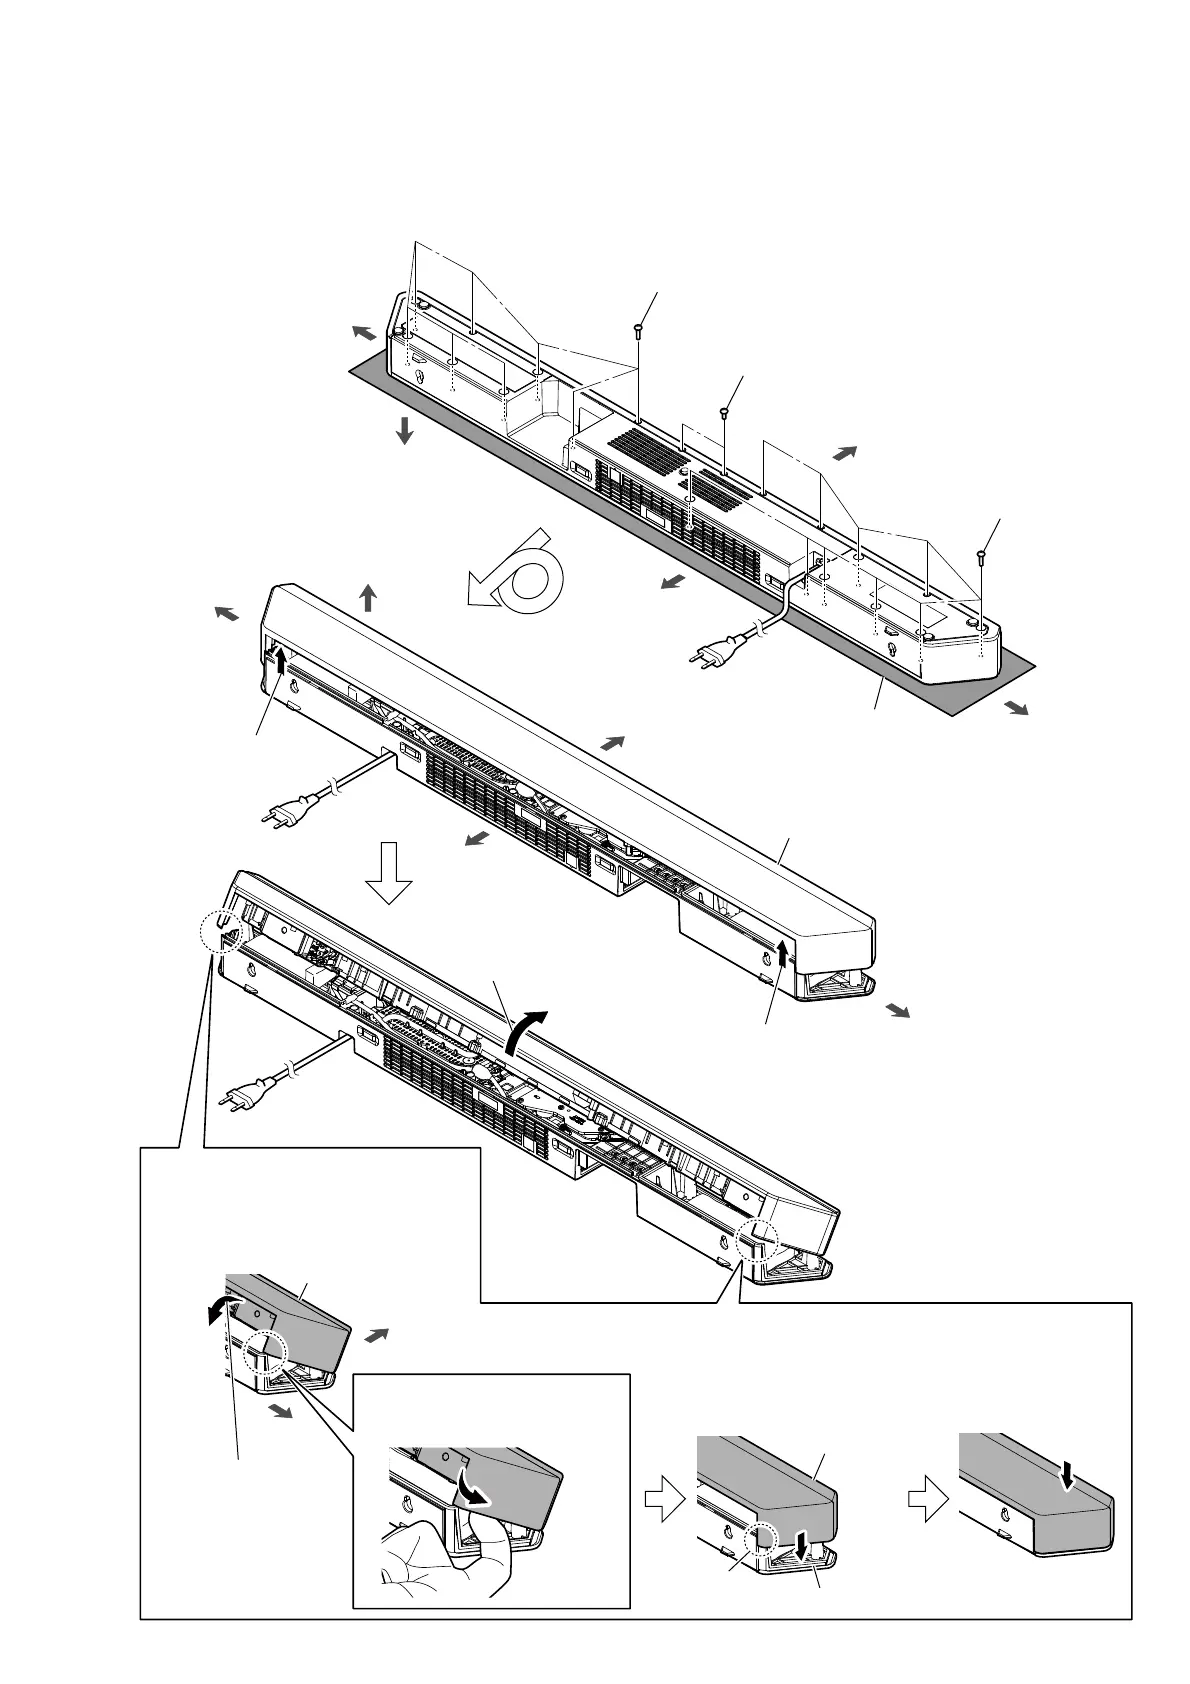
1 eight screws
(BVTP3 u 10)
1 ten screws
(BVTP3 u 10)
top side
+RZWRLQVWDOOWKHWRSFDELQHWEORFN
2 two screws
(BVTP3 u 6)
top cabinet block
rear side
left side
right side
top side
front side
soft cloth, etc.
Turn over.
rear side
front side
4 Remove the top cabinet block
in the direction of the arrow.
3
Lift up the top cabinet
block in the direction
of the arrow.
3
Lift up the top cabinet
block in the direction
of the arrow.
top cabinet block
left side
bottom cabinet block
top cabinet block
6 Push the top cabinet
block.
Push.
Note:
Install the top cabinet block on the left and right at the same time.
The figures below explain using illustrations of the left side.
1 First install the front side of the top
cabinet block as shown below.
2 Open to the outer side with your
fingers so that the corner of the
top cabinet block does not touch.
3 Install the top cabinet
block in the direction
of the arrow.
5 Slowly lower the top cabinet
block straight down.
Attach in order from 1 to 6.
4 Check.
Note: Follow the disassembly procedure in the numerical order given.
2-2. TOP/BOTTOM CABINET BLOCK-1
• Continued on 2-3 (page 10).
 Loading...